AWS for M&E Blog
Super slow motion video creation using generative AI on AWS
Slow motion video is an integral part of media productions, particularly sports broadcasting, that provides viewers with an enhanced experience. Capturing action in slow motion allows the audience to see details not possible to observe at full speed. However, recording real-time video at high frame rates requires expensive specialized cameras. Even then, extreme slow motion (more than 240 frames per second) can be jittery and of low quality.
Generative AI provides an innovative solution to create super slow-motion video by interpolating synthetic frames between real frames. Models like Frame Interpolation for Large Motion (FILM) analyze motions between input frames to generate new transitional frames that create seamless ultra-high frame rate slow motion. This approach also scales using cloud services like Amazon SageMaker to deliver low-latency performance for near real-time use cases.
In this blog post, we demonstrate how to leverage FILM and Amazon SageMaker to generate super slow-motion video from standard footage. We will share start how to package the model, deploy the model at scale using Amazon SageMaker Asynchronous endpoint, and then invoke the endpoint to process the video frames. Finally, we assemble the original and synthesized frames into a high frame rate slow motion video. Figure1 and Figure2 show side-by-side comparison videos of the original media and 3x slow motion (3 times more frames per second) media.

Figure1 – Original media |

Figure2 – 3x slow motion media |
Architecture overview
Figure 3 depicts a reference architecture for building an end-to-end super slow-motion workflow on Amazon Web Services (AWS). Users can reference the end-to-end solution architecture described in this image to understand how these AWS Services fit into a bigger picture, and to build on top as needed.
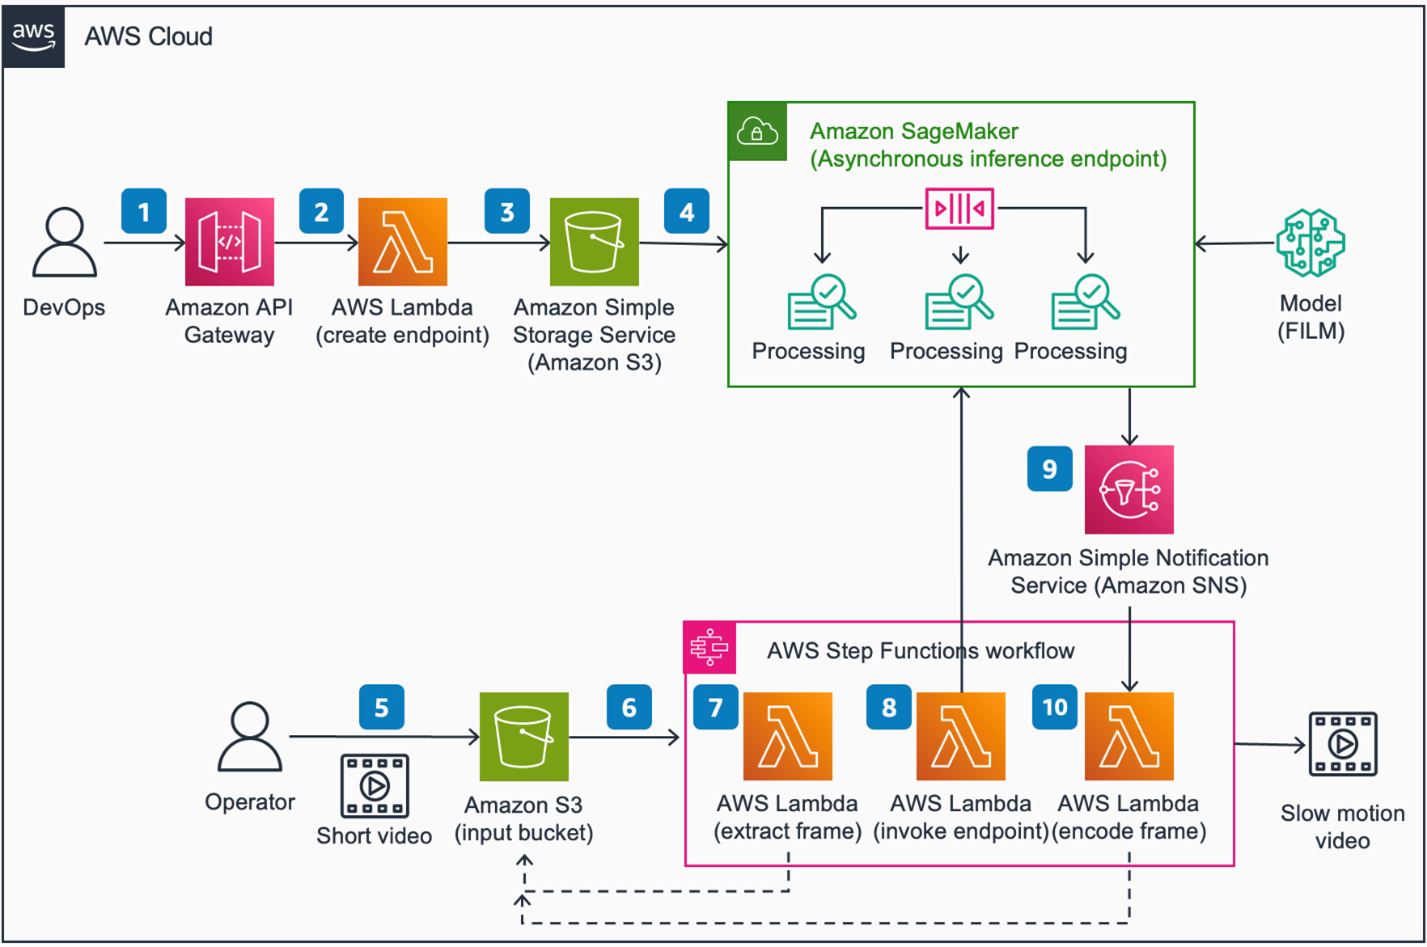
Figure3 – Super Slow Motion using generative AI on AWS
Architecture steps
- Invoke an Amazon API Gateway RESTful API endpoint with AWS Identity and Access Management (IAM)
- Amazon API Gateway invokes an AWS Lambda function to process the request.
- AWS Lambda function uploads model artifacts (FILM model) and endpoint configuration to an Amazon Simple Storage Service (Amazon S3) bucket and creates an Amazon SageMaker Asynchronous Inference endpoint.
- Amazon SageMaker Asynchronous Inference endpoint are used to run the FILM
- Upload a short video to an Amazon S3 bucket for processing.
- An Amazon Simple Storage Service (S3) event triggers an AWS Step Functions state machine execution to process the request.
- An AWS Lambda function extracts frames from the video and stores them in the S3 bucket.
- An AWS Lambda function creates an inference job by invoking the SageMaker Asynchronous inference endpoint where the FILM model interpolates new frames. The state machine execution is paused and waits for a job completion status.
- SageMaker Inference endpoint sends job status to Amazon Simple Notification Service (Amazon SNS).
- The state machine execution resumes where an AWS Lambda function encodes all new frames to create a slow motion video for storage in the S3 bucket.
This blog post focuses on the model hosting and management portion (steps 4 and 5) of the reference architecture described in Figure 3. We also share jupyter notebook and sample code, which can be run on Amazon SageMaker Studio. The jupyter notebook code is published on GitHub.
Deployment prerequisites
- You need to have an AWS account. Make sure your AWS identity has the requisite permissions, which includes the ability to create SageMaker Resources (Domain, Model, and Endpoints) in addition to Amazon S3 access to upload model artifacts. Alternatively, you can attach the AmazonSageMakerFullAccess managed policy to your IAM User or Role.
- This notebook is tested using default python3 kernel on SageMaker Studio. A GPU instance such as ml.g4dn.xlarge is recommended. Please reference the documentation on setting up a domain for SageMaker Studio.
- You need at least one ml.g5.4xlarge instance for inference. More is required if you want to process multiple video chunks in parallel. Please make sure your AWS account has sufficient quota for SageMaker inference.
Deployment steps
- To deploy the solution manually, download the AWS CloudFormation template to your local hard drive.
- Sign in to the AWS CloudFormation console.
- Select Create Stack.
- On the Create stack page, specify template section and select Upload a template file.
- Under Upload a template file, select Choose file and select the edited template from your local drive.
- Choose Next and follow the steps in Launch the stack.
- This will take a few minutes and set up a SageMaker Studio Domain. Follow the instructions here to launch the Studio environment.
- In SageMaker Studio, clone this Git repository using the following command. More details about how to clone Git repository in SageMaker Studio is available here.
Deployment validation
After successfully cloning the repo, the following files and libraries will download in the following directory structure:
|– assets/ Assets folder
|– deployment/ CloudFormation template to deploy SageMaker environment
|– source/ Code directory to host FILM model and generate slow-mo video
| |–slow-mo.ipynb
| |–helper.py
└── slow_mo_generator Model and inference code for SageMaker Asynchronous Inference
|– interpolator.py
|– model.py
|– requirements.txt
|– serving.properties
└── utils.py
Running the guidance
- From within the SageMaker Studio console, cd to the repo folder guidance-for-super-slow-motion-video-creation-using-generative-ai-on-aws.
- open slow-mo.ipynb notebook, and follow the instructions to run through each cell.
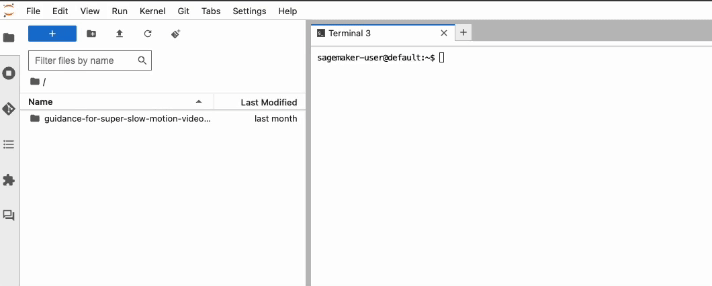
Figure 4- open slow-mo.ipynb
The notebook automatically provides a sample video to test. Please feel free to replace the sample video with your own. The architecture diagram in Figure 3 provides an overview of the full end-to-end solution. In this blog post, we focus on the following core solution components.
- Packaging and deploying the FILM model to a SageMaker Asynchronous endpoint
- Preparing input video
- Invoke Amazon SageMaker Asynchronous Inference Endpoint
- Generating slow motion video
Let’s look at each solution component in more detail.
Packaging and deploying the FILM model to a SageMaker Asynchronous endpoint.
We use Amazon SageMaker asynchronous inference (SAI) to host the FILM model. Amazon SageMaker is a fully managed machine learning platform that enables building, training, deploying, and managing machine learning models at scale. Asynchronous inference is a feature in SageMaker that allows deploying a live endpoint to process large volumes of data asynchronously.
We chose SAI because it provides a managed way to scale large payload inference like video frame processing. With auto-scaling, it can scale to thousands of concurrent inference processes to handle large volumes of payload in parallel. The service has a built in queue to manage unpredictable traffic and add robustness. SAI can automatically scale down to 0 when not in use, helping customers save on costs. All these features make SAI ideal for our slow motion video creation use case, and allow us to build a solution that can scale to process large volumes of video frames in a robust and cost-effective manner.
To create the SAI endpoint, we first need to download the pre-trained FILM model.
# download pretrained model and unzip it to source/pretrained_model folder
Next, we want to package the model for deployment. How to package depends on the model server we use. In this case, we use Deep Java Library (DJL) serving, which is an open-source, framework-agnostic model server developed by Amazon. Following are the files we need to package for this solution.
slow_mo_generator
|–model/… # Downloaded Pretrain model
|–serving.properties # DJL serving configuration file
|–model.py # inference handler code
|–interpolator.py # Custom module
|–utils.py # Custom module
|–requirements.txt # Public module to extend the container
Following is the DJL container we used for this project:
DJL requires a serving.properties and model.py to serve the model. The first is a configuration file to define how your model is served and what type of inference optimization libraries you need. And the latter is a custom handler functions in python to define how the model is loaded and how you like the inference to be served. If you need to extend the container, you can include a requirements.txt file.
Example serving.properties file:
The handler function is the core component of the model.py file. It first loads the original video frame and model, then iteratively runs inference to generate in-between frames, and then uploads the results to Amazon S3.
All of this inference code along with the pre-trained model are packaged in a tar.gz file and uploaded to Amazon S3.
To host this to an SAI endpoint, we first create a SageMaker model using the container image and S3 location of our model package.
Create an endpoint configuration that defines how the Async Inference will be served.
Finally, deploy and create a predictor.
Prepare Input video
After the model is hosted to an SAI, we need to prepare our video by extracting the frames using FFmpeg, an open-source video processing tool. In our sample code, we created a helper function that takes in a video file and generates the frame in a `tmp` location.
Along with the frames, we also store a config.json file in the same folder. This file specifies process configuration parameters to tell the model how the slow motion frames should be interpolated. Following are some of the example parameters:
- ALIGN: frame dimensions padded to align with GPU memory.
- BLOCK_HEIGHT and BLOCK_WIDTH: split frame into blocks if too large. This is good for high-resolution slow motion that is too large to process at once.
- TIME_TO_INTERPOLATE: number of frames to generate between each input frame.
The frames and the config.json file are compressed in a single tar.gz file and upload to Amazon S3 for inference.
For production, you would run this code in a dynamically scalable batch job to split a large video into small chunks and send each chunk to the SAI to maximize the parallel processing. For that, AWS Batch is a great managed solution.
Invoke Amazon SageMaker Asynchronous Inference endpoint
With the endpoint deployed and input frames staged in Amazon S3, we can now invoke the endpoint to generate our slow motion frames.
This triggers the asynchronous job to process the frames using our pre-trained FILM model. The newly generated frames are stored in the S3 output location when the process is complete.
To maximize parallelization to process large video files more quickly, we also provide example code to auto-scale the SAI endpoint when receiving a large number of invocations. In sample code, we provided an example to auto-scale the endpoint between 0 and 5 instances. The endpoint will automatically scale out instances if it has more than 5 jobs in the queue, and it will scale to 0 if it’s not used, so you will not incur any cost. You can also define how fast to scale out and in using the ScaleInCooldown and ScaleOutCooldown attributes.
Generate slow motion video
Once the process is complete, the last step is to assemble the newly generated frames in the correct sequence, and generate the final slow motion video. We created another helper function to do this automatically.
When calling the create_video function, you provide the location of the frames, the output file name, and the frame rate of the final video. FFmpeg will take care of the rest and combine the frames to the final slow motion video in .mp4 format.
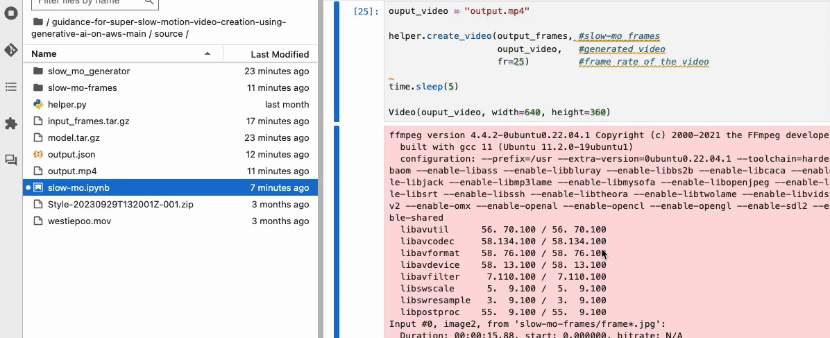
Figure 5 – Playing generated slow-motion video
Clean up
To avoid incurring AWS charges after you are done testing the guidance, make sure you delete the following resources:
- Amazon SageMaker Studio Domain
- Amazon SageMaker Asynchronous Inference endpoint
Conclusion
In this post, we demonstrate an end-to-end workflow to generate super slow-motion video using a generative AI model called FILM. This model creates synthetic frames that are interpolated between real footage to increase frame rates. Running FILM on a SageMaker asynchronous endpoint provides scalable and low-latency performance for near real-time use cases. The solution can process standard video to produce high quality, ultra-smooth slow motion effects.
Generative AI models like FILM open up new possibilities for creating engaging video content. Slow motion is just one application – similar techniques can be used to increase video resolution, fill in missing frames, remove objects, and more. As generative AI advances, we can expect more innovations in synthesizing and enhancing video.
Lastly, we encourage you to check out the following AWS blog posts in which we explore a few other generative AI use cases for the media and entertainment industry.