Category: AWS Elastic Beanstalk
Configuration Persistence and Support for URL Swapping with AWS Elastic Beanstalk
We just released two new capabilities for AWS Elastic Beanstalk that help you save your preferred environment settings and deploy changes to your applications with minimal downtime.
Configuration Persistence

Using the AWS Management Console, you can now save an environments configuration, launch a new environment with a saved configuration, and apply a saved configuration to an existing environment. This allows you to seamlessly launch multiple environments with your preferred settings. For more details, go to the Managing Your Application Environments section in the AWS Elastic Beanstalk Developer Guide.
URL Swapping

Many customers have asked us for a way to eliminate downtime when rolling out new versions of their applications or when they are modifying their environments configuration. By using the URL swapping functionality, end users of your web application should not experience downtime when you deploy a new application version. You can stage your new application version on a test environment and swap the URLs with the production environment.
You can even integrate this functionality into your build process using the Elastic Beanstalk Command-Line Tool. For more details about this functionality and how to integrate it into your build process, go to Deploying New Versions with Zero Downtime in the AWS Elastic Beanstalk Developer Guide.
Working Together
The following example demonstrates how we get these two new features to work together when you deploy, test and launch new versions of a web application. Lets assume that you have your production environment running at myapp-prod.elasticbeanstalk.com.
- Save the configuration of myapp-prod.elasticbeanstalk.com by going to the AWS Management Console and selecting Save Configuration on the Actions menu.
- Type a name for the configuration settings and click Save Configuration. Now you can launch environments that look and behave the same as the production environment.
- In the console, click Launch New Environment and type the name, the description and the URL for the new environment. Lets assume the URL for the new environment is myapp-staging.elasticbeanstalk.com.
- Select Upload and use a new application version and use the Browse button to locate the new version of your application.
- Choose the container type and click Continue.
- On the Configuration Details pane of the Launch New Environment wizard, you can select your saved configuration from the drop down. This will populate the settings for your environment.
- Complete the wizard and wait for the environment to launch. Now you can test your new version at myapp-staging.elasticbeanstalk.com.
- You can continue to upload new versions of your application to the staging environment until youre ready to go live.
- When youre ready, click on the Actions menu for your production environment and select Swap Environment URL.
- Select the staging environment from the drop-down and click Swap URL.
- After you swap the URLs, all traffic to myapp-prod.elasticbeanstalk.com will now be sent to the new version of your application.
For more information about this release, check out the AWS Elastic Beanstalk Release Notes.
~ Matt
AWS Elastic Beanstalk Now Supports Tomcat 7
We’ve added a second container type to AWS Elastic Beanstalk. Version 7 of Apache Tomcat is now available for use and is the default for all new environments (you can still choose version 6 if you’d like).
Tomcat 7 includes functional improvements such as support for the latest versions of a number of standards including Servlet 3.0 (JSR 315), JSP 2.2 (JSR 245), and JSP-EL 2.2. It also includes some security improvements such as CSRF request prevention using a nonce and a memory leak detection and prevention mechanism. For more information, check out the Apache Tomcat 7 documentation.
The AWS Toolkit for Eclipse also supports a new server type called “AWS Elastic Beanstalk for Tomcat 7.” You will need to update your AWS Toolkit plugin using the Software Updates menu item in the Eclipse Help menu.
If your application can run on Tomcat 7 and you would like to migrate your environment, here is how you can do it with minimal downtime:
- In the AWS Management Console, make sure the application youd like to migrate is selected.
- Click on Launch New Environment in the top right corner.
- From the Select an existing application version drop down, choose the application version that youd like to run on Tomcat 7.
- From the Container Type drop-down, select the Tomcat 7 container that best fits your application and complete the rest of the wizard with the settings that work for your application.
- Once the environment has launched, test your application and make sure that it works as expected
- Move your existing domain name to point to the new environments URL.
- Once youve verified that the domain name is pointing to the new environment, use the Actions menu for the old environment, to Terminate this Environment.
— Jeff;
Upcoming Event: AWS Tech Summit, London
I’m very pleased to invite you all to join the AWS team in London, for our first Tech Summit of 2011. We’ll take a quick, high level tour of the Amazon Web Services cloud platform before diving into the technical detail of how to build highly available, fault tolerant systems, host databases and deploy Java applications with Elastic Beanstalk.
We’re also delighted to be joined by three expert customers who will be discussing their own, real world use of our services:
- Francis Barton, from Costcutter
- Richard Churchill, from Servicetick
- Richard Holland, from Eagle Genomics
So if you’re a developer, architect, sysadmin or DBA, we look forward to welcoming you to the Congress Centre in London on the 17th of March.
We had some great feedback from our last summit in November, and this event looks set to be our best yet.
The event is free, but you’ll need to register.
~ Matt
Rack and the Beanstalk
AWS Elastic Beanstalk manages your web application via Java, Tomcat and the Amazon cloud infrastructure. This means that in addition to Java, Elastic Beanstalk can host applications developed with languages compatible with the Java VM.
This includes tools such as Clojure, Scala and JRuby – in this post we start to think out of the box, and show you how to run any Rack based Ruby application (including Rails and Sinatra) on the Elastic Beanstalk platform. You get all the benefits of deploying to Elastic Beanstalk: autoscaling, load balancing, versions and environments, with the joys of developing in Ruby.
Getting started
We’ll package a new Rails app into a Java .war file which will run natively through JRuby on the Tomcat application server. There is no smoke and mirrors here – Rails will run natively on JRuby, a Ruby implementation written in Java.
Java up
If you’ve not used Java or JRuby before, you’ll need to install them. Java is available for download, or via your favourite package repository and is usually already installed on Mac OS X. The latest version of JRuby is available here. It’s just a case of downloading the latest binaries for your platform (or source, if you are so inclined), and unpacking them into your path – full details here. I used v1.5.6 for this post.
Gem cutting
Ruby applications and modules are often distributed as Rubygems. JRuby maintains a separate Rubygem library, so we’ll need to install a few gems to get started including Rails, the Java database adaptors and warbler, which we’ll use to package our application for deployment to AWS Elastic Beanstalk. Assuming you added the jruby binaries to your path, you can run the following on your command line:
jruby -S gem install rails
jruby -S gem install warbler
jruby -S gem install jruby-openssl
jruby -S gem install activerecord-jdbcsqlite3-adapter
jruby -S gem install activerecord-jdbcmysql-adapter
To skip the lengthy documentation generation, just throw ‘–no-ri –no-rdoc‘ on the end of each of these commands.
A new hope
We can now create a new Rails application, and set it up for deployment under the JVM application container of Elastic Beanstalk. We can use a preset template, provided by jruby.org, to get us up and running quickly. Again, on the command line, run:
jruby -S rails new aws_on_rails -m http://jruby.org/rails3.rb
This will create a new Rails application in a directory called ‘aws_on_rails’. Since it’s so easy with Rails, let’s make our example app do something interesting. For this, we’ll need to first setup our database configuration to use our Java database drivers. To do this, just define the gems in the application’s Gemfile, just beneath the line that starts gem ‘jdbc-sqlite3’:
gem ‘activerecord-jdbcmysql-adapter’, :require => false
gem ‘jruby-openssl’
Now we setup the database configuration details – add these to your app’s config/database.yml file.
development:
adapter: jdbcsqlite3
database: db/development.sqlite3
pool: 5
timeout: 5000
production:
adapter: jdbcmysql
driver: com.mysql.jdbc.Driver
username: admin
password: <password>
pool: 5
timeout: 5000
url: jdbc:mysql://<hostname>/<db-name>
If you don’t have a MySQL database, you can create one quickly using the Amazon Relational Database Service. Just log into the AWS Management Console, go to the RDS tab, and click ‘Launch DB instance’. you can find more details about Amazon RDS here. The hostname for the production settings above are listed in the console as the database ‘endpoint’. Be sure to create the RDS database in the same region as Elastic Beanstalk, us-east and setup the appropriate security group access.
Application
We’ll create a very basic application that lets us check in to a location. We’ll use Rails’ scaffolding to generate a simple interface, a controller and a new model.
jruby -S rails g scaffold Checkin name:string location:string
Then we just need to migrate our production database, ready for the application to be deployed to Elastic Beanstalk:
jruby -S rake db:migrate RAILS_ENV=production
Finally, we just need to set up the default route. Add the following to config/routes.rb:
root :to => “checkins#index”
This tells Rails how to respond to the root URL, which is used by the Elastic Beanstalk load balancer by default to monitor the health of your application.
Deployment
We’re now ready to package our application, and send it to Elastic Beanstalk. First of all, we’ll use warble to package our application into a Java war file.
jruby -S warble
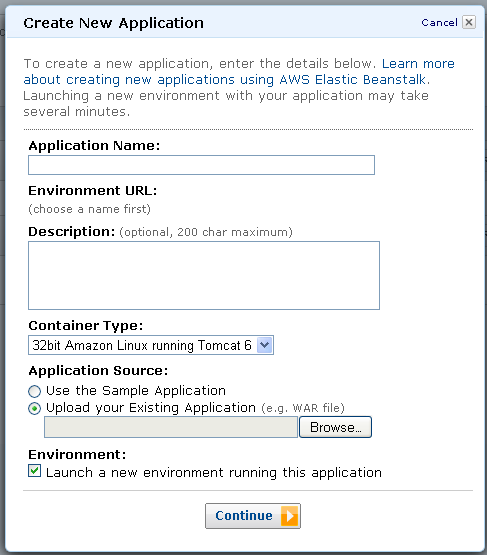
This will create a new war file, named after your application, located in the root directory of your application. Head over to the AWS Management Console, click on the Elastic Beanstalk tab, and select ‘Create New Application’. Setup your Elastic Beanstalk application with a name, URL and container type, then upload the Rails war file.
After Elastic Beanstalk has provisioned your EC2 instances, load balancer and autoscaling groups, your application will start under Tomcat’s JVM. This step can take some time but once your app is launched, you can view it at the Elastic Beanstalk URL.
Congrats! You are now running Rails on AWS Elastic Beanstalk.
By default, your application will launch under Elastic Beanstalk in production mode, but you can change this and a wide range of other options using the warbler configuration settings. You can adjust the number of instances and autoscaling settings from the Elastic Beanstalk console.
Since Elastic Beanstalk is also API driven, you can automate the configuration, packaging and deployment as part of your standard build and release process.
~ Matt
Introducing AWS Elastic Beanstalk
I’ve been looking forward to being able to tell you about this new part of AWS for quite a while. Perhaps I’m biased, but I do think that this is a pretty big deal! I think we’ve managed to balance power and ease of use in a nice tidy package that will make AWS even more approachable for developers wishing to build powerful and highly scalable web applications.
AWS Elastic Beanstalk will make it even easier for you to create, deploy, and operate web applications at any scale. You simply upload your code and we’ll take care of the rest. We’ll create and configure all of the AWS resources (Amazon EC2 instances, an Elastic Load Balancer, and an Auto Scaling Group) needed to run your application. Your application will be up and running on AWS within minutes.
Much like the beanstalk in the popular fairy tale, Elastic Beanstalk allows you to start at ground level and climb toward the sky. However, as you will soon see, the beanstalk is built using a number of existing AWS services, not from magic beans.
When you use Elastic Beanstalk, you get to focus on the more creative and enjoyable aspects of application design and development while we take care of your software stack and your infrastructure. We do this in a very flexible way so that you still have complete control of what goes on. You can still access the underlying AWS resources if you’d like.
 It has been years (1.5 decades to tell the truth) since I have done any serious Java development (Java Beans and the Java Native Interface, anyone?). Despite this, I was able to get the Elastic Beanstalk sample application up and running in less than five minutes. The application was effectively in production and ready to scale to meet the challenges of a world-wide load. Not too much later I was able to successfully compile and deploy some code of my very own.
If you are familiar with the market segment that is often called PaaS (short for Platform as a Service) you might be thinking “Ok, so what? Other environments have been able to do this for some time now. What’s so special about this?” Well, lots of things. Here’s a quick summary:
- Elastic Beanstalk is built on top of the proven AWS infrastructure. It takes full advantage of Amazon EC2, Elastic Load Balancing, Amazon CloudWatch, Auto Scaling, and other AWS services. You get all of the economy and scalability of AWS in a form that’s easier and quicker to deploy than ever before.
- With Elastic Beanstalk you can choose to gradually assert control over a number of aspects of your application. You can start by tuning a number of parameters (see my post on the Elastic Beanstalk Console for more information about this). You can choose the EC2 instance type that provides the optimal amount of RAM and CPU power for your application. You can log in to the EC2 instances to troubleshoot application issues, and you can even take the default Elastic Beanstalk AMI (Amazon Machine Image), customize it, and then configure Amazon Beanstalk to use it for your application. This gradual assertion of control extends all the way to “eleven” — you can choose to move your application off of Elastic Beanstalk and manage the raw components yourself if you so choose.
- Elastic Beanstalk was designed to support multiple languages and application environments. We are already working with solution providers to make this happen.
- Each of your Elastic Beanstalk applications will be run on one or more EC2 instances that are provisioned just for your application. Applications running on Elastic Beanstalk have the same degree of security as those running on an EC2 instance that you launch yourself.
- You can build an application that makes use of Elastic Beanstalk along with other services that you deploy on EC2 without having to worry about network latency across a wide-area network. You can launch the services in the same Region as your Elastic Beanstalk application. The ability to efficiently access existing services running on EC2 instances gives you additional flexibility and even more architectural and implementation options.
You can choose to remain blissfully unaware of the infrastructure that hosts your application and I fully expect that many of our customers will choose to do so. I also expect some of our customers to delve beneath the surface. Some will dip their toes in, others will take a deep dive. Either one is fine, and both are fully supported. When and if you choose to do this, you won’t be entering some mysterious zone stuffed with undocumented code. Instead, you’ll find that the Elastic Beanstalk AMI is based on the Amazon Linux AMI running the Apache Web Server, Tomcat, and the Enterprise Edition of the Java platform, all running on top of publicly documented AWS services.
 The public beta release of AWS Elastic Beanstalk allows you to write Java code, compile it, package it up into a WAR (web archive) file, and upload it to a Tomcat environment. You can do the upload using a new tab on the AWS Management Console; read my AWS Elastic Beanstalk From The AWS Management Console post to learn more.
 You can use the Elastic Beanstalk APIs and the Elastic Beanstalk command-line tools to connect your existing development tools and processes to Elastic Beanstalk. We’ve already used these APIs to extend the AWS Toolkit for Eclipse to allow developers to work with Elastic Beanstalk without needing to leave their IDE. See my post on AWS Elastic Beanstalk Eclipse Integration for additional information.
I hope that this post has given you enough information to give you an appreciation for AWS Elastic Beanstalk. If you are hungry for more, I’ve prepared a set of detailed posts with even more information for you. Each post is linked to the next one, so start with the Elastic Beanstalk Concepts and click your way through.
- Elastic Beanstalk Concepts.
- Elastic Beanstalk Under the Hood.
- Elastic Beanstalk Programming Model.
- Elastic Beanstalk from the AWS Management Console.
- Elastic Beanstalk and Eclipse.
- Elastic Beanstalk APIs and Command Line Tools.
This is an exciting step forward and we have a lot more in the works. Keep reading this blog and you’ll be the first to know about each new development.
You may also want to attend the Introduction to AWS Elastic Beanstalk webinar at 11:00 AM (PST) on January 24th.
Keep Reading: Elastic Beanstalk Concepts or Werner Vogels’ post: AWS Elastic Beanstalk: A Quick and Simple Way into the Cloud.
— Jeff;
PS – I almost forgot! You can build and run Elastic Beanstalk applications at no charge beyond those for the AWS resources that you consume. If you are eligible for the AWS Free Usage Tier, you can run a small web application 24×7 without incurring any AWS usage fees. See the full details of this offer here.
AWS Elastic Beanstalk Under the Hood
The default configuration settings for your AWS Elastic Beanstalk application were chosen to work well under a wide variety of conditions. However, rest assured that you have the ability to view and to edit the settings as you’d like if and when you decide to “open the hood” (so to speak). You can do all of this from within the Elastic Beanstalk tab on the AWS Management Console.
Here’s an outline of the settings available for each Elastic Beanstalk application. There is a tab in the console’s Configuration Editor for each category:
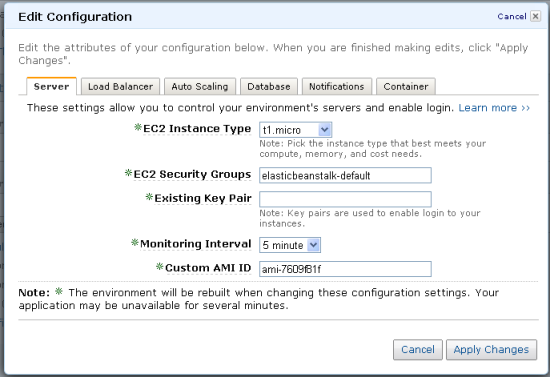
- Server – EC2 instance type, security groups, key pair (for SSH login), CloudWatch monitoring interval, and AMI ID (for customization).
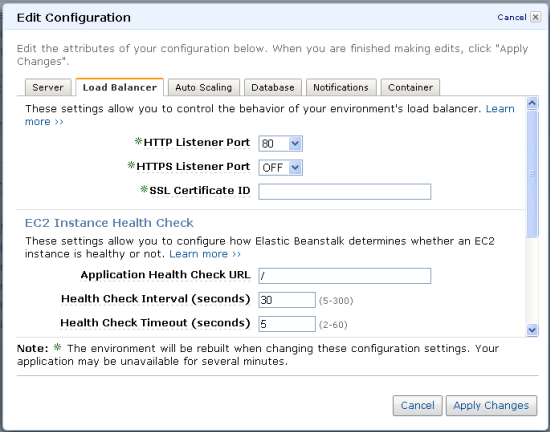
- Load Balancer – HTTP and HTTPS ports (each optional), the ID of a previously uploaded SSL Certificate, health check intervals, timeouts, and URL, and optional session stickiness with control over the cookie lifetime.
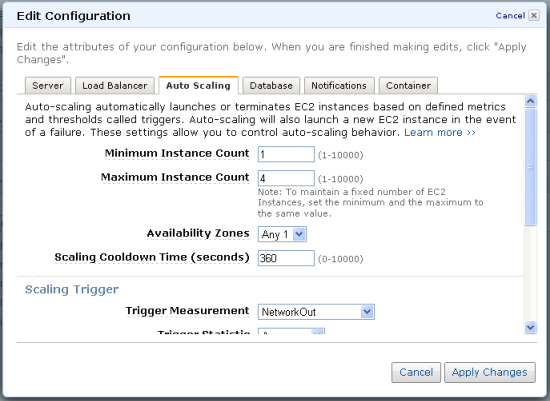
- Auto Scaling – Minimum and maximum instance count, and nine settings for the trigger that is used to drive scaling decisions.
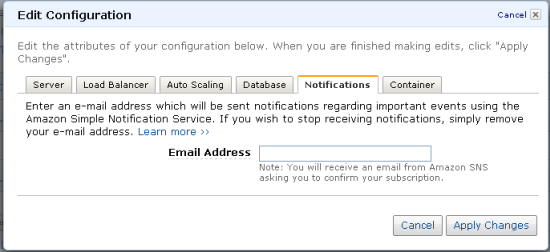
- Notifications – An email address that can receive notification of important application events such as scale-up and scale-down actions initiated by Auto Scaling.
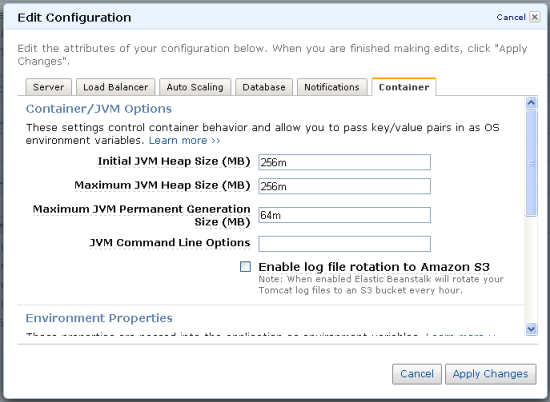
- Container – The settings in this tab are peculiar to each container type. With the default (Java / Tomcat 6) container, this tab lets you control the size of the Java Virtual Machine’s heap and garbage collection parameters. You can also pass any desired arguments directly to the JVM. You can also choose to make your AWS credentials and a JDBC connection string available within each running EC2 instance.
You have the ability to fine tune your application’s resource utilization, performance, and behavior, should you have the need to do so.
Keep Reading: AWS Elastic Beanstalk Programming Model.
— Jeff;
AWS Elastic Beanstalk Eclipse Integration
You can create, test, debug, and deploy an AWS Elastic Beanstalk application from within the comfort of the Eclipse IDE. The newest version of the AWS Toolkit for Eclipse includes a brand-new plug-in that lets you deploy Java web applications to Elastic Beanstalk from within Eclipse. This toolkit includes the AWS SDK for Java along with tools to manage EC2, SimpleDB, and Elastic Beanstalk. You can develop your application locally and then deploy it to Elastic Beanstalk or you can do all of your development and test deployments to Elastic Beanstalk if you’d like.
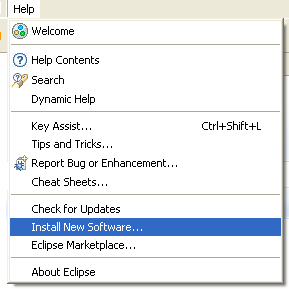
You must first install the toolkit by opening up the Eclipse Help menu and choosing Install New Software… .
You will need to add the location http://aws.amazon.com/eclipse/ to the list of sites. Once you have done this, Eclipse will walk you through the process of selecting the components to install, agreeing to the license, and installing the components. You will need to restart Eclipse to finalize the installation.
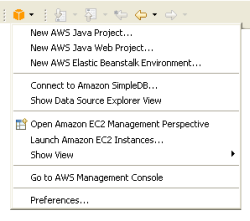
The AWS Toolkit for Eclipse is accessible through the menu with the AWS logo:
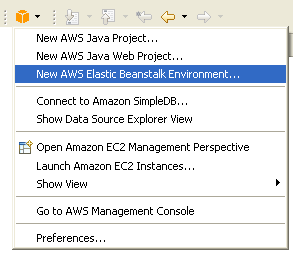
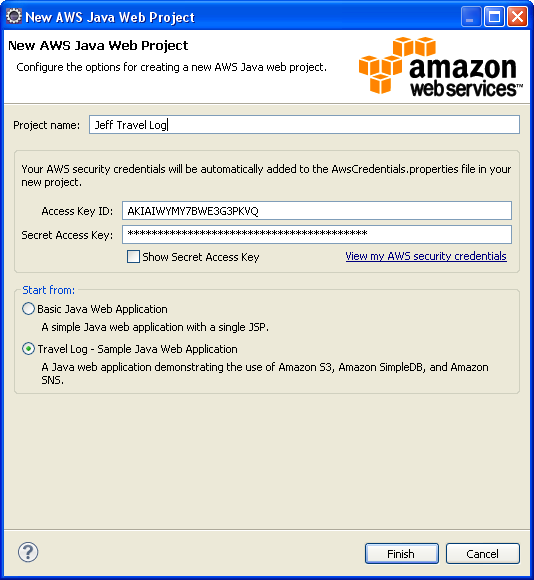
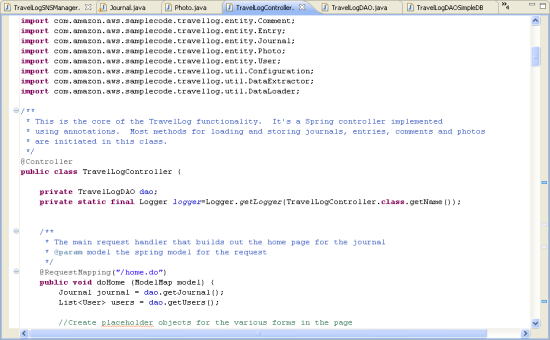
The next step is to create a new AWS Java Web Project. You will be prompted to enter your AWS Access Key ID and your Secret Access Key. You can start with an empty project or you can include a complete AWS-powered reference application called Travel Log by simply checking a box:
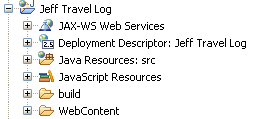
Within a few seconds the project is ready to go:
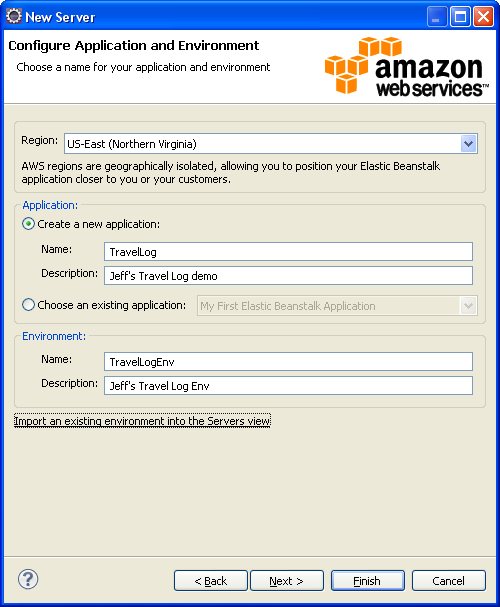
From here, you can define AWS Elastic Beanstalk as the server to be used when you run the application. That’s really easy choose the server type (AWS Elastic Beanstalk for Tomcat 6), choose the AWS Region (Elastic Beanstalk will be available in US East (Northern Virginia) to start), and assign names to the Application and the Environment, and (optionally) set up a Key Pair, an SSL Certificate ID, a CNAME, a health check, and an email address for notifications:

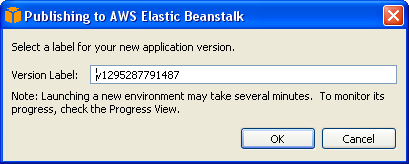
Before you can run a particular version of your code on Elastic Beankstalk you need to name it. The Eclipse Toolkit will propose a name for you and you can simply agree to use it:
And the Travel Log application is up and running. It is visible from within Eclipse, although it requires JavaScript and works a bit better in a standalone web browser

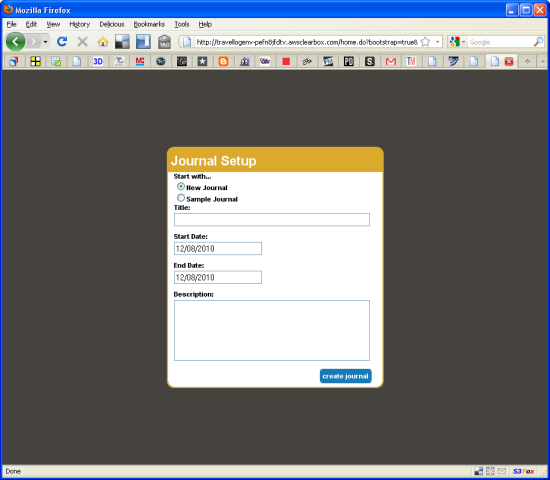
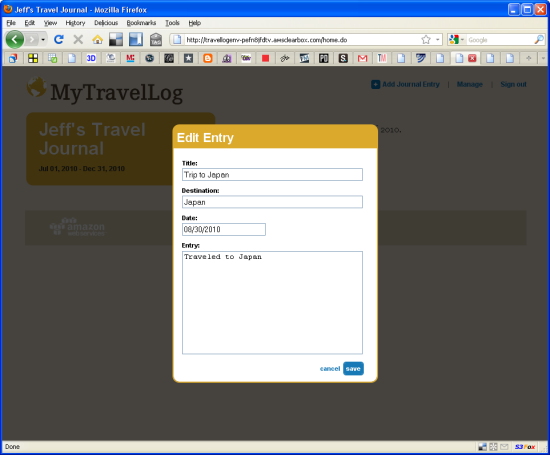
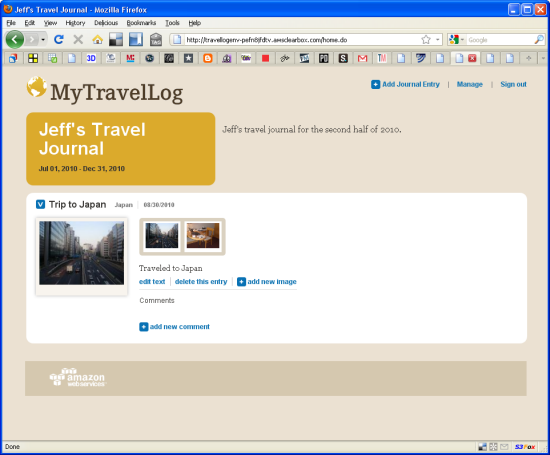
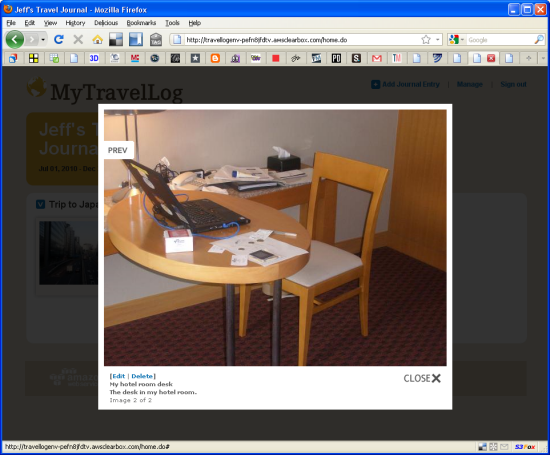
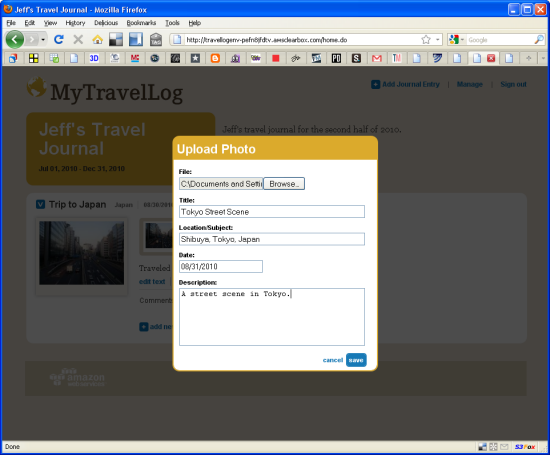
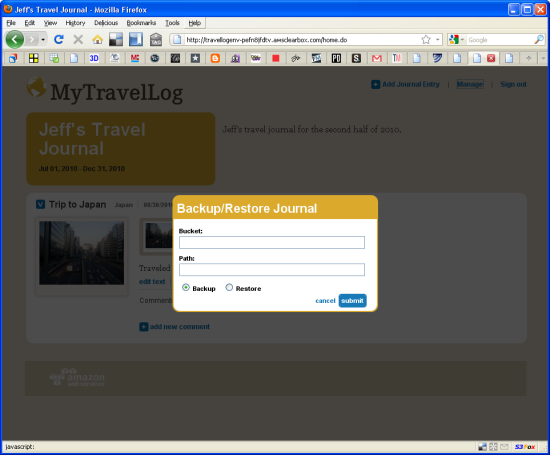
The Travel Log application runs on EC2, stores original and thumbnailed images in Amazon S3, tracks information about each photo and log entry in Amazon SimpleDB, and can also send email notifications using the Simple Notification Service. Please feel free to browse through the sample code and to adapt it for use in your own application.
I hope that you have enjoyed this tour of the AWS Toolkit for Eclipse and that it gives you a good sense of how you can use it to build and deploy your own applications on Elastic Beanstalk.
Keep Reading: AWS Elastic Beanstalk APIs and Command Line Tools.
— Jeff;
AWS Elastic Beanstalk From The AWS Management Console
The AWS Management Console includes support for AWS Elastic Beanstalk. If you already have a Java WAR file that you want to use to try out Elastic Beanstalk, you can do so through its browser-based interface. If you don’t happen to have an application of your own handy, you can use the sample application provided with Elastic Beanstalk to start learning more without writing any code.
Let’s take a tour!
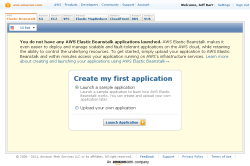
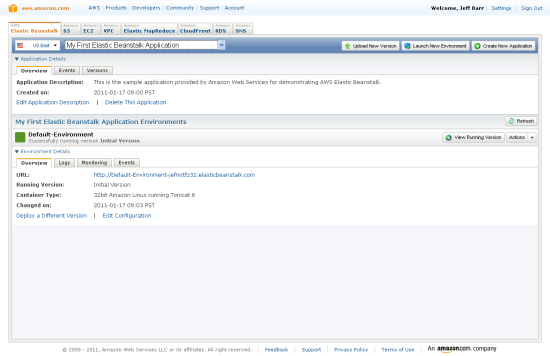
Here is the new Elastic Beanstalk tab on the Console. You can launch a sample application and use it to learn more about Elastic Beanstalk or you can upload your own application’s WAR file.

If you choose to launch the sample application, it will be launched with a default environment. This should take a few minutes at most. Here’s what the console looks like during the launch process:
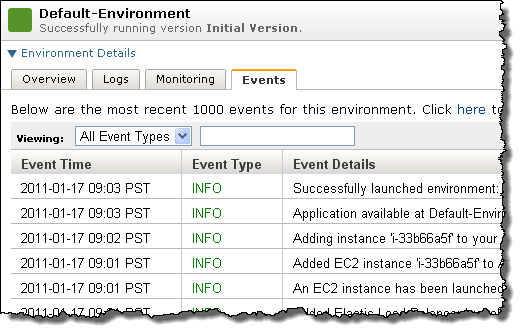
You can check the event list at any time to see how things are progressing:
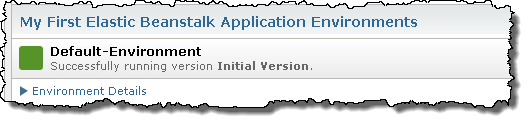
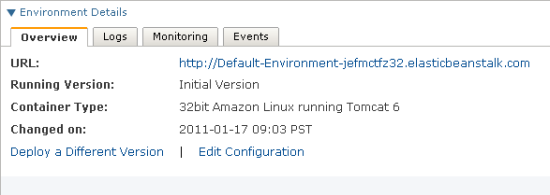
The environment’s status will change to Ready as soon as the Elastic Load Balancer and Auto Scaling are set up, the EC2 instance(s) are launched, and Apache and Tomcat are up and running:
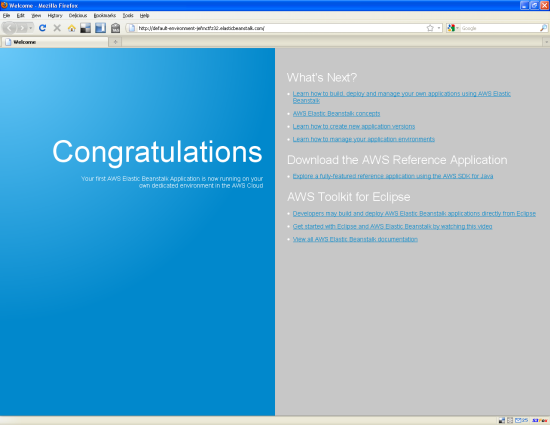
The console displays the URL of the application so you can access it with just a click (you can also click on the View Running Version Button):

or
The sample application provides you with links to additional Elastic Beanstalk resources:
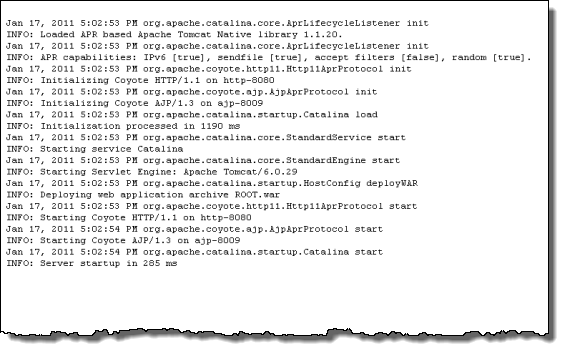
In case you want to diagnose any issues, you can ask for a snapshot of the server’s log files at any time.

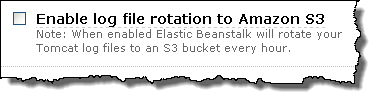
You can also arrange for the application server logs to be sent to Amazon S3 every hour (these will be Tomcat logs if you are using the default container type):
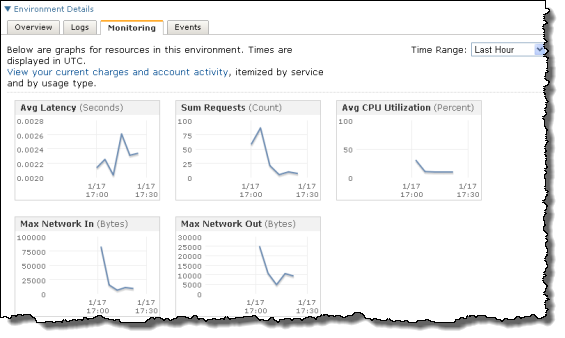
Amazon CloudWatch monitoring is automatically enabled for the application and is visible in the Console:
You can also view and edit all of the configuration settings for each of your environments. The default settings will work well under a wide variety of conditions and are a good place to start if you are not very familiar with AWS. Let’s take a look at each of tabs.
The Server tab lets you control the type of EC2 instance used to run your Elastic Beanstalk application. You can also associate one or more Security Groups to the instance and you can enable administrative shell access to the EC2 instances by designating a Key Pair.
The Load Balancer tab gives you control of ports, health checks, and session cookies.
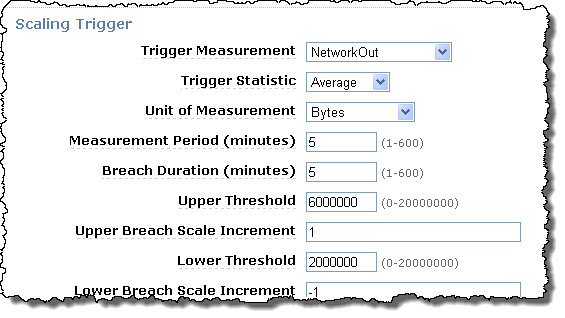
The Auto Scaling tab lets you control scaling behavior. You can control the minimum and maximum number of EC2 instances and you can set up the Scaling Trigger as desired.
The Database tab provides information about the database options available to your Elastic Beanstalk application.

The Notifications tab lets you sign up to be notified when significant application events take place. The Amazon Simple Notification Service is used to deliver the notifications.
The Container tab lets you control very detailed aspects of the Tomcat configuration including memory allocation and log file rotation. You can also opt to pass your AWS credentials and a JDBC connection string to each instance.
When you do need to make changes to your configuration settings, the console gives you complete control. For example, here are the configurable parameters for the scaling triggers that drive the scale-up and scale-down activities:
As noted previously, you can create a new application by uploading a WAR file like this:
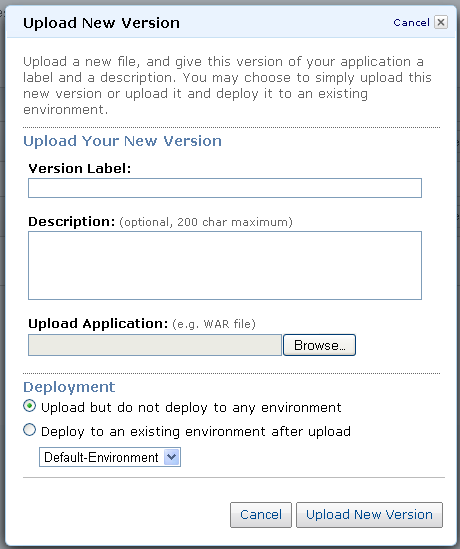
You can also upload a new version of an existing application:
As you can see from the screen shots above, the Elastic Beanstalk tab of the AWS Management Console gives you a lot of information, control, and power. For more information, please see the Elastic Beanstalk User Guide.
Keep Reading: AWS Elastic Beanstalk and Eclipse.
— Jeff;
AWS Elastic Beanstalk Programming Model
Let’s talk about the way that your design your application for use within AWS Elastic Beanstalk..
As I have already mentioned, Elastic Beanstalk will handle the nitty-gritty day-to-day details associated with running and scaling your application. You get to focus on your application and on your customers instead of on the details of the infrastructure.
You can use the development tools and development environment of your choice. You can use your existing build system and you can even use the Elastic Beanstalk command-line tools to fully automate most of the compile/deploy/test cycle.
You can also use the AWS Toolkit for Eclipse. You can write your application, deploy it to Elastic Beanstalk, and even test it out without having to switch your focus away from Eclipse.
Each application runs in a container of a particular type. The default Elastic Beanstalk container lets you run Java applications in a Tomcat environment. Your application can make use of Servlets and JavaServer pages and you can mix the two of them as you would like. You can also use all of the usual Java EE classes and APIs as you would like; Elastic Beanstalk won’t get in your way!
You do need to give some thought to data persistence if you want to build a scalable and highly reliable application (and I’m sure that you do). Because an Elastic Beanstalk application can scale to multiple EC2 instances, storing long-term data on the file system of the instance is not a good idea. Instances will also come and go as a result of Auto Scaling and the occasional hardware failure. Therefore, any data that you need to keep around for an indeterminate period of time should be stored in a database, not on the EC2 instance. Amazon S3, Amazon SimpleDB, and the Relational Database Service will all be of use here.
Your code can also make use of the AWS SDK for Java. This SDK gives you access to important parts of AWS including:
- The Amazon Simple Storage Service (S3) for public or private storage of data objects of any size (1 byte up to 5 TB).
- Amazon SimpleDB for highly available and highly scalable storage of non-relational data.
- The Amazon Simple Queue Service for reliable storage of messages as they travel between independent components of your application.
- The Amazon Simple Notification Service for highly scalable publish and subscribe messaging.
- The Amazon Relational Database Service for easy and convenient access to a scalable relational database.
- Amazon Elastic MapReduce to process large amounts of data using a hosted Hadoop framework.
Each of these services is scalable and highly reliable and available for you to use (or not) as desired. Depending on when you signed up for AWS, you may have access to these services within the AWS free usage tier.
You can also use the SDK to access EC2, CloudWatch, and AutoScaling APIs. This is probably an edge case since Elastic Beanstalk will take care of the hosting and scaling for you, but I’m sure someone will find an interesting way to make use of these services from within an Elastic Beanstalk application.
Although I am a big fan of each of these services and certainly hope that you will use them, I think that it is important to note that nothing in the Elastic Beanstalk model or in the default container type actually forces you to use them. If you have existing code that makes use of other middleware, go right ahead and use it. If you need to call other services that run on other EC2 instances in the AWS cloud, go ahead and call them (and enjoy reliable, low-latency access while you are at it). Need to call services that are running outside of AWS? Go for it! Freedom of choice is a fundamental tenet of AWS and one that I can’t emphasize enough.
I should also point out that Elastic Beanstalk itself has a full set of APIs. The Elastic Beanstalk APIs can be used to create, control, modify, and delete applications and environments. I have covered these APIs in a separate post.
Keep Reading: AWS Elastic Beanstalk from the AWS Management Console.
— Jeff;
AWS Elastic Beanstalk APIs and Command Line Tools
Just like every other part of AWS, Elastic Beanstalk is programmable. A complete set of Elastic Beanstalk command line tools is available. You can use the Elastic Beanstalk APIs or the command line tools to integrate Elastic Beanstalk into your existing development process in new and interesting ways.
For example, Makefiles (and other build tools such as Ant) generally include build targets for test and deploy. It would be easy to modify the actions associated with these targets to create Elastic Beanstalk Applications or Environments as needed. The actions could also use the RDS command line tools to create or clone Amazon RDS DB Instances, use them for testing, and then destroy them afterward. This dynamic use of hardware and system resources will be cost-effective and a good illustration of the power and value of cloud computing.
You could also implement powerful regression testing tools, iterating through an application’s versions or configurations in order to figure out exactly when a particular bug appeared or disappeared or when performance or responsiveness unexpectedly took a turn for the worse. In a somewhat related vein, you could combine this with my first suggestion and take up the practice of continuous integration, putting the entire system together and testing it out after every change is committed.
If you have built a Software as a Service (SaaS) application using Elastic Beanstalk and need to deploy a new instance for each customer, you can automate the entire on-boarding process. You can dynamically instantiate and configure the entire application, effectively building a production line which spits out customized application deployments. The deployment can include Elastic Beanstalk applications, RDS DB instances (sized and tuned for each customer), and even domain names courtesy of our new Route 53 service.
Here are some of the fundamental Elastic Beanstalk API calls and their command-line equivalents:
- The CheckDNSAvailabilityFunction function (elastic-beanstalk-check-dns-availability from the command line) verifies that a desired DNS name (CNAME) is available for you to use for an environment.
- The CreateApplication function (elastic-beanstalk-create-application from the command line) creates an empty application no versions and a default configuration template, using a name and a description that you provide.
- The CreateApplicationVersion function (elastic-beanstalk-create-application-version from the command line) creates a new version of an application. You must supply a description and a label for the version, and you can also provide a pointer to an Amazon S3 bucket that contains the source bundle for the application. If you don’t supply this information a sample application version will be used instead.
- The CreateEnvironment function (elastic-beanstalk-create-environment from the command line) launches an application for you using a specified configuration template and application version.
- The CreateConfigurationTemplate function (elastic-beanstalk-create-configuration-template from the command line) creates a new configuration template within your application using the option settings and container type that you specify.
You also have access to a complete set of Describe, Delete, and Modify functions and tools.
If you use the Elastic Beanstalk APIs or the command-line tools to create a powerful and/or interesting integration or if you have an idea for one, please feel free to leave a comment.
This is the end of the Elastic Beanstalk tour. Next stop: Elastic Beanstalk detail page.
— Jeff;