Category: AWS CodeStar
Launch – .NET Core Support In AWS CodeStar and AWS Codebuild
A few months ago, I introduced the AWS CodeStar service, which allows you to quickly develop, build, and deploy applications on AWS. AWS CodeStar helps development teams to increase the pace of releasing applications and solutions while reducing some of the challenges of building great software.
When the CodeStar service launched in April, it was released with several project templates for Amazon EC2, AWS Elastic Beanstalk, and AWS Lambda using five different programming languages; JavaScript, Java, Python, Ruby, and PHP. Each template provisions the underlying AWS Code Services and configures an end-end continuous delivery pipeline for the targeted application using AWS CodeCommit, AWS CodeBuild, AWS CodePipeline, and AWS CodeDeploy.
As I have participated in some of the AWS Summits around the world discussing AWS CodeStar, many of you have shown curiosity in learning about the availability of .NET templates in CodeStar and utilizing CodeStar to deploy .NET applications. Therefore, it is with great pleasure and excitement that I announce that you can now develop, build, and deploy cross-platform .NET Core applications with the AWS CodeStar and AWS CodeBuild services.
AWS CodeBuild has added the ability to build and deploy .NET Core application code to both Amazon EC2 and AWS Lambda. This new CodeBuild capability has enabled the addition of two new project templates in AWS CodeStar for .NET Core applications. These new project templates enable you to deploy .NET Code applications to Amazon EC2 Linux Instances, and provides everything you need to get started quickly, including .NET Core sample code and a full software development toolchain.
Of course, I can’t wait to try out the new addition to the project templates within CodeStar and the update .NET application build options with CodeBuild. For my test scenario, I will use CodeStar to create, build, and deploy my .NET Code ASP.Net web application on EC2. Then, I will extend my ASP.Net application by creating a .NET Lambda function to be compiled and deployed with CodeBuild as a part of my application’s pipeline. This Lambda function can then be called and used within my ASP.Net application to extend the functionality of my web application.
So, let’s get started!
First, I’ll log into the CodeStar console and start a new CodeStar project. I am presented with the option to select a project template.
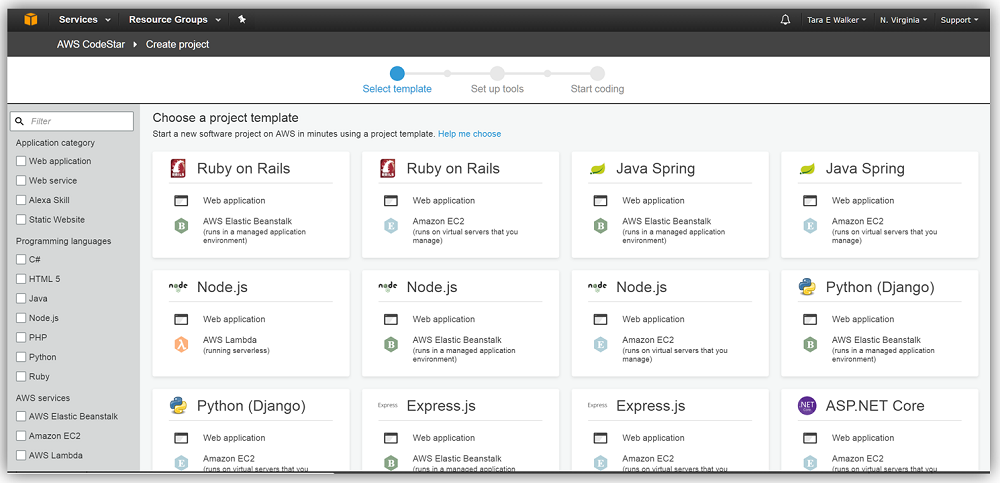
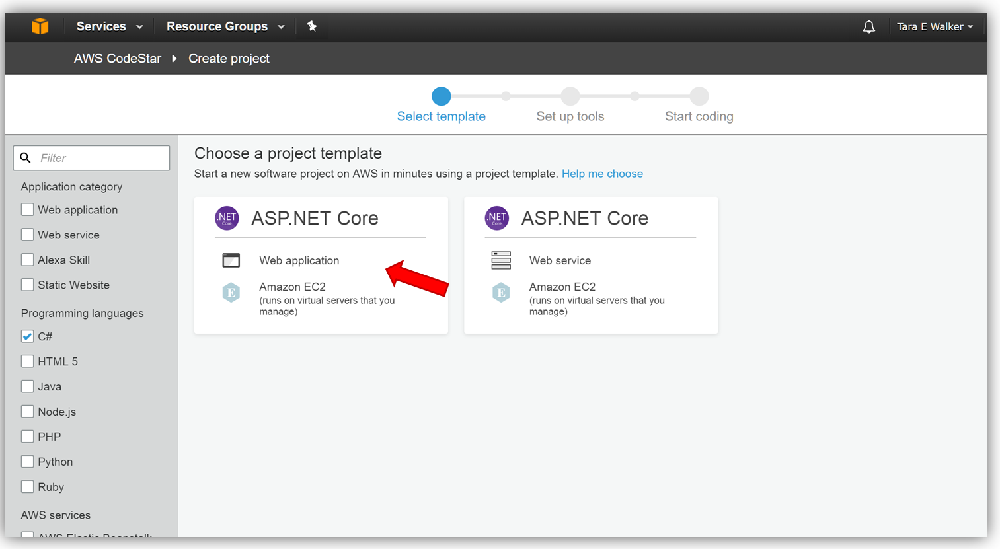
Right now, I would like to focus on building .NET Core projects, therefore, I’ll filter the project templates by selecting the C# in the Programming Languages section. Now, CodeStar only shows me the new .NET Core project templates that I can use to build web applications and services with ASP.NET Core.
I think I’ll use the ASP.NET Core web application project template for my first CodeStar .NET Core application. As you can see by the project template information display, my web application will be deployed on Amazon EC2, which signifies to me that my .NET Core code will be compiled and packaged using AWS CodeBuild and deployed to EC2 using the AWS CodeDeploy service.
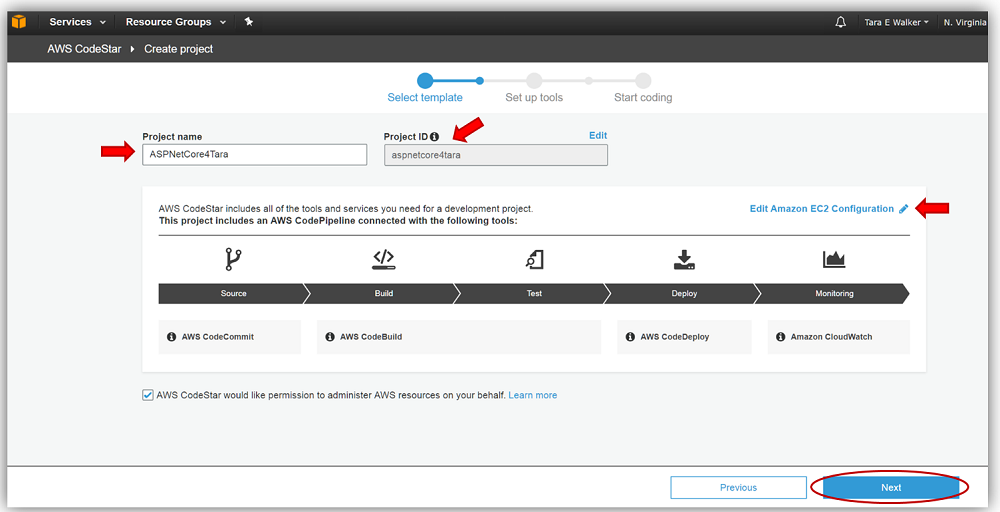
My hunch about the services is confirmed on the next screen when CodeStar shows the AWS CodePipeline and the AWS services that will be configured for my new project. I’ll name this web application project, ASPNetCore4Tara, and leave the default Project ID that CodeStar generates from the project name. Yes, I know that this is one of the goofiest names I could ever come up with, but, hey, it will do for this test project so I’ll go ahead and click the Next button. I should mention that you have the option to edit your Amazon EC2 configuration for your project on this screen before CodeStar starts configuring and provisioning the services needed to run your application.
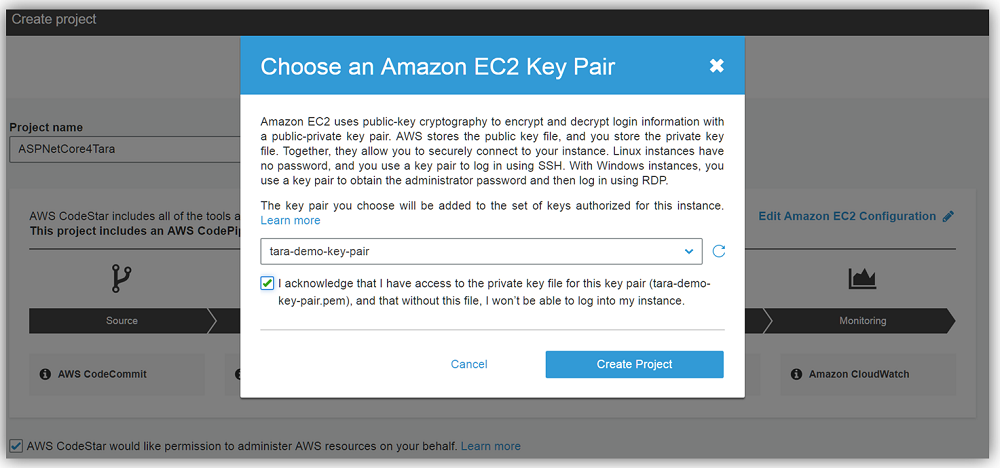
Since my ASP.Net Core web application will be deployed to an Amazon EC2 instance, I will need to choose an Amazon EC2 Key Pair for encryption of the login used to allow me to SSH into this instance. For my ASPNetCore4Tara project, I will use an existing Amazon EC2 key pair I have previously used for launching my other EC2 instances. However, if I was creating this project and I did not have an EC2 key pair or if I didn’t have access to the .pem file (private key file) for an existing EC2 key pair, I would have to first visit the EC2 console and create a new EC2 key pair to use for my project. This is important because if you remember, without having the EC2 key pair with the associated .pem file, I would not be able to log into my EC2 instance.
With my EC2 key pair selected and confirmation that I have the related private file checked, I am ready to click the Create Project button.
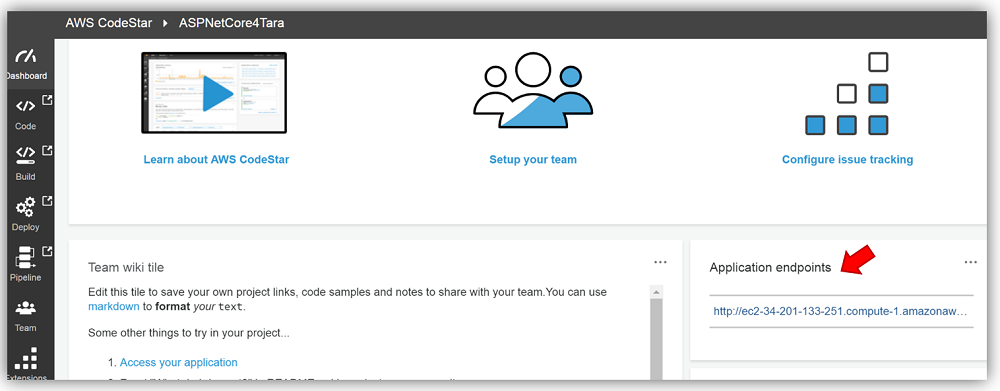
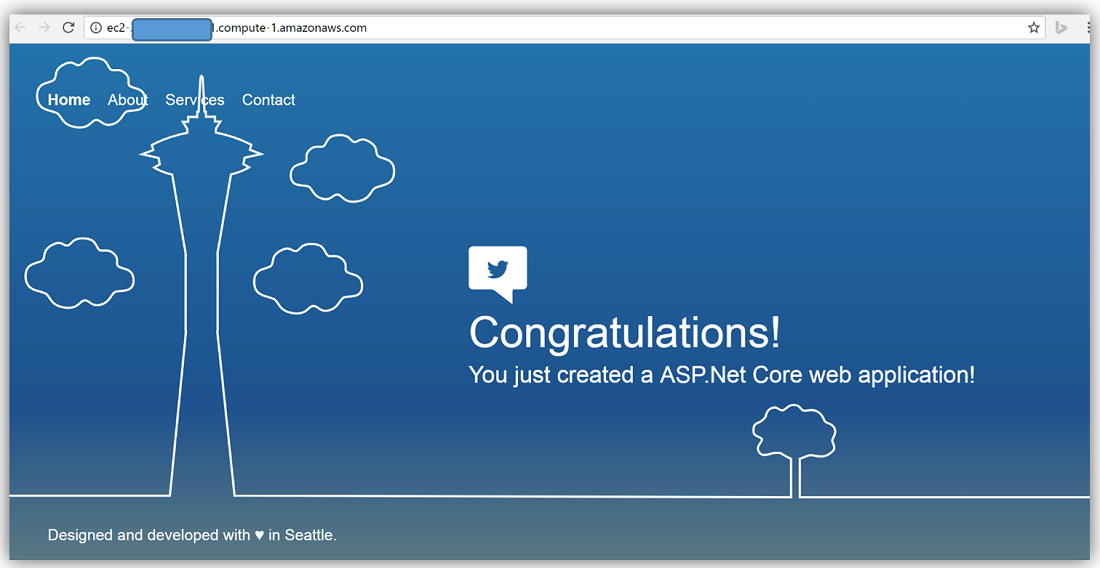
After CodeStar completes the creation of the project and the provisioning of the project related AWS services, I am ready to view the CodeStar sample application from the application endpoint displayed in the CodeStar dashboard. This sample application should be familiar to you if have been working with the CodeStar service or if you had an opportunity to read the blog post about the AWS CodeStar service launch. I’ll click the link underneath Application Endpoints to view the sample ASP.NET Core web application.
Now I’ll go ahead and clone the generated project and connect my Visual Studio IDE to the project repository. I am going to make some changes to the application and since AWS CodeBuild now supports .NET Core builds and deployments to both Amazon EC2 and AWS Lambda, I will alter my build specification file appropriately for the changes to my web application that will include the use of the Lambda function. Don’t worry if you are not familiar with how to clone the project and connect it to the Visual Studio IDE, CodeStar provides in-console step-by-step instructions to assist you.
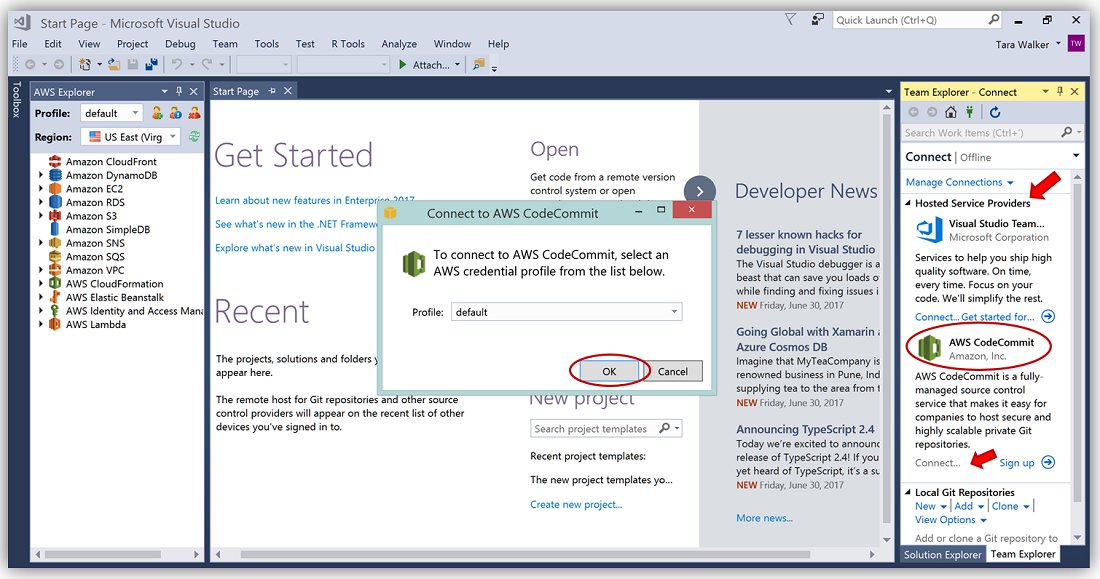
First things first, I will open up the Visual Studio IDE and connect to AWS CodeCommit repository provisioned for my ASPNetCore4Tara project. It is important to note that the Visual Studio 2017 IDE is required for .NET Core projects in AWS CodeStar and the AWS Toolkit for Visual Studio 2017 will need to be installed prior to connecting your project repository to the IDE.
In order to connect to my repo within Visual Studio, I will open up Team Explorer and select the Connect link under the AWS CodeCommit option under Hosted Service Providers. I will click Ok to keep my default AWS profile toolkit credentials.
I’ll then click Clone under the Manage Connections and AWS CodeCommit hosted provider section.
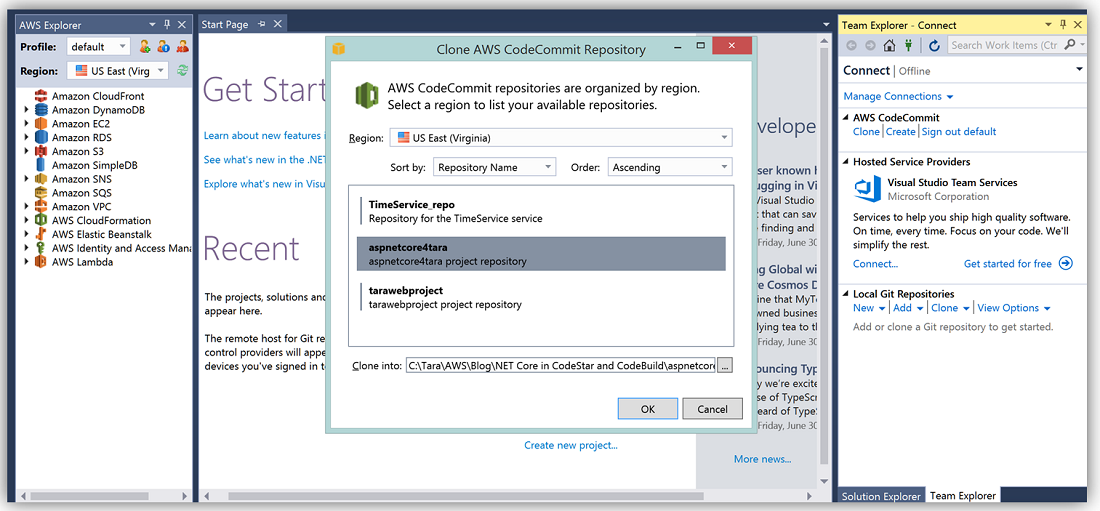
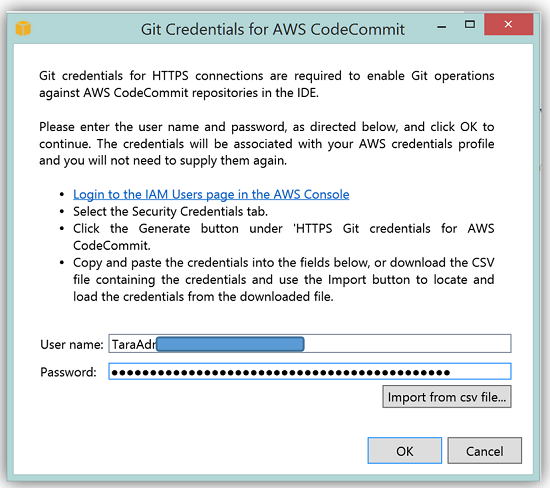
Once I select my aspnetcore4tara repository in the Clone AWS CodeCommit Repository dialog, I only have to enter my IAM role’s HTTPS Git credentials in the Git Credentials for AWS CodeCommit dialog and my process is complete. If you’re following along and receive a dialog for Git Credential Manager login, don’t worry just your enter the same IAM role’s Git credentials.
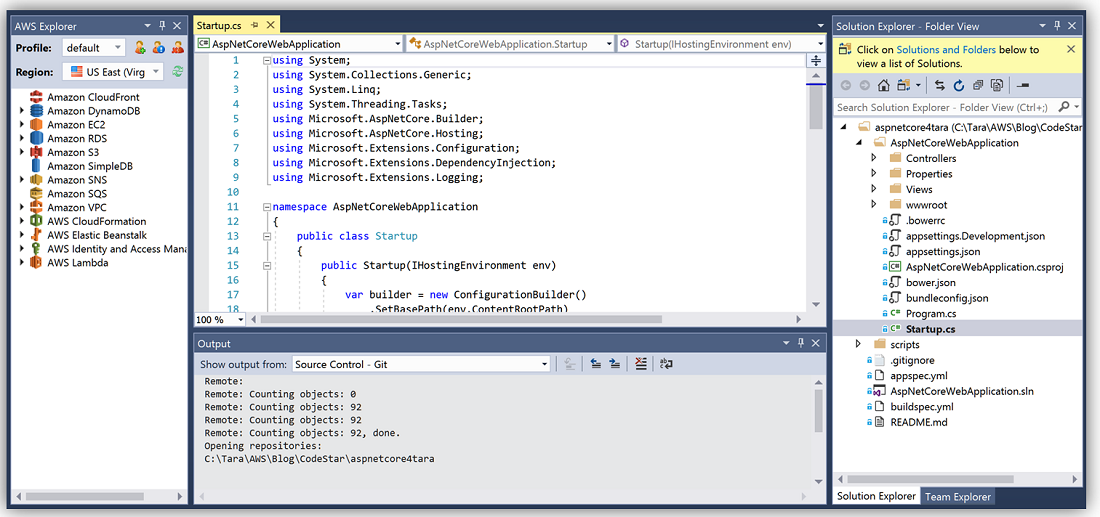
My project is now connected to the aspnetcore4tara CodeCommit repository and my web application is loaded to editing. As you will notice in the screenshot below, the sample project is structured as a standard ASP.NET Core MVC web application.
With the project created, I can make changes and updates. Since I want to update this project with a .NET Lambda function, I’ll quickly start a new project in Visual Studio to author a very simple C# Lambda function to be compiled with the CodeStar project. This AWS Lambda function will be included in the CodeStar ASP.NET Core web application project.
The Lambda function I’ve created makes a call to the REST API of NASA’s popular Astronomy Picture of the Day website. The API sends back the latest planetary image and related information in JSON format. You can see the Lambda function code below.
using System;
using System.Collections.Generic;
using System.Linq;
using System.Threading.Tasks;
using System.Net.Http;
using Amazon.Lambda.Core;
// Assembly attribute to enable the Lambda function's JSON input to be converted into a .NET class.
[assembly: LambdaSerializer(typeof(Amazon.Lambda.Serialization.Json.JsonSerializer))]
namespace NASAPicOfTheDay
{
public class SpacePic
{
HttpClient httpClient = new HttpClient();
string nasaRestApi = "https://api.nasa.gov/planetary/apod?api_key=DEMO_KEY";
/// <summary>
/// A simple function that retreives NASA Planetary Info and
/// Picture of the Day
/// </summary>
/// <param name="context"></param>
/// <returns>nasaResponse-JSON String</returns>
public async Task<string> GetNASAPicInfo(ILambdaContext context)
{
string nasaResponse;
//Call NASA Picture of the Day API
nasaResponse = await httpClient.GetStringAsync(nasaRestApi);
Console.WriteLine("NASA API Response");
Console.WriteLine(nasaResponse);
//Return NASA response - JSON format
return nasaResponse;
}
}
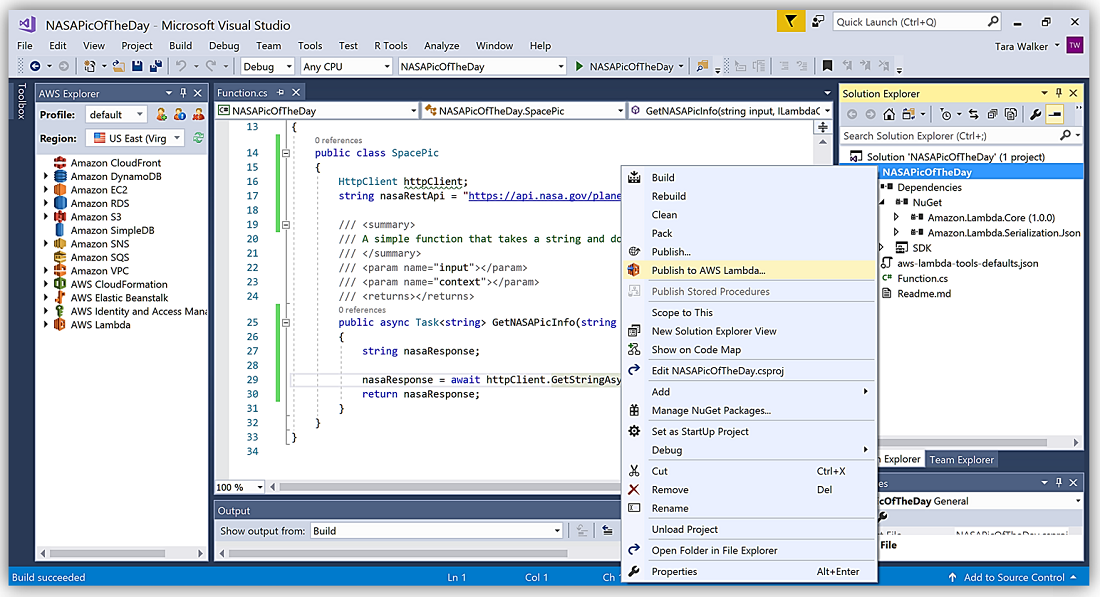
}I’ll now publish this C# Lambda function and test by using the Publish to AWS Lambda option provided by the AWS Toolkit for Visual Studio with NASAPicOfTheDay project. After publishing the function, I can test it and verify that it is working correctly within Visual Studio and/or the AWS Lambda console. You can learn more about building AWS Lambda functions with C# and .NET at: http://docs.aws.amazon.com/lambda/latest/dg/dotnet-programming-model.html
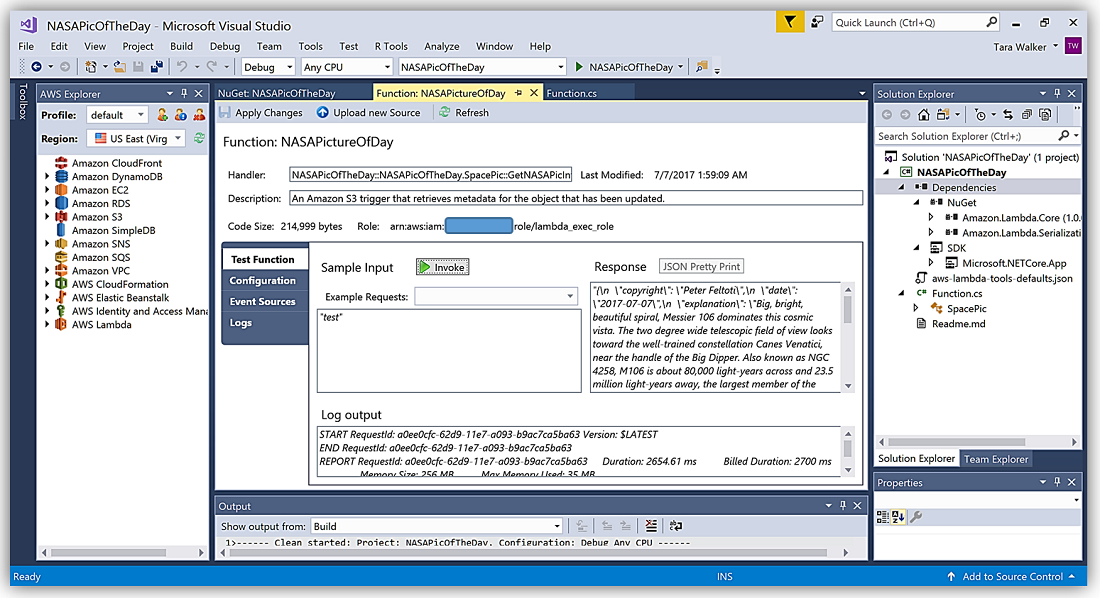
Now that I have my Lambda function completed and tested, all that is left is to update the CodeBuild buildspec.yml file within my aspnetcore4tara CodeStar project to include publishing and deploying of the Lambda function.
To accomplish this, I will create a new folder named functions and copy the folder that contains my Lambda function .NET project to my aspnetcore4tara web application project directory.
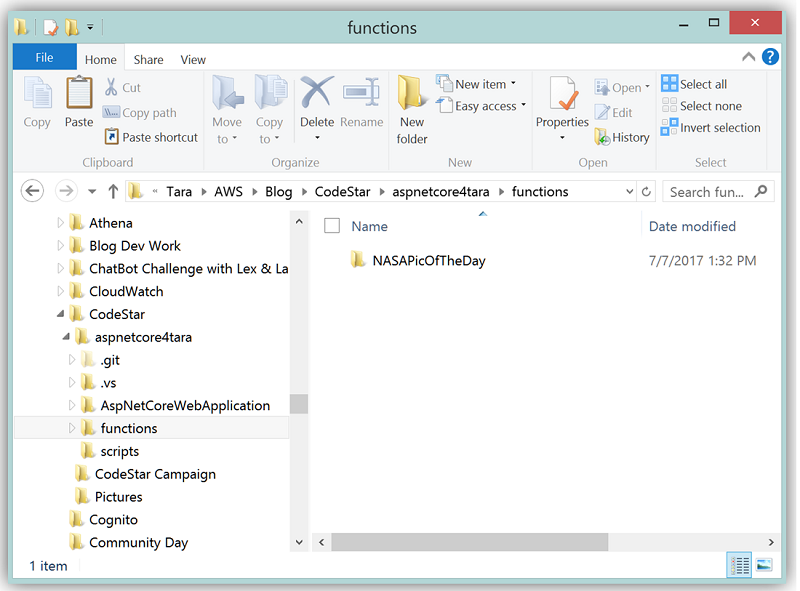
To build and publish my AWS Lambda function, I will use commands in the buildspec.yml file from the aws-lambda-dotnet tools library, which helps .NET Core developers develop AWS Lambda functions. I add a file, funcprof, to the NASAPicOfTheDay folder which contains customized profile information for use with aws-lambda-dotnet tools. All that is left is to update the buildspec.yml file used by CodeBuild for the ASPNetCore4Tara project build to include the packaging and the deployment of the NASAPictureOfDay AWS Lambda function. The updated buildspec.yml is as follows:
version: 0.2
phases:
  env:
  variables:
    basePath: 'hold'
  install:
    commands:
      - echo set basePath for project
      - basePath=$(pwd)
      - echo $basePath
      - echo Build restore and package Lambda function using AWS .NET Tools...
      - dotnet restore functions/*/NASAPicOfTheDay.csproj
      - cd functions/NASAPicOfTheDay
      - dotnet lambda package -c Release -f netcoreapp1.0 -o ../lambda_build/nasa-lambda-function.zip
  pre_build:
    commands:
      - echo Deploy Lambda function used in ASPNET application using AWS .NET Tools. Must be in path of Lambda function build
      - cd $basePath
      - cd functions/NASAPicOfTheDay
      - dotnet lambda deploy-function NASAPicAPI -c Release -pac ../lambda_build/nasa-lambda-function.zip --profile-location funcprof -fd 'NASA API for Picture of the Day' -fn NASAPicAPI -fh NASAPicOfTheDay::NASAPicOfTheDay.SpacePic::GetNASAPicInfo -frun dotnetcore1.0 -frole arn:aws:iam::xxxxxxxxxxxx:role/lambda_exec_role -framework netcoreapp1.0 -fms 256 -ft 30
      - echo Lambda function is now deployed - Now change directory back to Base path
      - cd $basePath
      - echo Restore started on `date`
      - dotnet restore AspNetCoreWebApplication/AspNetCoreWebApplication.csproj
  build:
    commands:
      - echo Build started on `date`
      - dotnet publish -c release -o ./build_output AspNetCoreWebApplication/AspNetCoreWebApplication.csproj
artifacts:
  files:
    - AspNetCoreWebApplication/build_output/**/*
    - scripts/**/*
    - appspec.yml
That’s it! All that is left is for me to add and commit all my file additions and updates to the AWS CodeCommit git repository provisioned for my ASPNetCore4Tara project. This kicks off the AWS CodePipeline for the project which will now use AWS CodeBuild new support for .NET Core to build and deploy both the ASP.NET Core web application and the .NET AWS Lambda function.
Summary
The support for .NET Core in AWS CodeStar and AWS CodeBuild opens the door for .NET developers to take advantage of the benefits of Continuous Integration and Delivery when building .NET based solutions on AWS. Read more about .NET Core support in AWS CodeStar and AWS CodeBuild here or review product pages for AWS CodeStar and/or AWS CodeBuild for more information on using the services.
Enjoy building .NET projects more efficiently with Amazon Web Services using .NET Core with AWS CodeStar and AWS CodeBuild.
– Tara
New- Introducing AWS CodeStar – Quickly Develop, Build, and Deploy Applications on AWS
It wasn’t too long ago that I was on a development team working toward completing a software project by a release deadline and facing the challenges most software teams face today in developing applications. Challenges such as new project environment setup, team member collaboration, and the day-to-day task of keeping track of the moving pieces of code, configuration, and libraries for each development build. Today, with companies’ need to innovate and get to market faster, it has become essential to make it easier and more efficient for development teams to create, build, and deploy software.
Unfortunately, many organizations face some key challenges in their quest for a more agile, dynamic software development process. The first challenge most new software projects face is the lengthy setup process that developers have to complete before they can start coding. This process may include setting up of IDEs, getting access to the appropriate code repositories, and/or identifying infrastructure needed for builds, tests, and production.
Collaboration is another challenge that most development teams may face. In order to provide a secure environment for all members of the project, teams have to frequently set up separate projects and tools for various team roles and needs. In addition, providing information to all stakeholders about updates on assignments, the progression of development, and reporting software issues can be time-consuming.
Finally, most companies desire to increase the speed of their software development and reduce the time to market by adopting best practices around continuous integration and continuous delivery. Implementing these agile development strategies may require companies to spend time in educating teams on methodologies and setting up resources for these new processes.
Now Presenting: AWS CodeStar
To help development teams ease the challenges of building software while helping to increase the pace of releasing applications and solutions, I am excited to introduce AWS CodeStar.
AWS CodeStar is a cloud service designed to make it easier to develop, build, and deploy applications on AWS by simplifying the setup of your entire development project. AWS CodeStar includes project templates for common development platforms to enable provisioning of projects and resources for coding, building, testing, deploying, and running your software project.
The key benefits of the AWS CodeStar service are:
- Easily create new projects using templates for Amazon EC2, AWS Elastic Beanstalk, or AWS Lambda using five different programming languages; JavaScript, Java, Python, Ruby, and PHP. By selecting a template, the service will provision the underlying AWS services needed for your project and application.
- Unified experience for access and security policies management for your entire software team. Projects are automatically configured with appropriate IAM access policies to ensure a secure application environment.
- Pre-configured project management dashboard for tracking various activities, such as code commits, build results, deployment activity and more.
- Running sample code to help you get up and running quickly enabling you to use your favorite IDEs, like Visual Studio, Eclipse, or any code editor that supports Git.
- Automated configuration of a continuous delivery pipeline for each project using AWS CodeCommit, AWS CodeBuild, AWS CodePipeline, and AWS CodeDeploy.
- Integration with Atlassian JIRA Software for issue management and tracking directly from the AWS CodeStar console
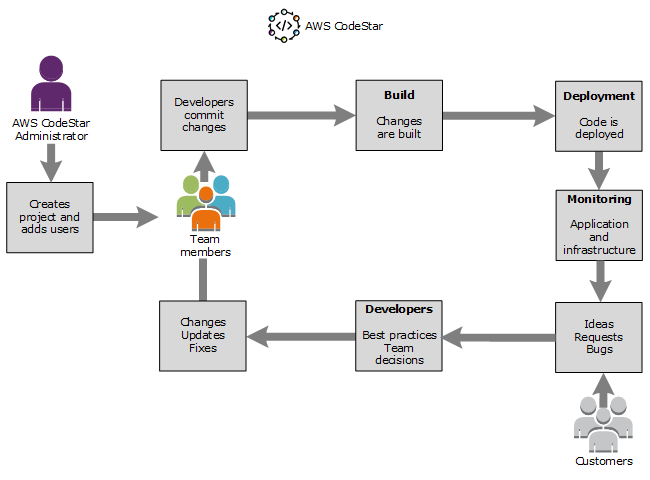
With AWS CodeStar, development teams can build an agile software development workflow that not only increases the speed in which teams can deploy software and bug fixes, but also enables developers to build software that is more inline with customers’ requests and needs.
An example of a responsive development workflow using AWS CodeStar is shown below:
Journey Into AWS CodeStar
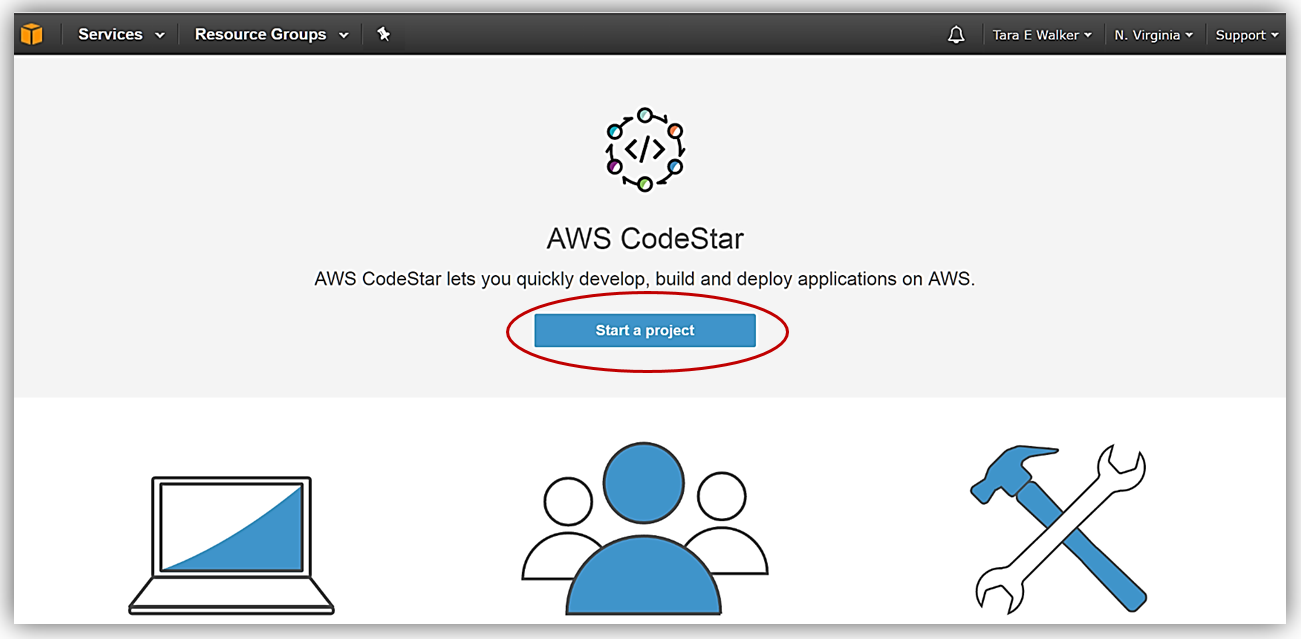
Now that you know a little more about the AWS CodeStar service, let’s jump into using the service to set up a web application project. First, I’ll go to into the AWS CodeStar console and click the Start a project button.
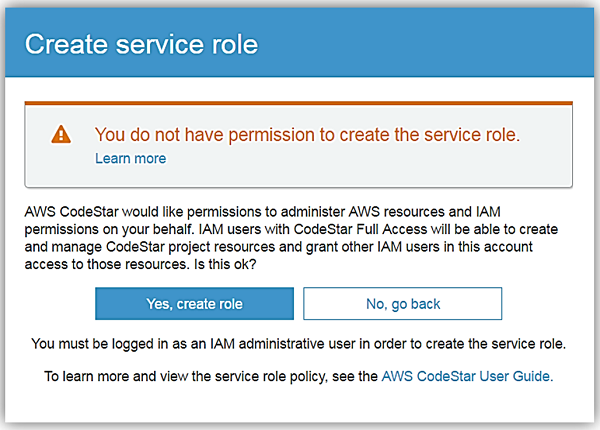
If you have not setup the appropriate IAM permissions, AWS CodeStar will show a dialog box requesting permission to administer AWS resources on your behalf. I will click the Yes, grant permissions button to grant AWS CodeStar the appropriate permissions to other AWS resources.

However, I received a warning that I do not have administrative permissions to AWS CodeStar as I have not applied the correct policies to my IAM user. If you want to create projects in AWS CodeStar, you must apply the AWSCodeStarFullAccess managed policy to your IAM user or have an IAM administrative user with full permissions for all AWS services.
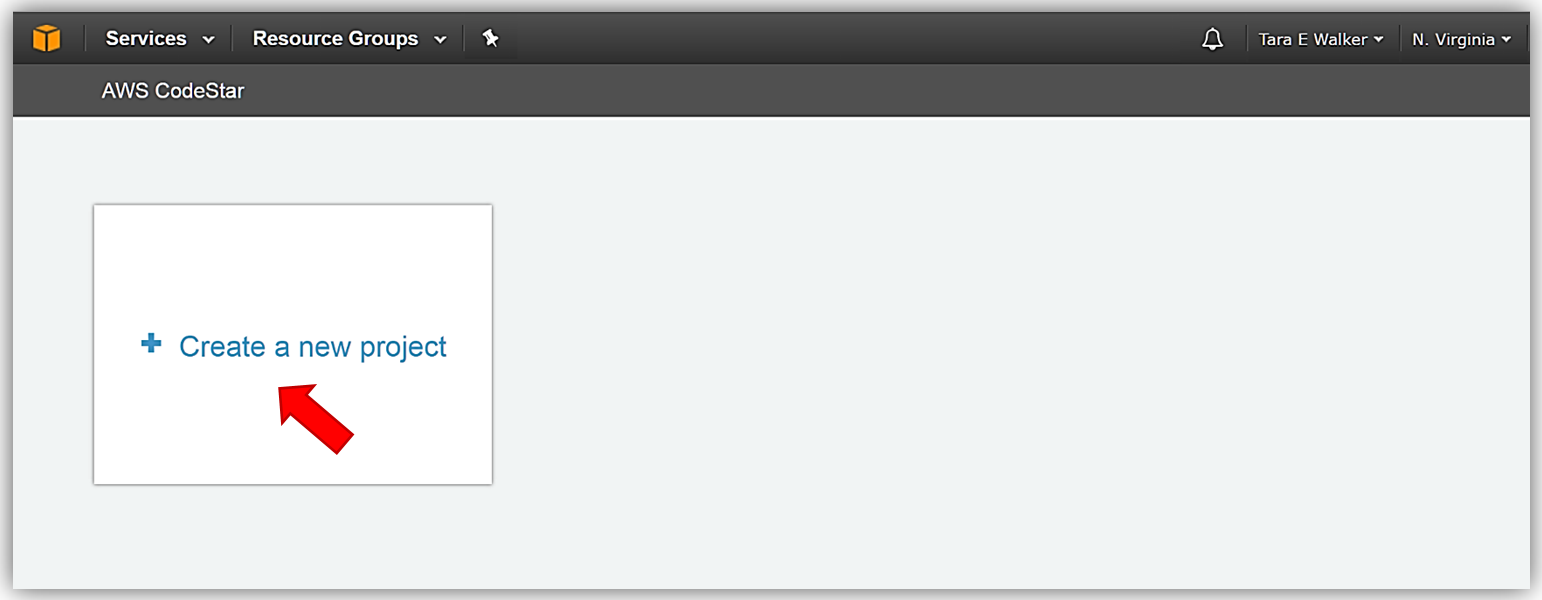
Now that I have added the aforementioned permissions in IAM, I can now use the service to create a project. To start, I simply click on the Create a new project button and I am taken to the hub of the AWS CodeStar service.
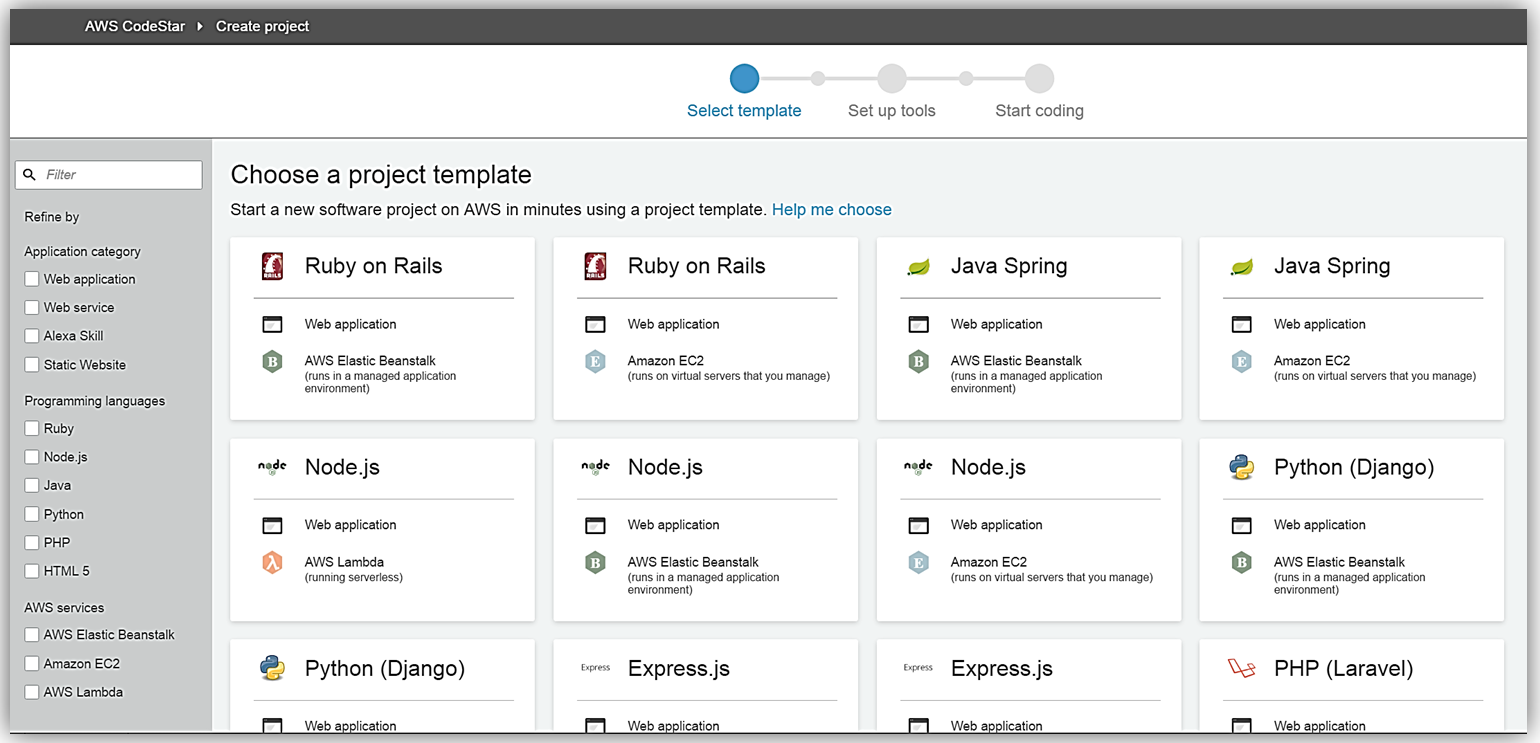
At this point, I am presented with over twenty different AWS CodeStar project templates to choose from in order to provision various environments for my software development needs. Each project template specifies the AWS Service used to deploy the project, the supported programming language, and a description of the type of development solution implemented. AWS CodeStar currently supports the following AWS Services: Amazon EC2, AWS Lambda, and AWS Elastic Beanstalk. Using preconfigured AWS CloudFormation templates, these project templates can create software development projects like microservices, Alexa skills, web applications, and more with a simple click of a button.
For my first AWS CodeStar project, I am going to build a serverless web application using Node.js and AWS Lambda using the Node.js/AWS Lambda project template.
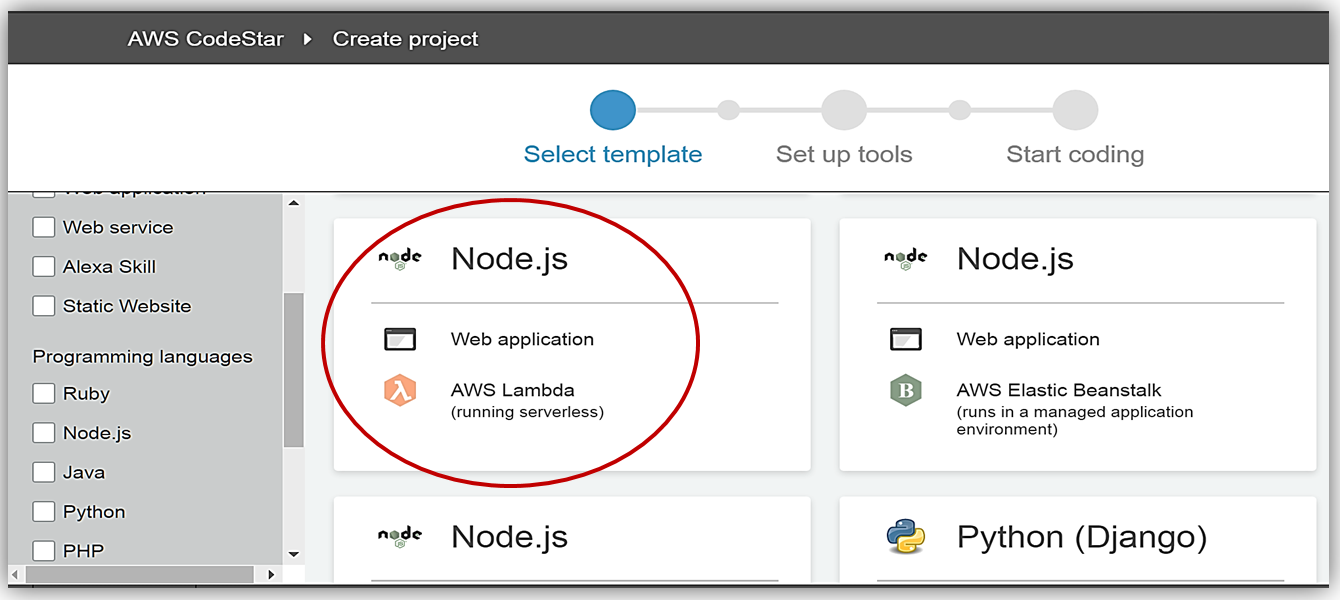
You will notice for this template AWS CodeStar sets up all of the tools and services you need for a development project including an AWS CodePipeline connected with the services; AWS CodeBuild, AWS CloudFormation, and Amazon CloudWatch. I’ll name my new AWS CodeStar project, TaraWebProject, and click Create Project.

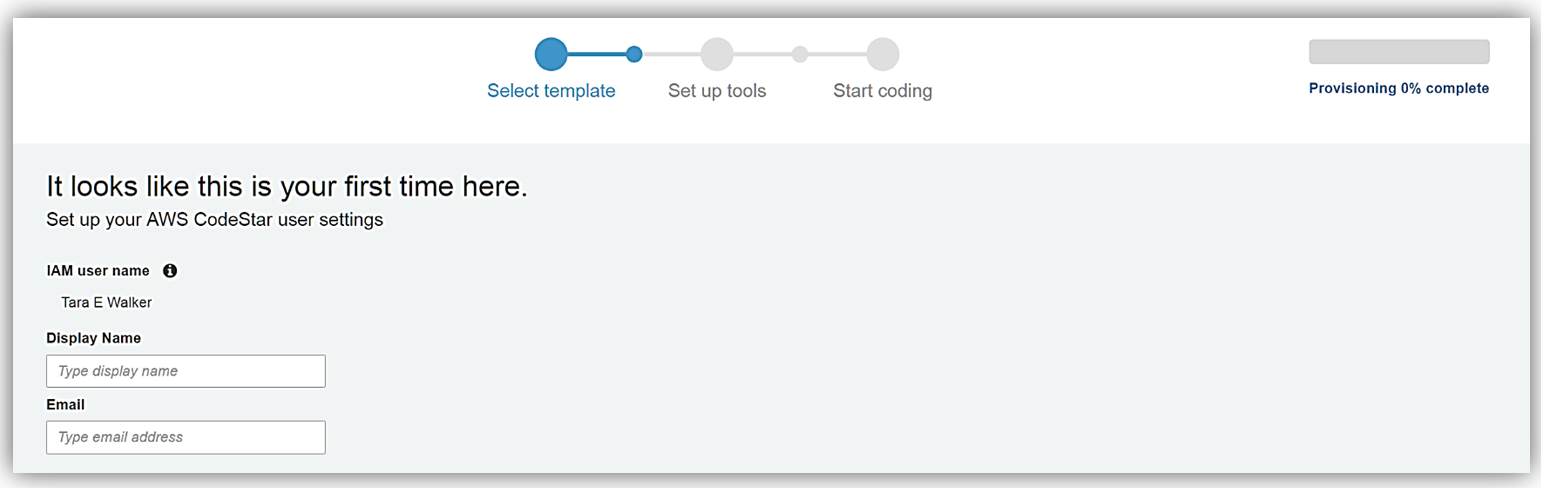
Since this is my first time creating an AWS CodeStar, I will see a dialog that asks about the setup of my AWS CodeStar user settings. I’ll type Tara in the textbox for the Display Name and add my email address in the Email textbox. This information is how I’ll appear to others in the project.
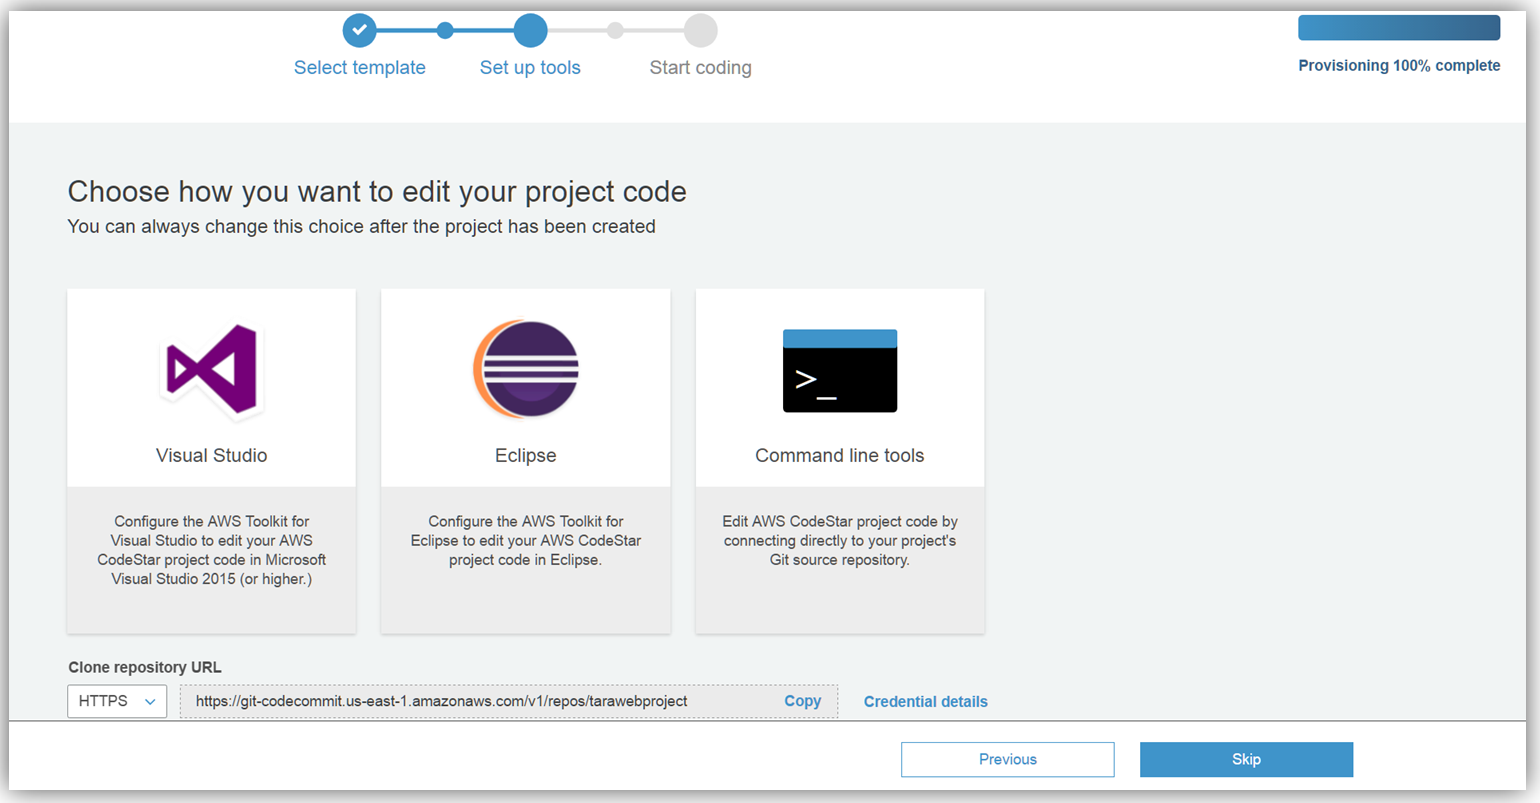
The next step is to select how I want to edit my project code. I have decided to edit my TaraWebProject project code using the Visual Studio IDE. With Visual Studio, it will be essential for me to configure it to use the AWS Toolkit for Visual Studio 2015 to access AWS resources while editing my project code. On this screen, I am also presented with the link to the AWS CodeCommit Git repository that AWS CodeStar configured for my project.
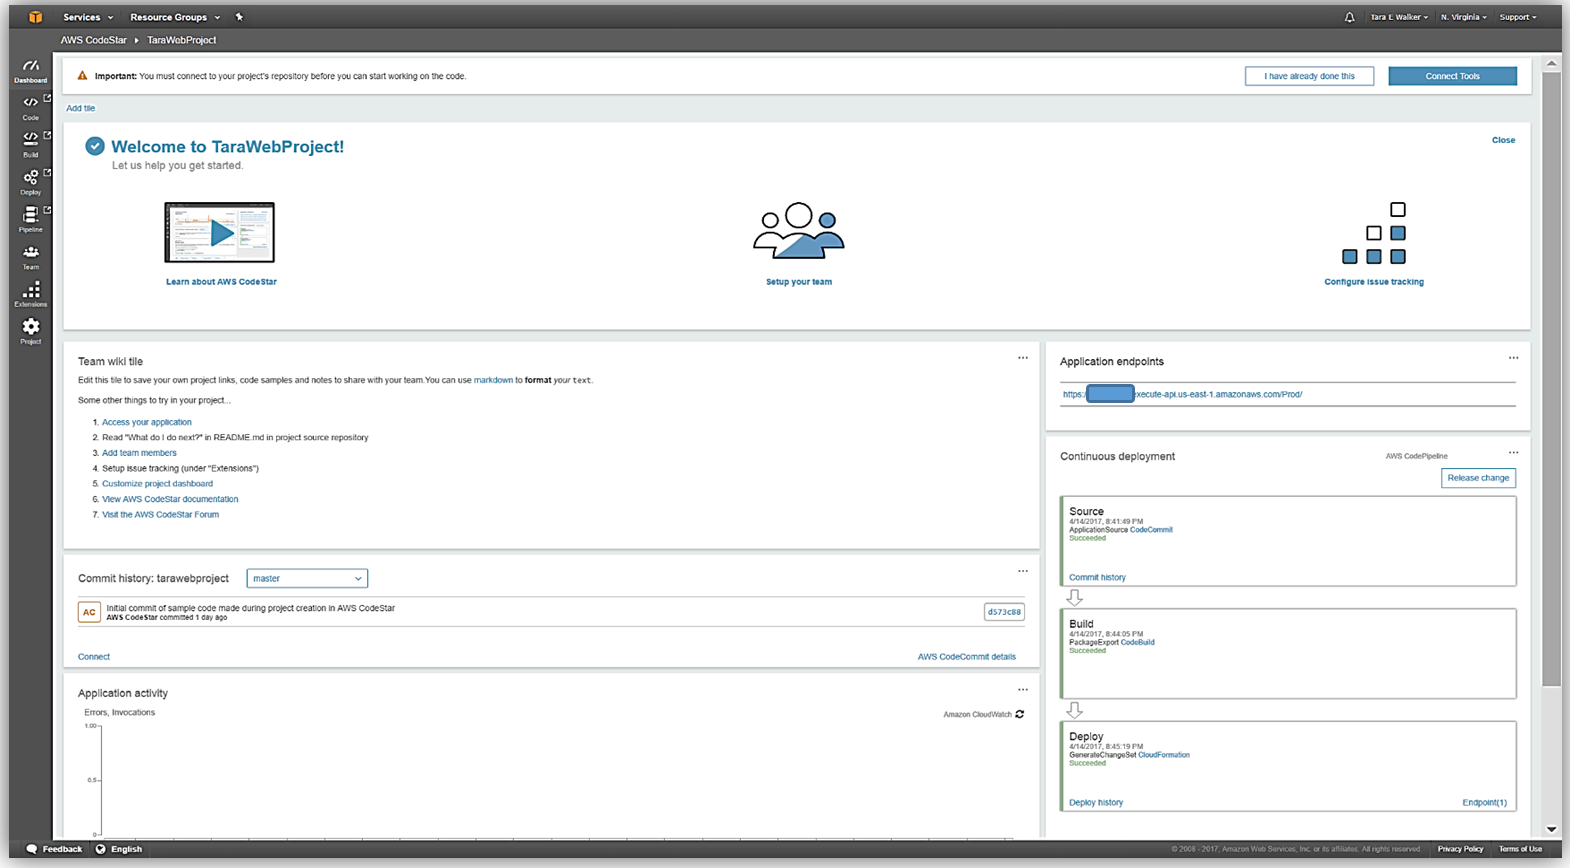
The provisioning and tool setup for my software development project is now complete. I’m presented with the AWS CodeStar dashboard for my software project, TaraWebProject, which allows me to manage the resources for the project. This includes the management of resources, such as code commits, team membership and wiki, continuous delivery pipeline, Jira issue tracking, project status and other applicable project resources.
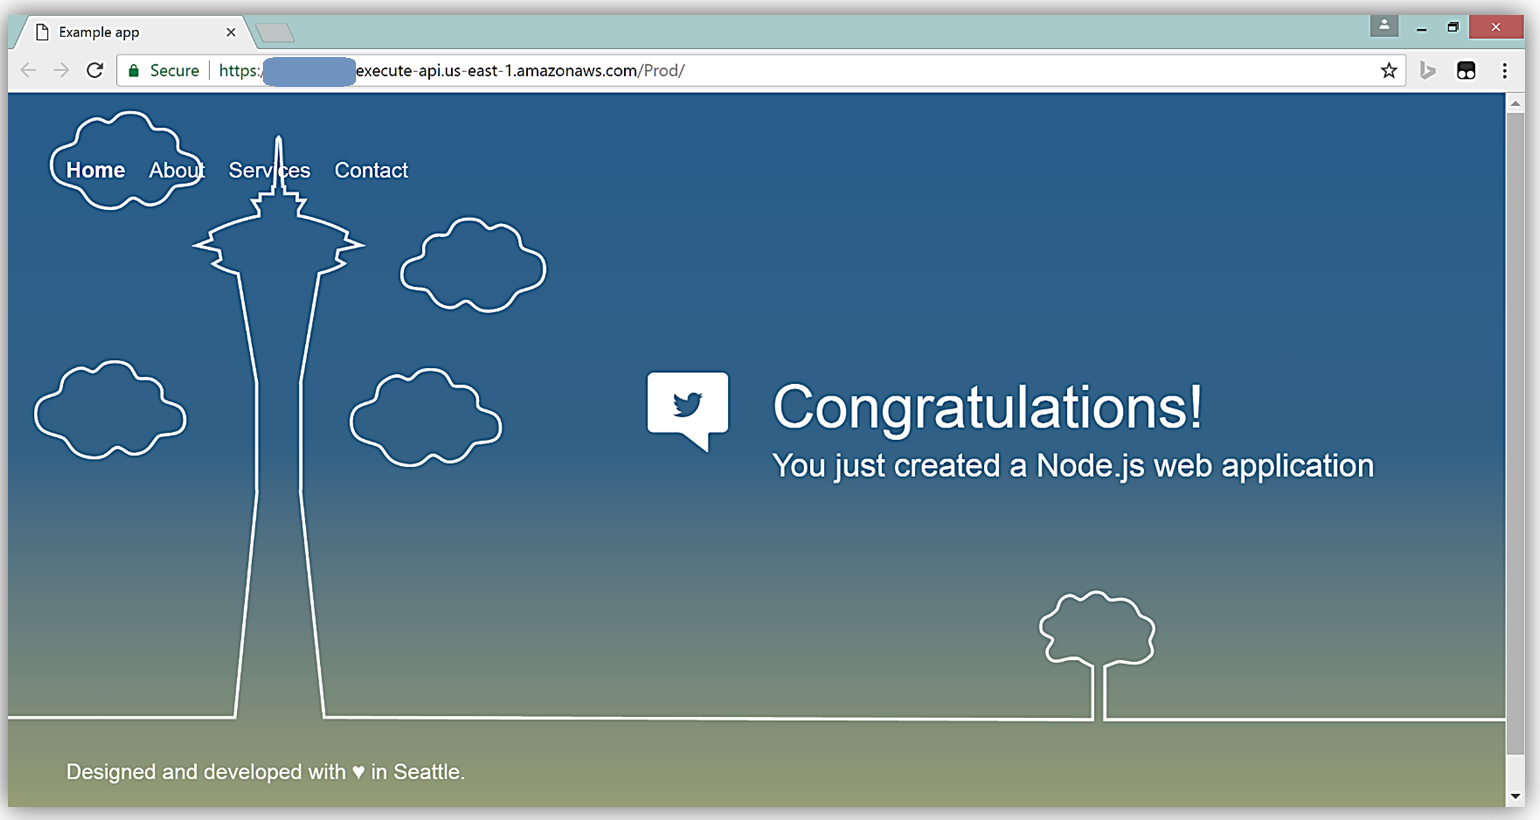
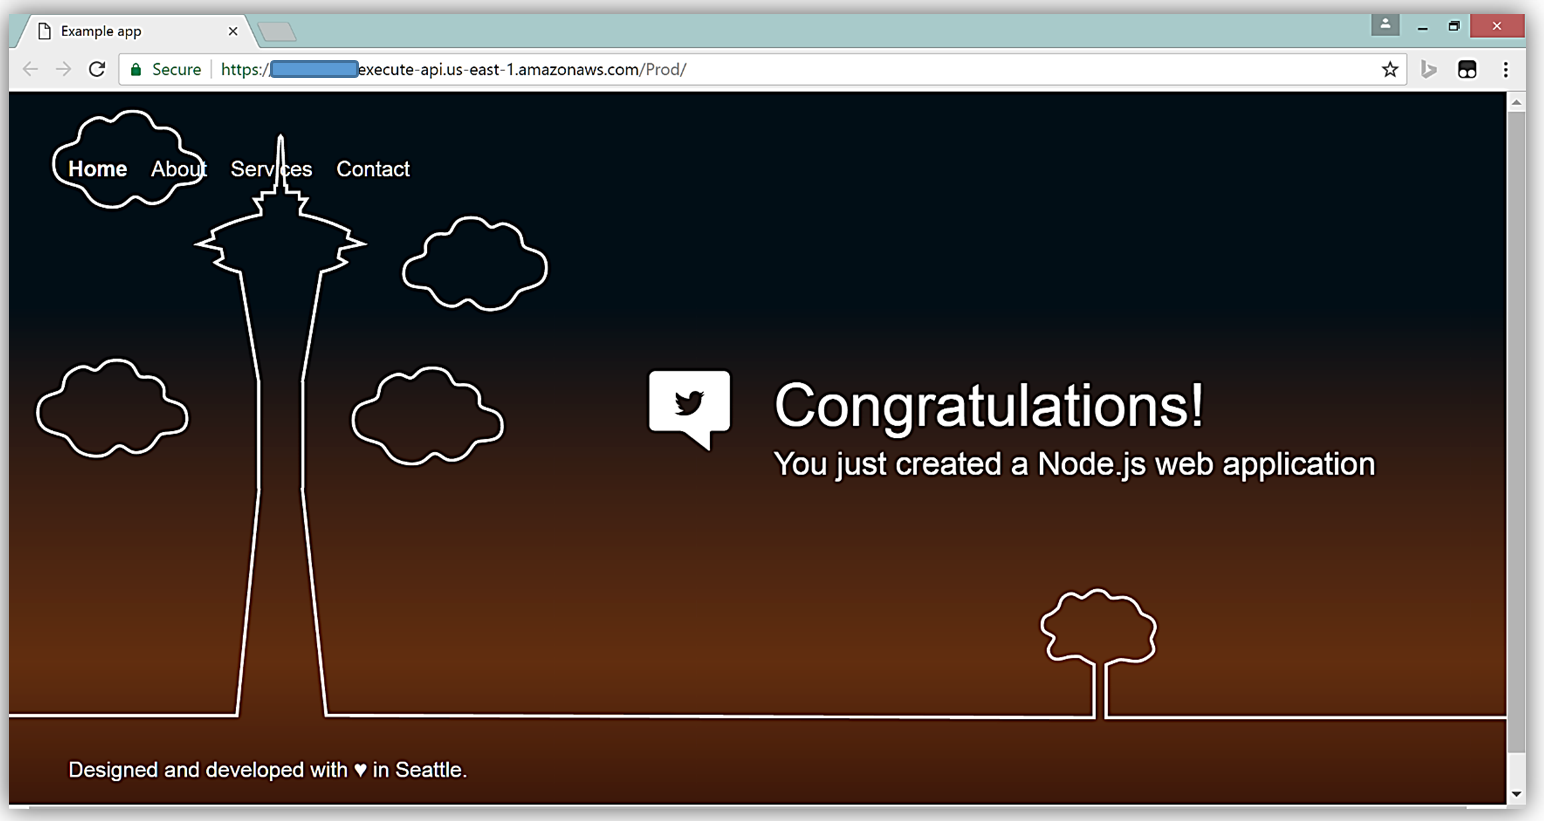
What is really cool about AWS CodeStar for me is that it provides a working sample project from which I can start the development of my serverless web application. To view the sample of my new web application, I will go to the Application endpoints section of the dashboard and click the link provided.
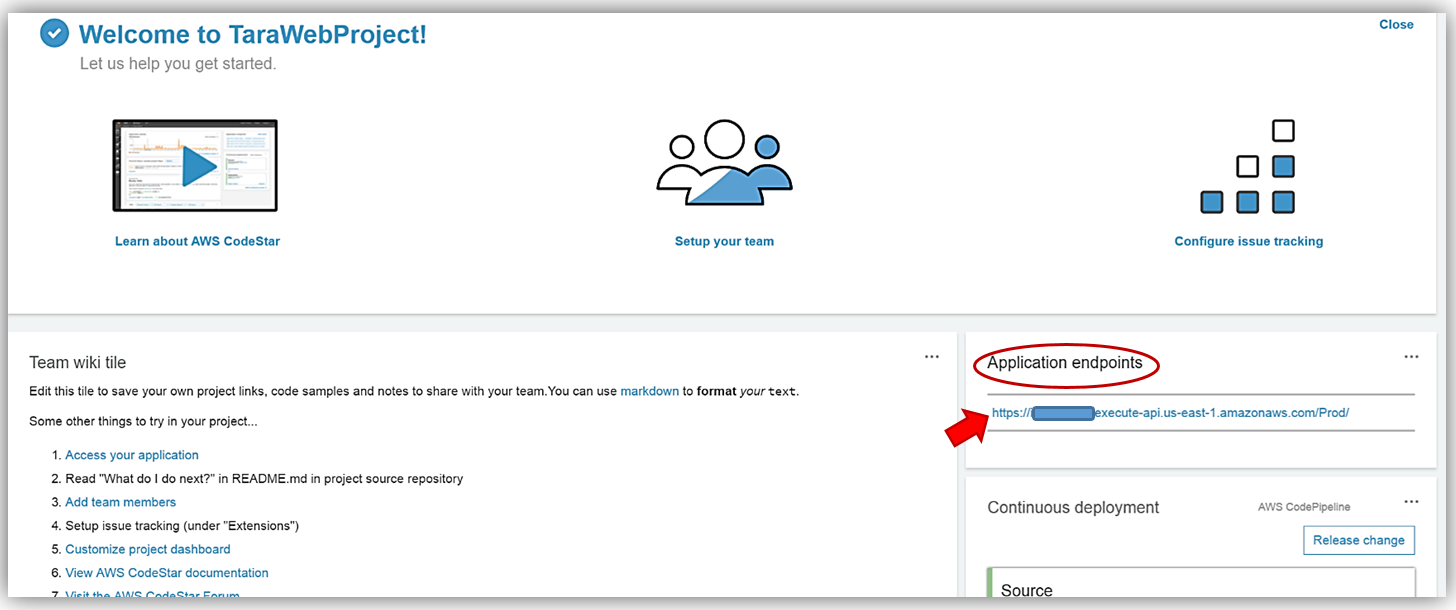
A new browser window will open and will display the sample web application AWS CodeStar generated to help jumpstart my development. A cool feature of the sample application is that the background of the sample app changes colors based on the time of day.
Let’s now take a look at the code used to build the sample website. In order to view the code, I will back to my TaraWebProject dashboard in the AWS CodeStar console and select the Code option from the sidebar menu.
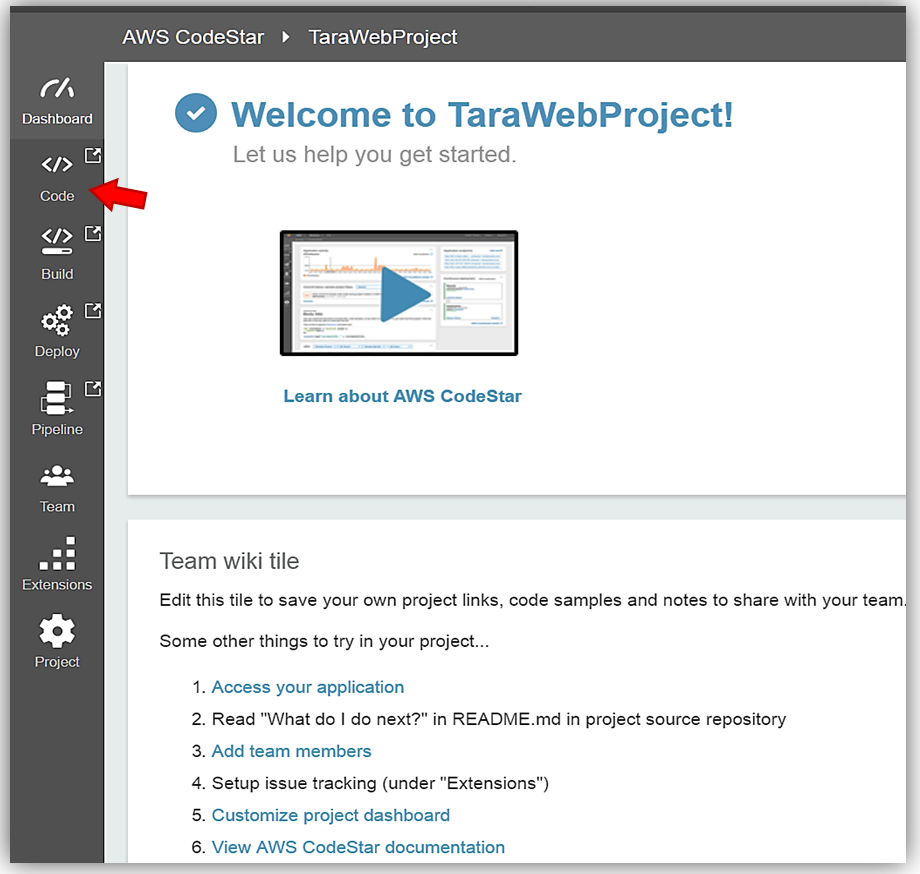
This takes me to the tarawebproject Git repository in the AWS CodeCommit console. From here, I can manually view the code for my web application, the commits made in the repo, the comparison of commits or branches, as well as, create triggers in response to my repo events.

This provides a great start for me to start developing my AWS hosted web application. Since I opted to integrate AWS CodeStar with Visual Studio, I can update my web application by using the IDE to make code changes that will be automatically included in the TaraWebProject every time I commit to the provisioned code repository.
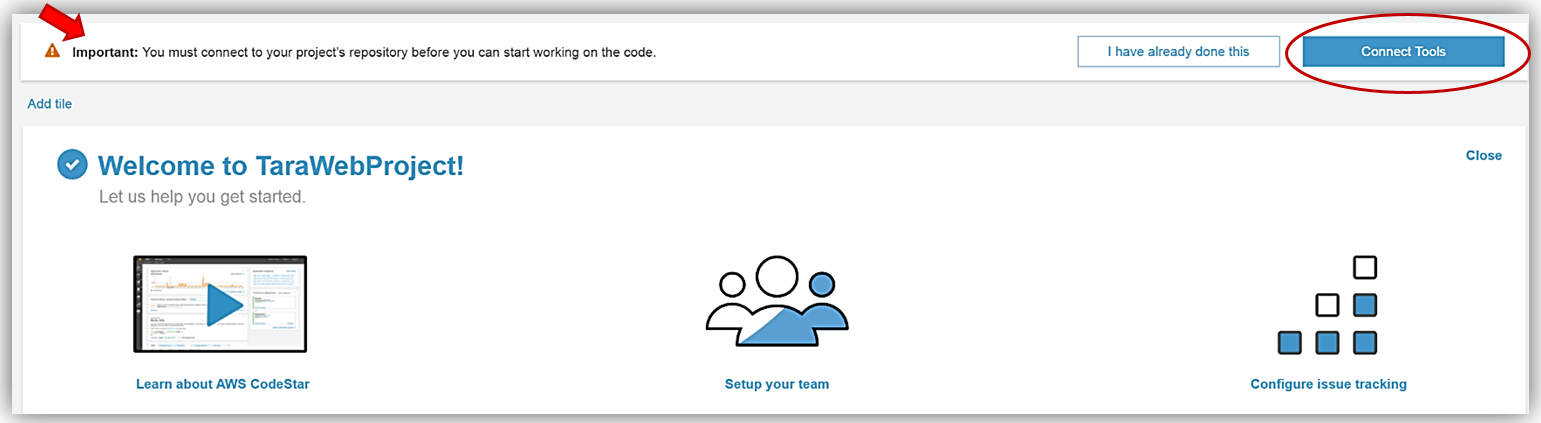
You will notice that on the AWS CodeStar TaraWebProject dashboard, there is a message about connecting the tools to my project repository in order to work on the code. Even though I have already selected Visual Studio as my IDE of choice, let’s click on the Connect Tools button to review the steps to connecting to this IDE.
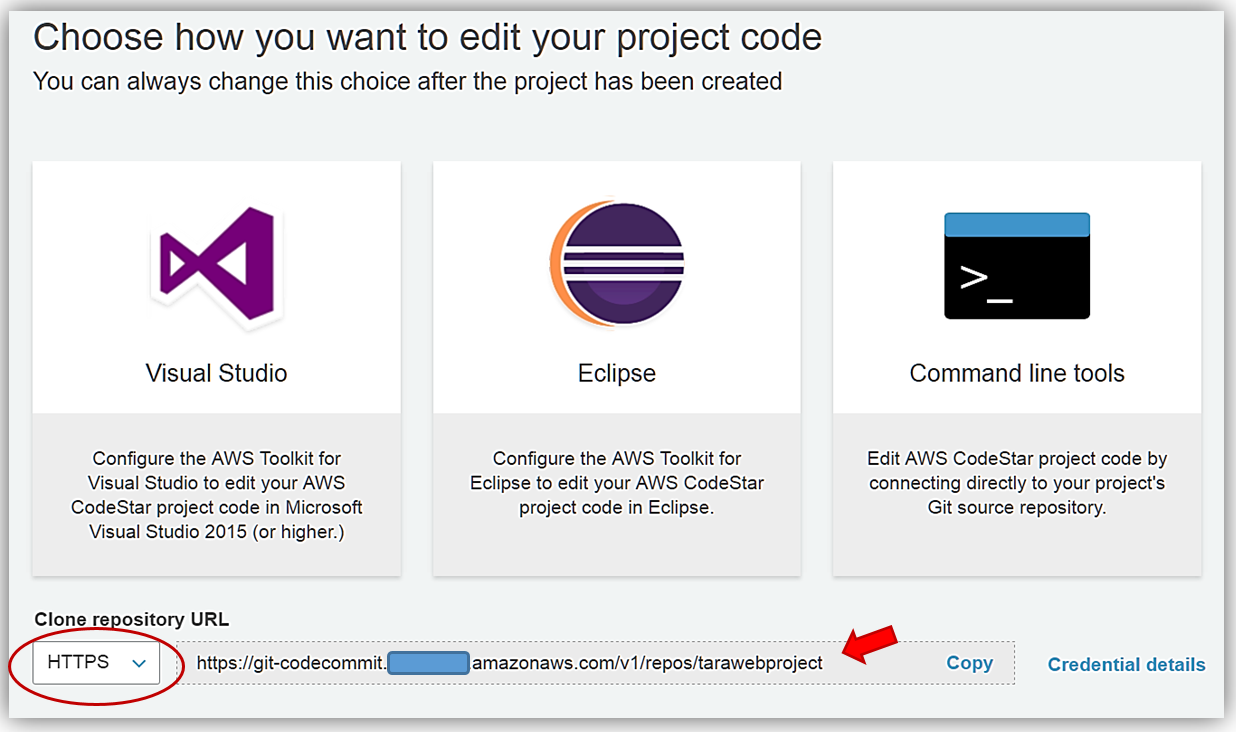
Again, I will see a screen that will allow me to choose which IDE: Visual Studio, Eclipse, or Command Line tool that I wish to use to edit my project code. It is important for me to note that I have the option to change my IDE choice at any time while working on my development project. Additionally, I can connect to my Git AWS CodeCommit repo via HTTPS and SSH. To retrieve the appropriate repository URL for each protocol, I only need to select the Code repository URL dropdown and select HTTPS or SSH and copy the resulting URL from the text field.
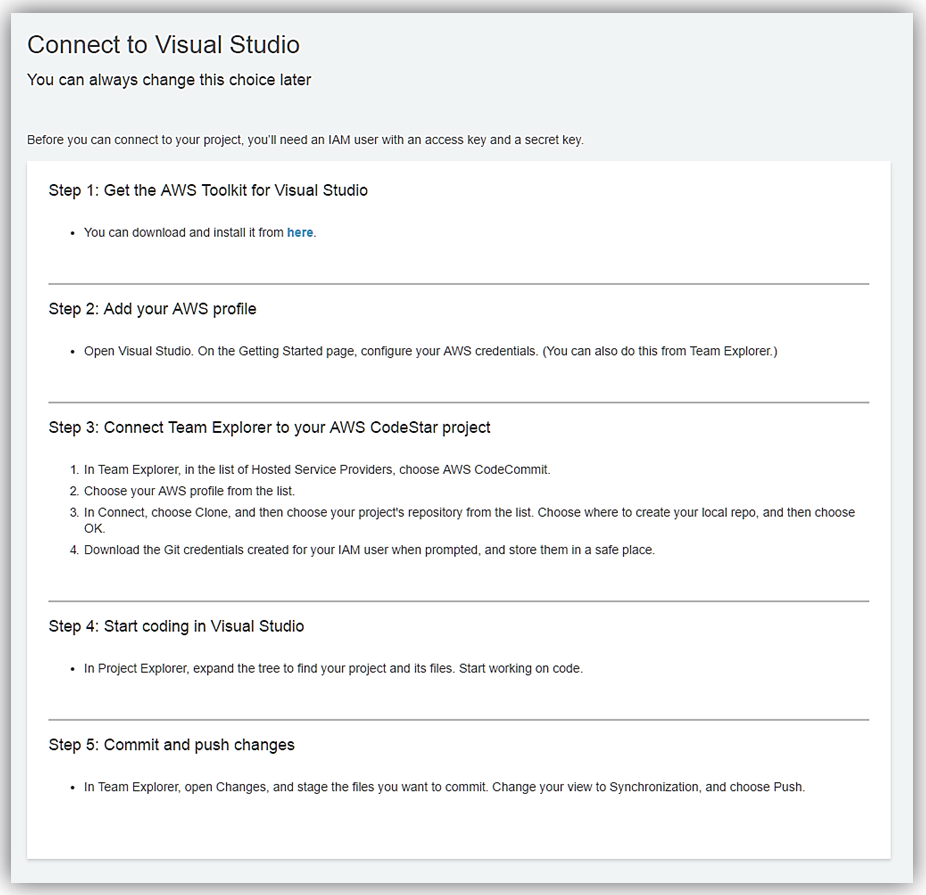
After selecting Visual Studio, CodeStar takes me to the steps needed in order to integrate with Visual Studio. This includes downloading the AWS Toolkit for Visual Studio, connecting the Team Explorer to AWS CodeStar via AWS CodeCommit, as well as, how to push changes to the repo.
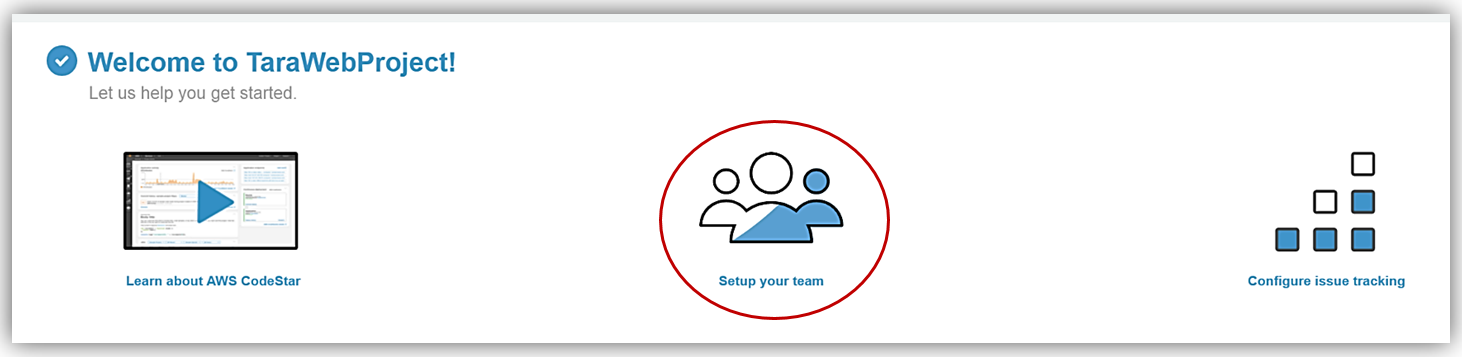
After successfully connecting Visual Studio to my AWS CodeStar project, I return to the AWS CodeStar TaraWebProject dashboard to start managing the team members working on the web application with me. First, I will select the Setup your team tile so that I can go to the Project Team page.
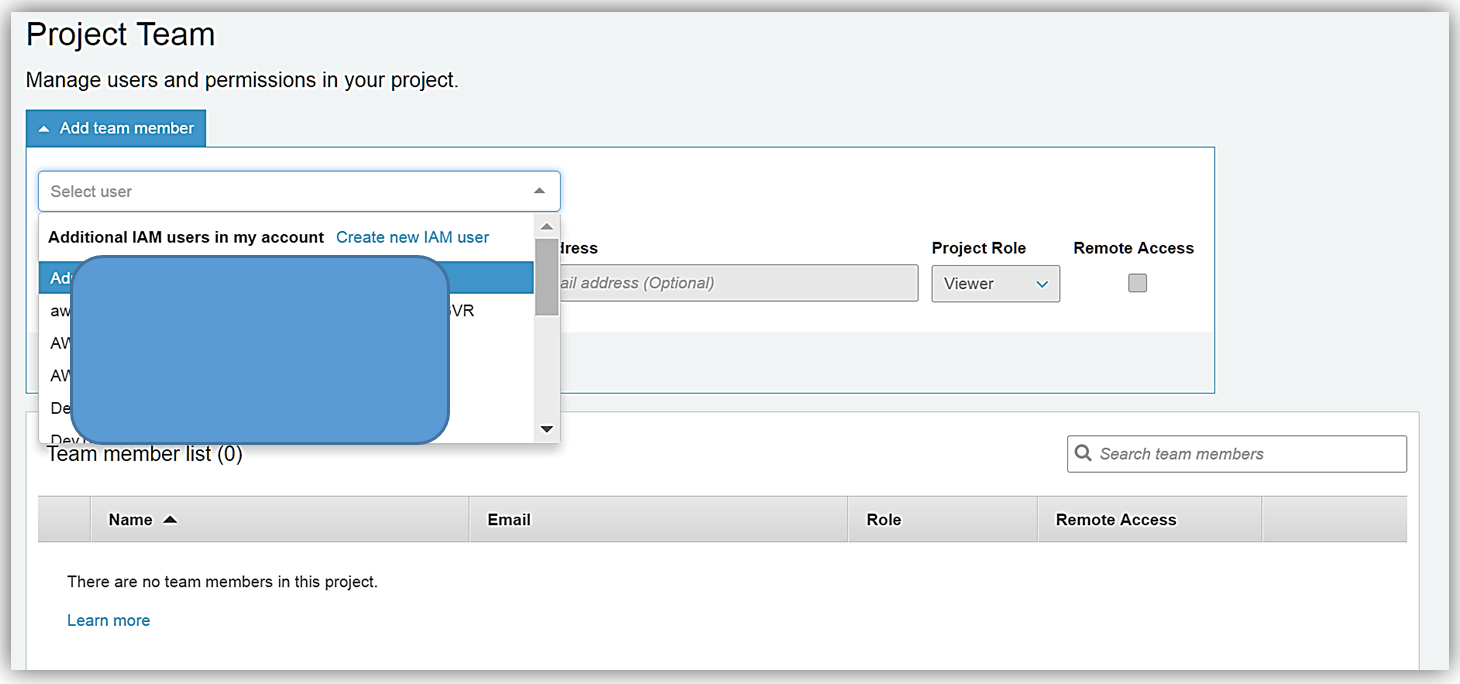
On my TaraWebProject Project Team page, I’ll add a team member, Jeff, by selecting the Add team member button and clicking on the Select user dropdown. Team members must be IAM users in my account, so I’ll click on the Create new IAM user link to create an IAM accounts for Jeff.
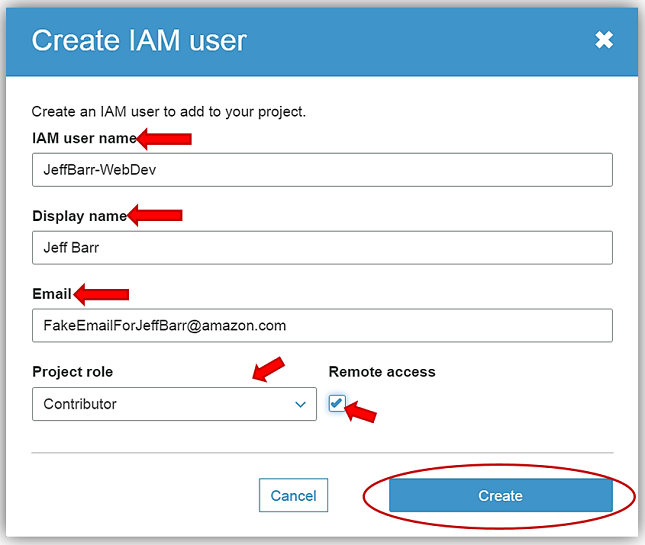
When the Create IAM user dialog box comes up, I will enter an IAM user name, Display name, and Email Address for the team member, in this case, Jeff Barr. There are three types of project roles that Jeff can be granted, Owner, Contributor, or Viewer. For the TaraWebProject application, I will grant him the Contributor project role and allow him to have remote access by select the Remote access checkbox. Now I will create Jeff’s IAM user account by clicking the Create button.
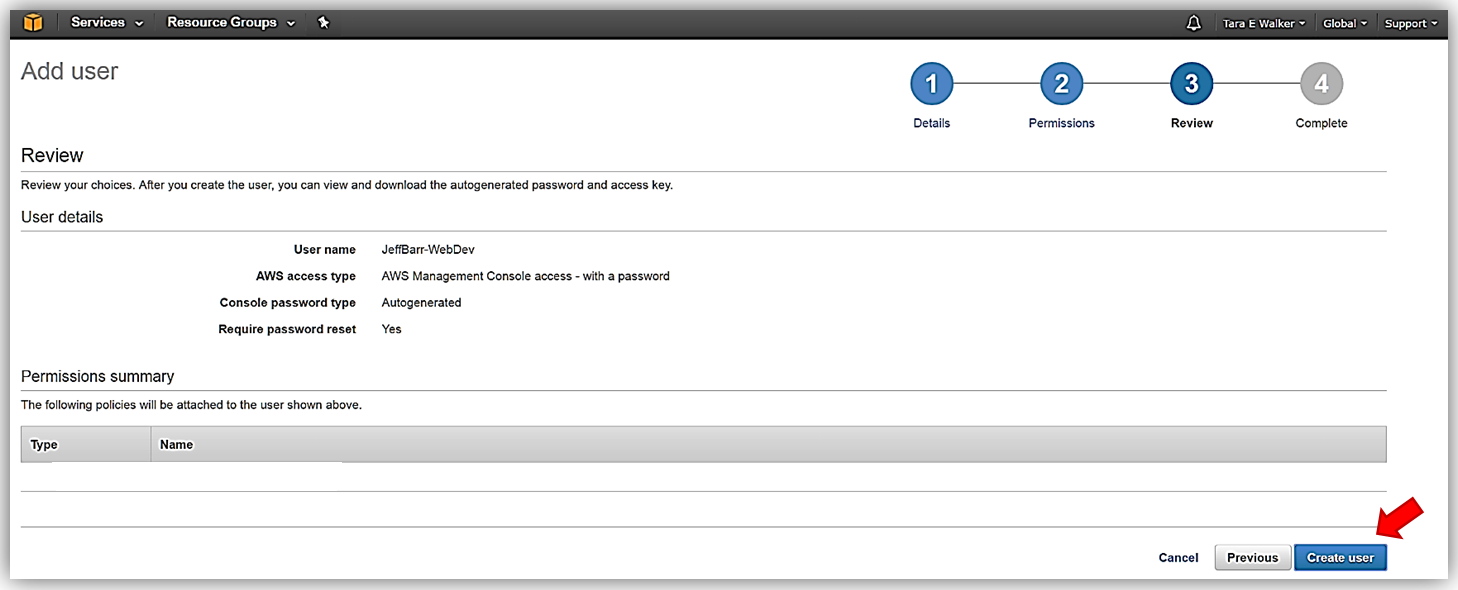
This brings me to the IAM console to confirm the creation of the new IAM user. After reviewing the IAM user information and the permissions granted, I will click the Create user button to complete the creation of Jeff’s IAM user account for TaraWebProject.
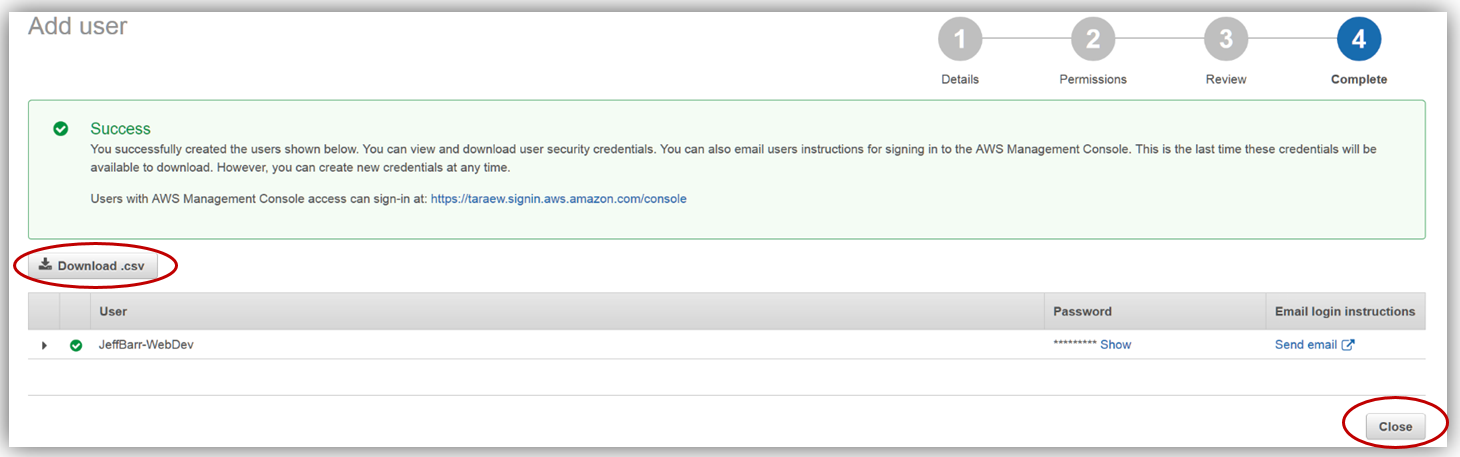
After successfully creating Jeff’s account, it is important that I either send Jeff’s login credentials to him in email or download the credentials .csv file, as I will not be able to retrieve these credentials again. I would need to generate new credentials for Jeff if I leave this page without obtaining his current login credentials. Clicking the Close button returns me to the AWS CodeStar console.
Now I can complete adding Jeff as a team member in the TaraWebProject by selecting the JeffBarr-WebDev IAM role and clicking the Add button.
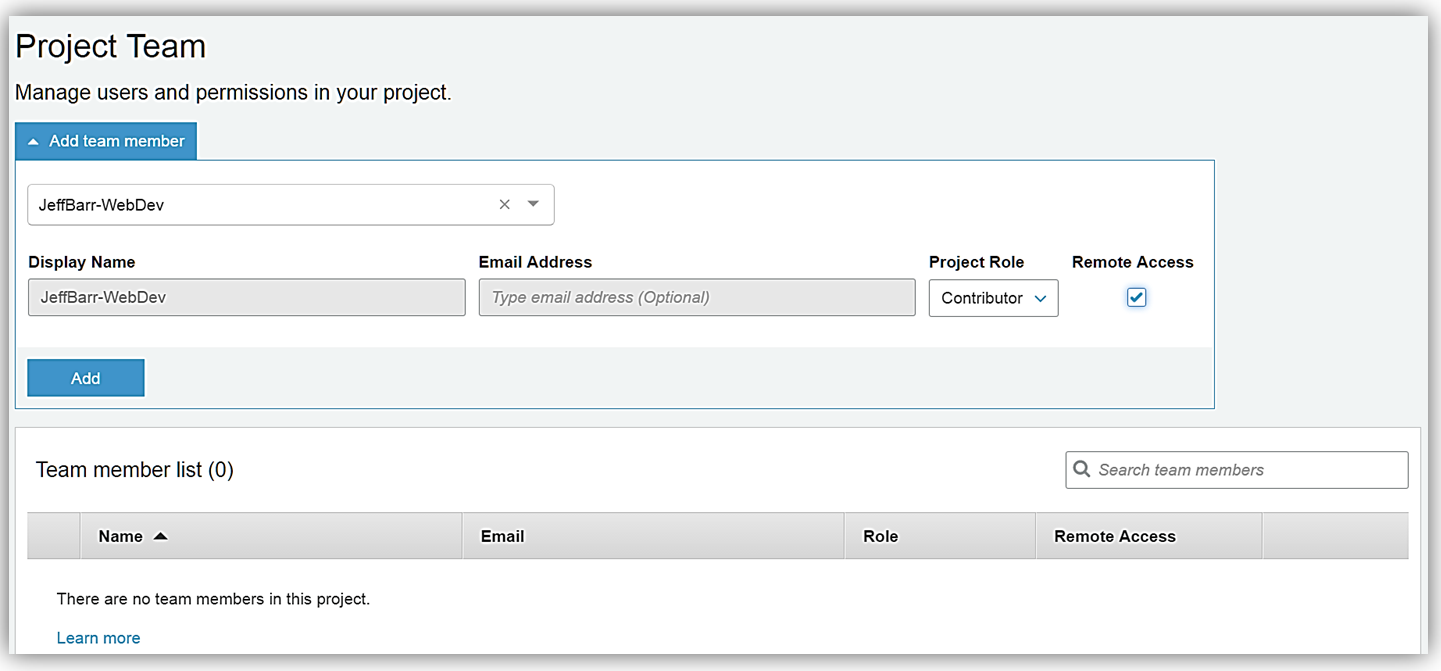
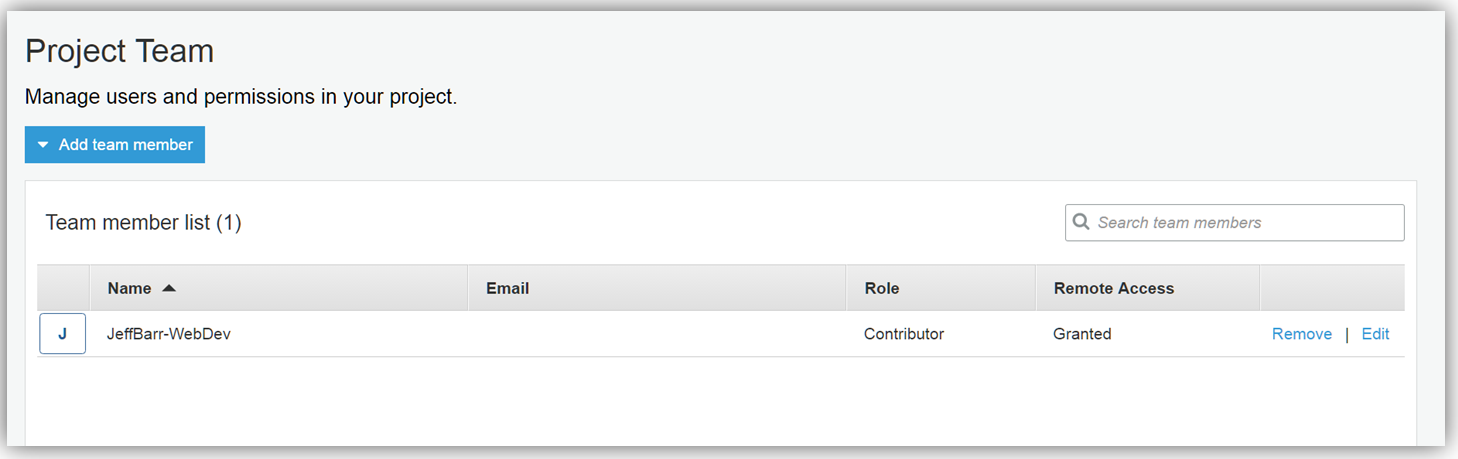
I’ve successfully added Jeff as a team member to my AWS CodeStar project, TaraWebProject enabling team collaboration in building the web application.
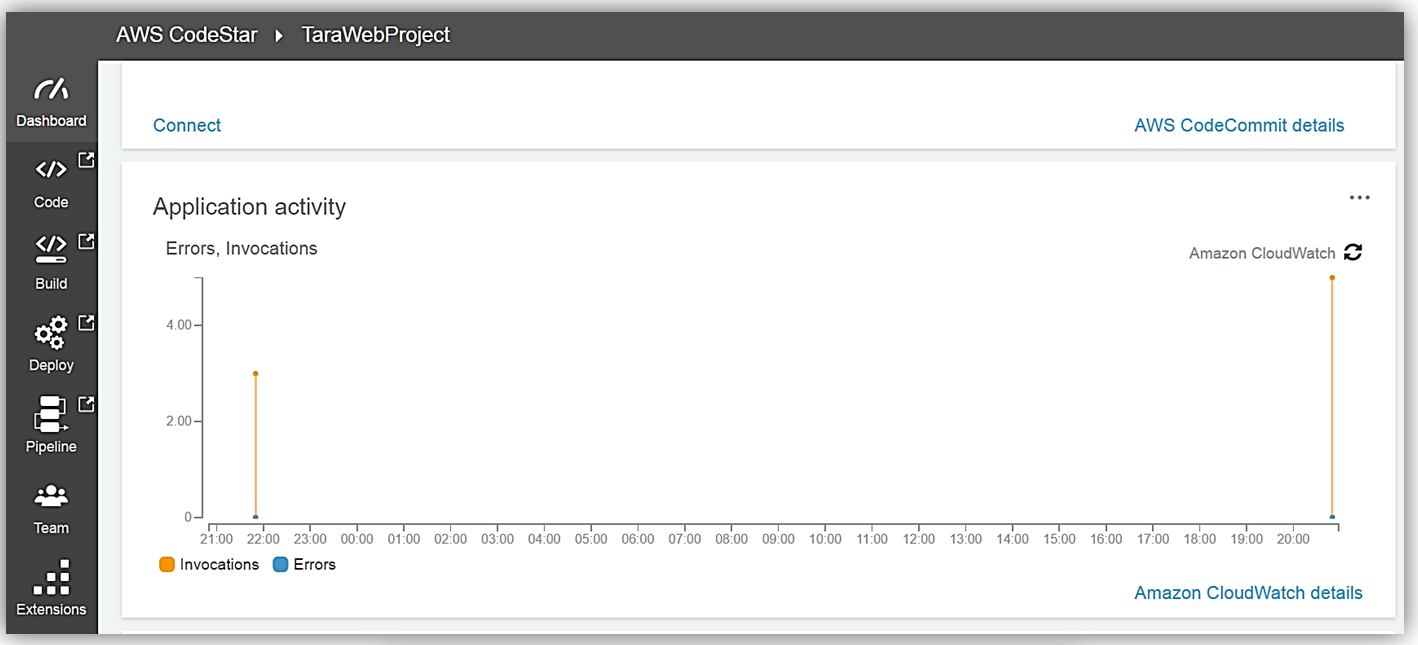
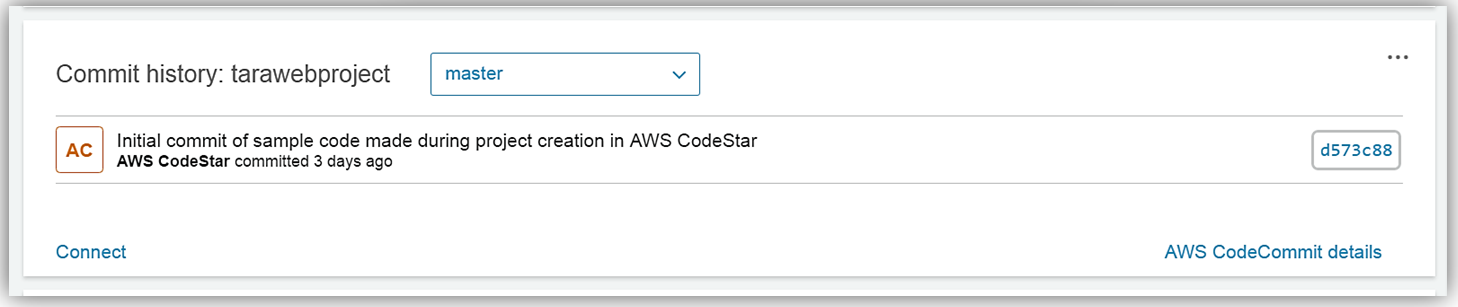
Another thing that I really enjoy about using the AWS CodeStar service is I can monitor all of my project activity right from my TaraWebProject dashboard. I can see the application activity, any recent code commits, and track the status of any project actions, such as the results of my build, any code changes, and the deployments from in one comprehensive dashboard. AWS CodeStar ties the dashboard into Amazon CloudWatch with the Application activity section, provides data about the build and deployment status in the Continuous Deployment section with AWS CodePipeline, and shows the latest Git code commit with AWS CodeCommit in the Commit history section.

Summary
In my journey of the AWS CodeStar service, I created a serverless web application that provisioned my entire development toolchain for coding, building, testing, and deployment for my TaraWebProject software project using AWS services. Amazingly, I have yet to scratch the surface of the benefits of using AWS CodeStar to manage day-to-day software development activities involved in releasing applications.
AWS CodeStar makes it easy for you to quickly develop, build, and deploy applications on AWS. AWS CodeStar provides a unified user interface, enabling you to easily manage your software development activities in one place. AWS CodeStar allows you to choose from various templates to setting up projects using AWS Lambda, Amazon EC2, or AWS Elastic Beanstalk. It comes pre-configured with a project management dashboard, an automated continuous delivery pipeline, and a Git code repository using AWS CodeCommit, AWS CodeBuild, AWS CodePipeline, and AWS CodeDeploy allowing developers to implement modern agile software development best practices. Each AWS CodeStar project gives developers a head start in development by providing working code samples that can be used with popular IDEs that support Git. Additionally, AWS CodeStar provides out of the box integration with Atlassian JIRA Software providing a project management and issue tracking system for your software team directly from the AWS CodeStar console.
You can get started using the AWS CodeStar service for developing new software projects on AWS today. Learn more by reviewing the AWS CodeStar product page and the AWS CodeStar user guide documentation.
– Tara