Category: Amazon GameLift
Launch: Amazon GameLift Now Supports All C++ and C# Game Engines
Calling all Game Developers! GDC 2017 was a blast in San Francisco a couple of weeks ago, so there is no better time to be inspired and passionate about learning and building cool games.
Therefore, I am excited to share that Amazon GameLift is now available for all C++ and C# game engines, including Amazon Lumberyard, Unreal Engine, and Unity, all with enhanced game session matching capabilities. For those of you not familiar with Amazon GameLift, let me introduce this managed service designed to aid game developers in delivering fun and innovative online game experiences.

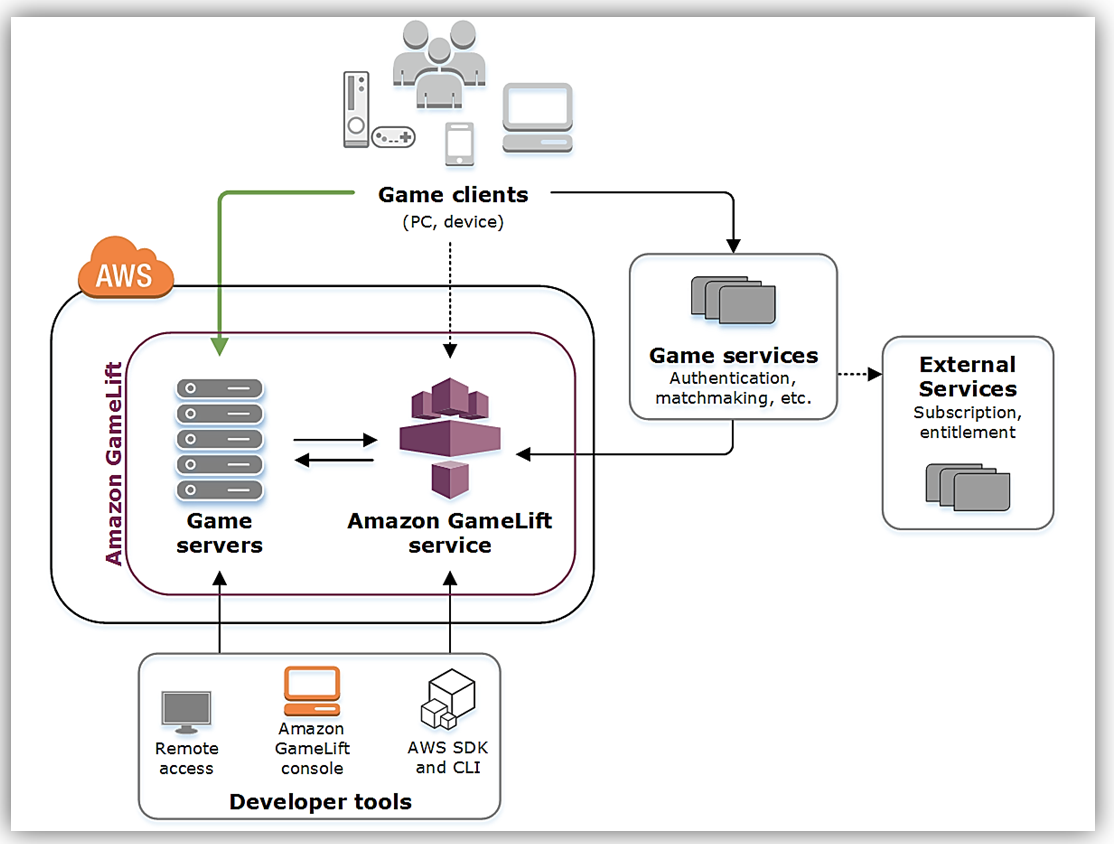
Amazon GameLift is a managed AWS service for hosting dedicated game servers, making it easier for game developers to scale their game capacity and match players into available game sessions. With Amazon GameLift, you can host servers, track game availability, defend game servers from distributed denial of service (DDoS) attacks, and deploy updates without taking your game offline. The Amazon GameLift service powers dedicated game servers for Amazon Game Studios, as well as external game development customers, and is designed to support session-based games with game loops that start and end within a specified time.
The latest Amazon GameLift release enhances the current functionality of the service, as well as adding awesome new features to help simplify game development and deployment for developers. Let us review some of the cool features of the Amazon GameLift service:
- Multi-engine support: Initially, Amazon GameLift service could only be used with the Amazon Lumberyard game engine. The service is now enhanced to integrate with popular game engines like Unreal Engine, Unity, as well as, custom C# and C++ game engines.
- New server SDK language support: In order to support a larger set of customers and developers, the service provides an Amazon GameLift Server SDK available for C# and C++. This includes an Unreal Engine plugin, which is a customized version of the C++ Server SDK that is compatible with the Unreal Engine API for Amazon GameLift.
- Client SDK language support expansion: The Amazon GameLift Client SDK is bundled with the AWS SDK, which is available in a myriad of different languages. This allows game developers to build game clients with an integration of the Amazon GameLift service in their language of choice.
- Matchmaking: Amazon GameLift continually scans available game servers around the world and matches them against player requests to join games. If low-latency game servers are not available, you can configure the service to automatically add more capacity near your players. Amazon GameLift maintains a queue of waiting players until new games start or new instances launch, then places waiting players into the lowest latency game.
- Player data handling: Game developers can now store custom player information and pass it directly to a game server. A game server or other game entity with an API call can then retrieve Player data from Amazon GameLift.
- Console Support: Amazon GameLift supports games developed and architected for Xbox One and PS4.
Amazon GameLift does the heavy lifting of tasks once required to create session-based multiplayer games by simplifying the process of deploying, scaling, and maintaining game servers while reducing the time, cost, and risks associated with building the infrastructure from scratch.
The reference architecture of a gaming solution that utilizes the Amazon GameLift would look as follows:
Integrating Amazon GameLift into Your Games
The process of integrating Amazon GameLift into your game build can be broken down in a few simple steps:
- Prepare your game server for hosting on Amazon GameLift by setting up your game server project with the Amazon GameLift Server SDK and adding communication code to the project.
- Package and upload your game server build to the AWS region targeted for game deployment
- Create and build a fleet of computing resources to host the game.
- Prepare your game client to connect to game sessions maintained by Amazon GameLift using the AWS SDK with Amazon GameLift APIs and add code to game client for calls to Amazon GameLift service and identifying the player region.
- Test your Amazon GameLift integration by connecting an Amazon GameLift-hosted game session and verifying game sessions are being created.
Let’s get started putting these steps into practice by setting up the Amazon GameLift Server SDK in a simple game server project using the Unreal game engine.
Unreal Engine (UE)
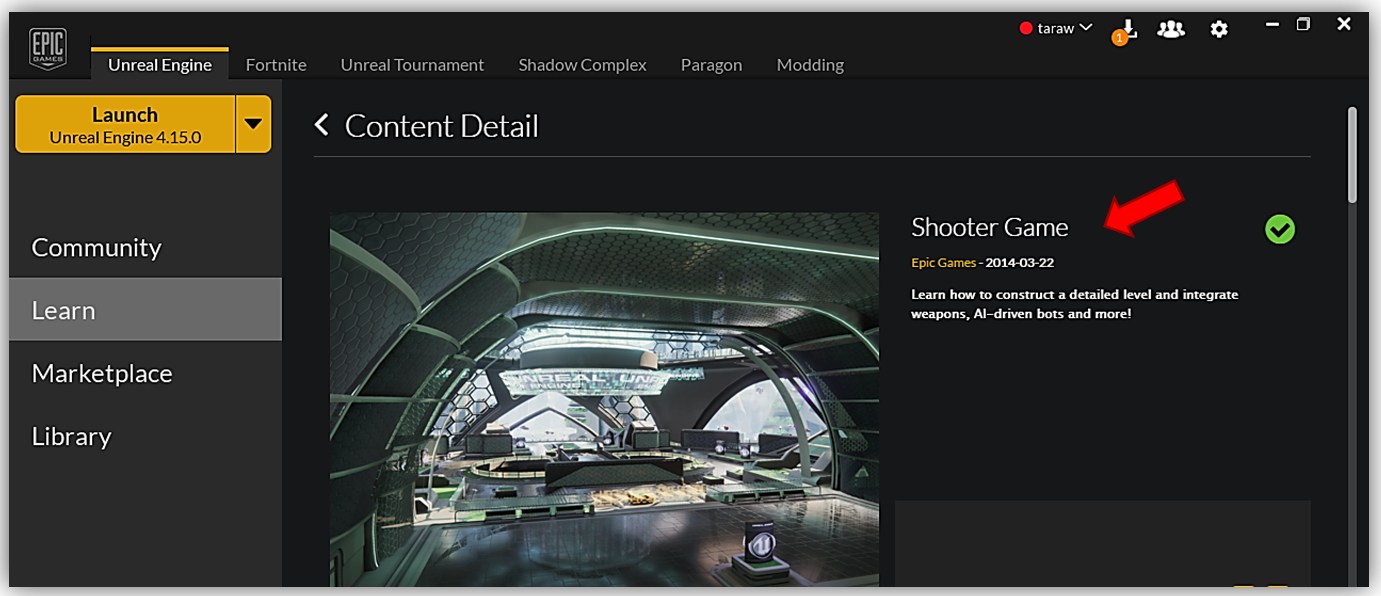
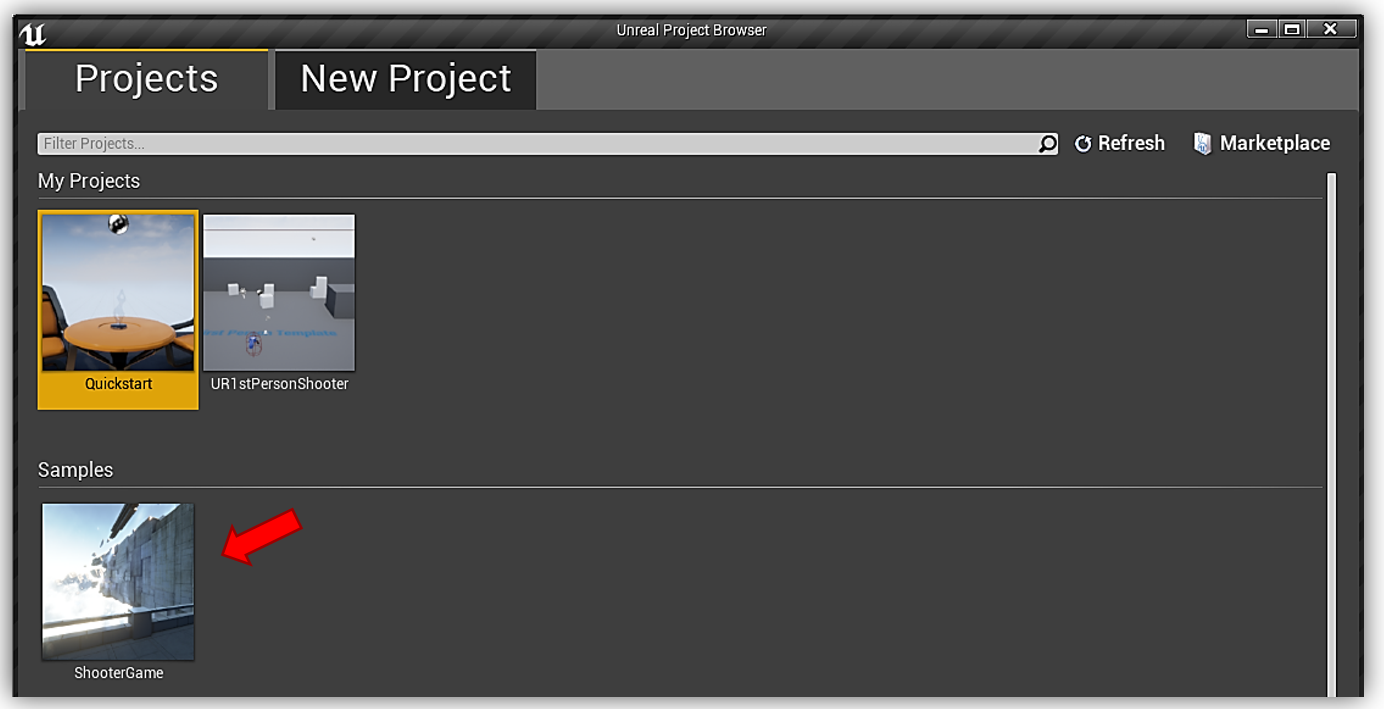
We start with Epic’s Unreal game engine. For simplicity, we will create the sample Shooter Game project with online multiplayer functionality built-in, and save it locally on the computer.
Now that I have the Multiplayer Shooter Game sample downloaded and open locally on my machine, I will need to be able to manipulate the C++ code to add the Amazon GameLift service to the UE Online Sub-System to manage the online game sessions. The Shooter Game sample is leveraging the Blueprints Visual Scripting system in Unreal Engine. The Blueprints system is a gameplay scripting system based on node-based interfaces in the UE editor, which enables game designers and content creators to create gameplay elements and functionality within UE editor.
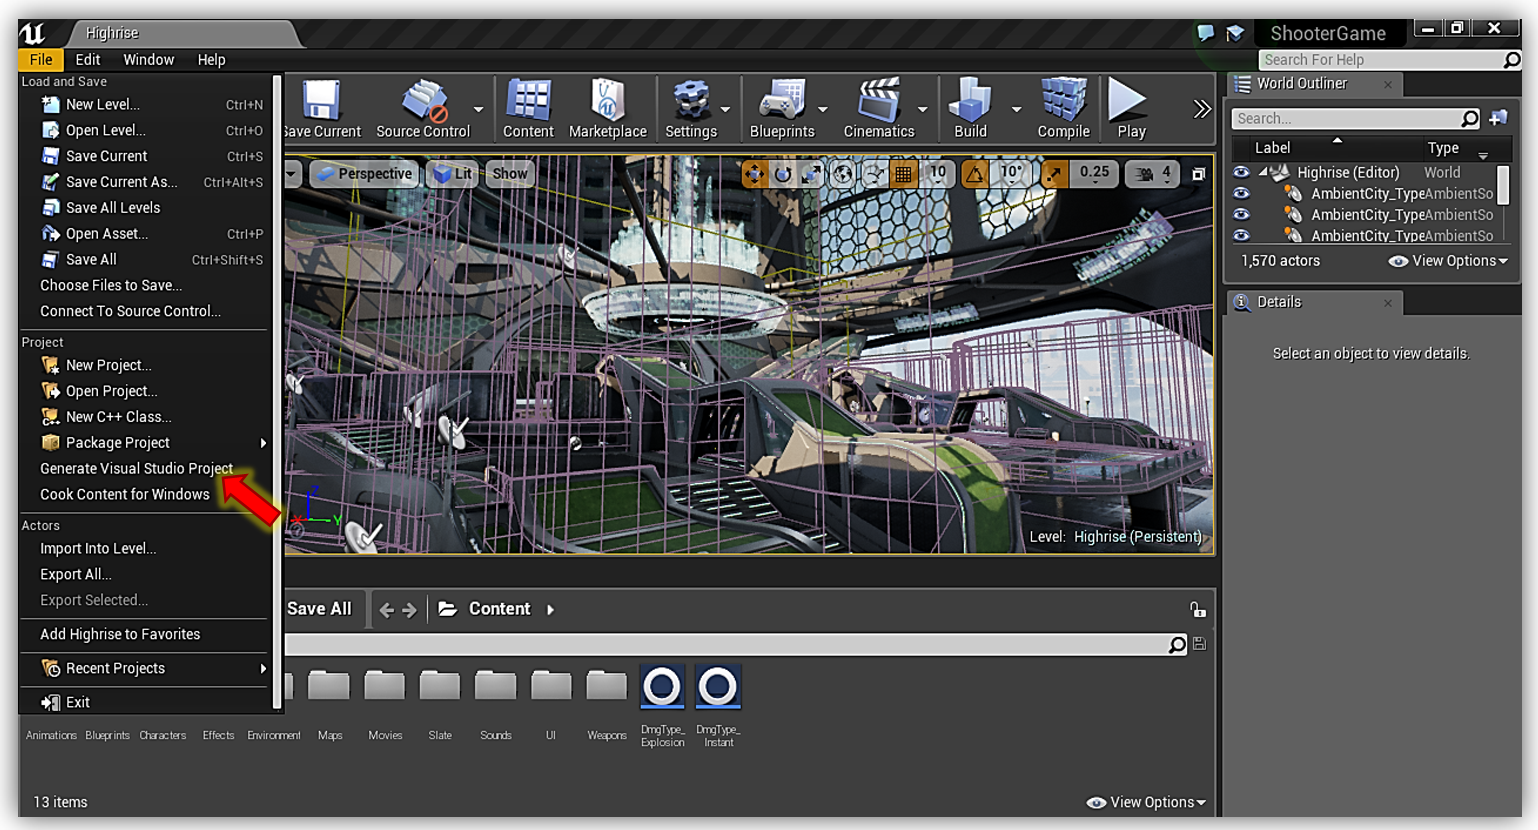
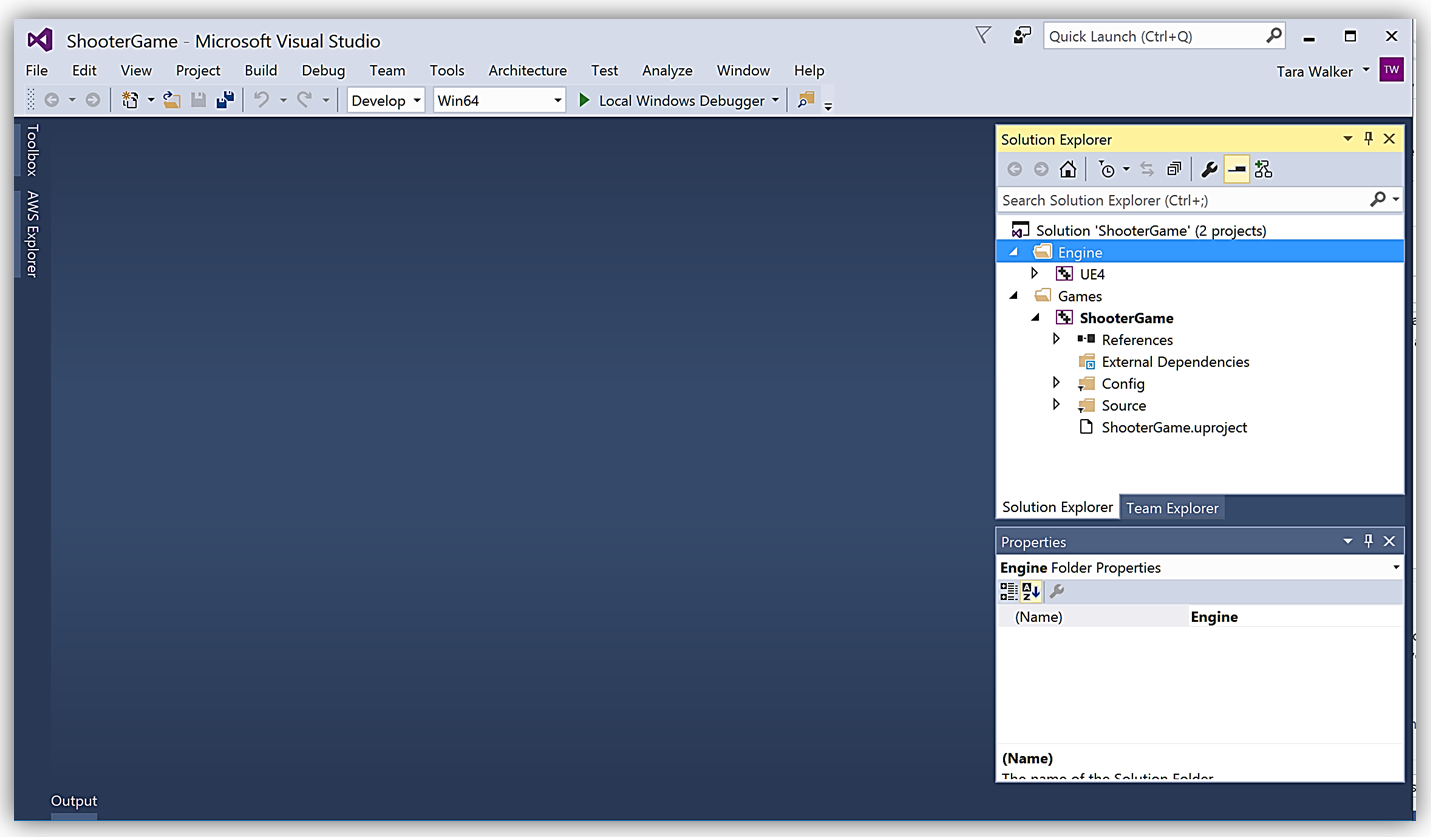
Since it is my goal to use the Amazon GameLift C++ SDK to include the Amazon GameLift service in the game and alter the game code, I will need to create Visual Studio project solution to tie in the game and correlate the source code and any binaries from the Shooter Game to the project. To accomplish this I navigate to the context menu and select the File menu option. In the menu dropdown, I find and select the Generate Visual Studio Project Files option.
Once the project has generated, I only need to return to the Context menu and select File, then Open with Visual Studio in order to open the project and view the source code.
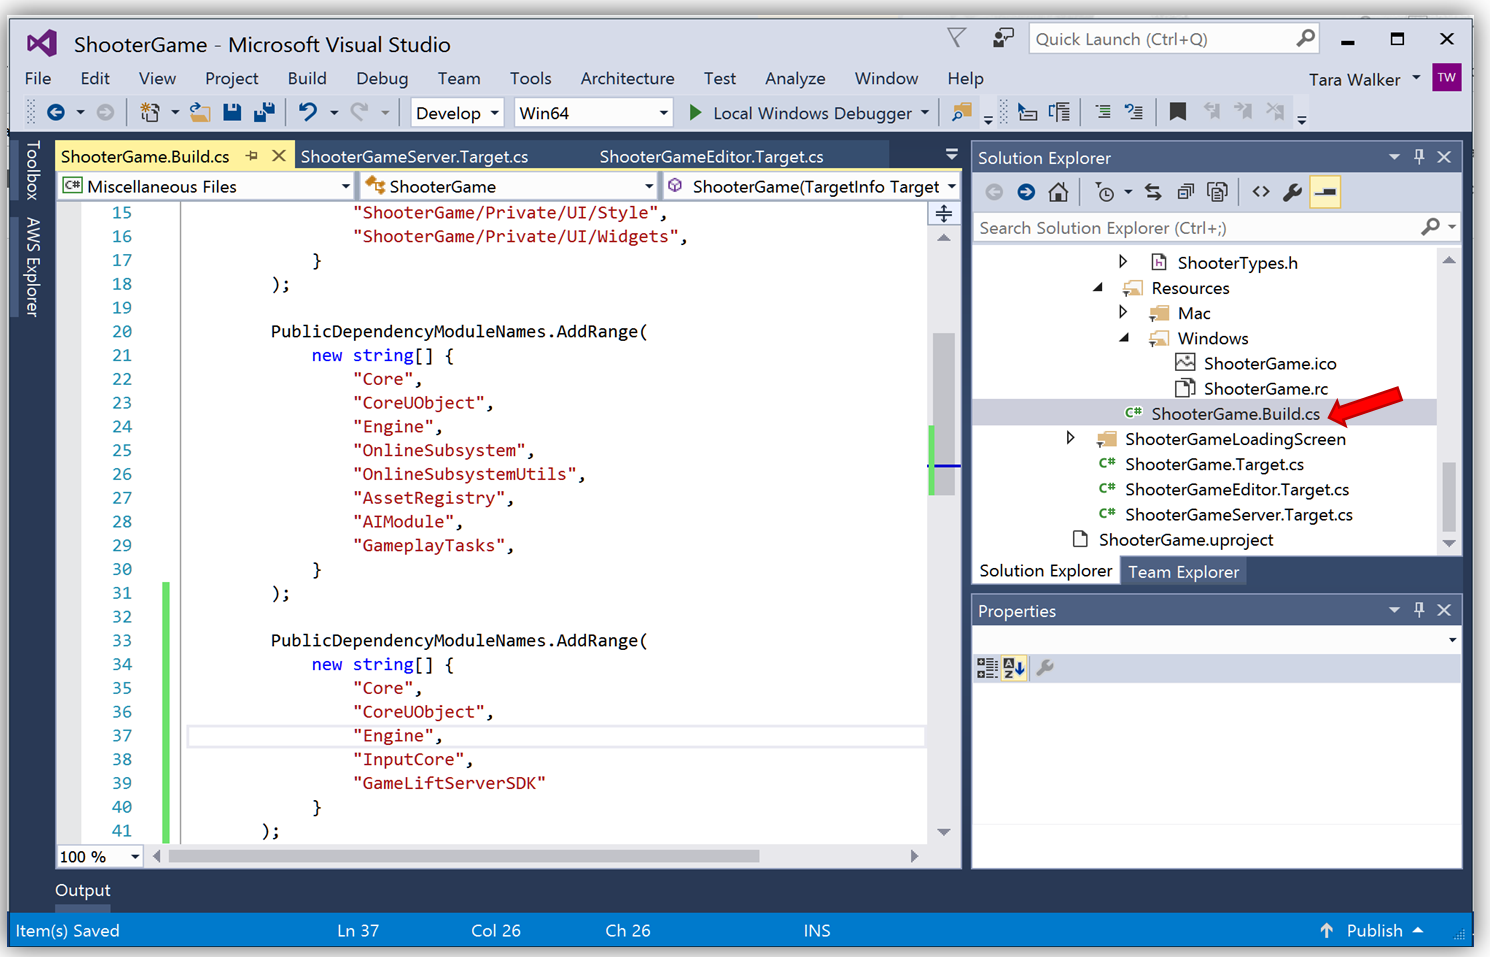
In preparation for adding the Amazon Game Lift service to the Shooter Game as the game service and for game session management, you will need to enable the OnlineSubSystem module in your project. In order to do this, open the game build settings file in the Visual Studio project. Since this game project is named ShooterGame, the build file is named ShooterGame.Build.cs and is located in the Source/ShooterGame folder(s) as shown below.
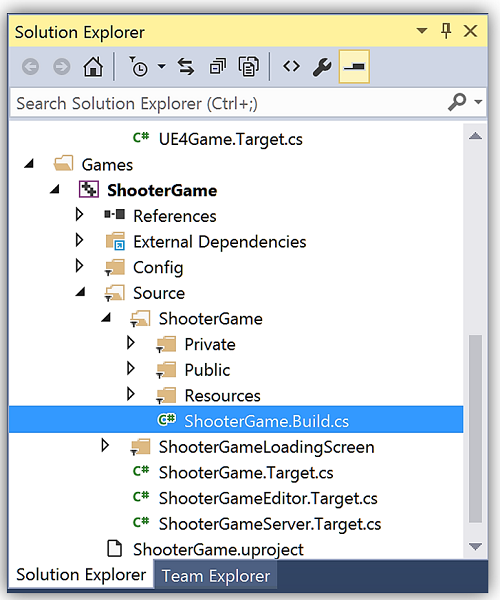
Open your Build files and uncomment the line for the OnlineSubsystemNull module. Since I am using the sample that already utilizes a multiplayer online system, my build options are set appropriately, and the code looks like this:
public class ShooterGame : ModuleRules
{
	public ShooterGame(TargetInfo Target)
	{
		PrivateIncludePaths.AddRange(
			new string[] {
				"ShooterGame/Classes/Player",
				"ShooterGame/Private",
				"ShooterGame/Private/UI",
				"ShooterGame/Private/UI/Menu",
				"ShooterGame/Private/UI/Style",
				"ShooterGame/Private/UI/Widgets",
            		}
		);
       PublicDependencyModuleNames.AddRange(
			new string[] {
				"Core",
				"CoreUObject",
				"Engine",
				"OnlineSubsystem",
				"OnlineSubsystemUtils",
				"AssetRegistry",
             			"AIModule",
				"GameplayTasks",
			}
		);
       PrivateDependencyModuleNames.AddRange(
			new string[] {
				"InputCore",
				"Slate",
				"SlateCore",
				"ShooterGameLoadingScreen",
				"Json"
			}
		);
		DynamicallyLoadedModuleNames.AddRange(
			new string[] {
				"OnlineSubsystemNull",
				"NetworkReplayStreaming",
				"NullNetworkReplayStreaming",
				"HttpNetworkReplayStreaming"
			}
		);
		PrivateIncludePathModuleNames.AddRange(
			new string[] {
				"NetworkReplayStreaming"
			}
		);
	}
}
Now that we are set with the Shooter Game project, let’s turn our attention on the Amazon GameLift SDK. I want to leverage the C++ SDK as a plugin for the Unreal Engine, therefore, I need to compile the SDK using the using a compilation directive that builds the binaries for this game engine.
With the SDK source downloaded, I can compile the SDK from the source based upon my operating system. Since I am using a Windows machine for this project, I will complete the following steps:
- Make an out directory to hold the binaries generated from the code compilation:
mkdir out
- Change to the previously created directory:
cd out
- Use CMake to specify a build system generator for VS 2015 Win x64 and set UE compilation flag:
cmake -DBUILD_FOR_UNREAL=1 -G “Visual Studio 14 2015 Win64” <source directory>
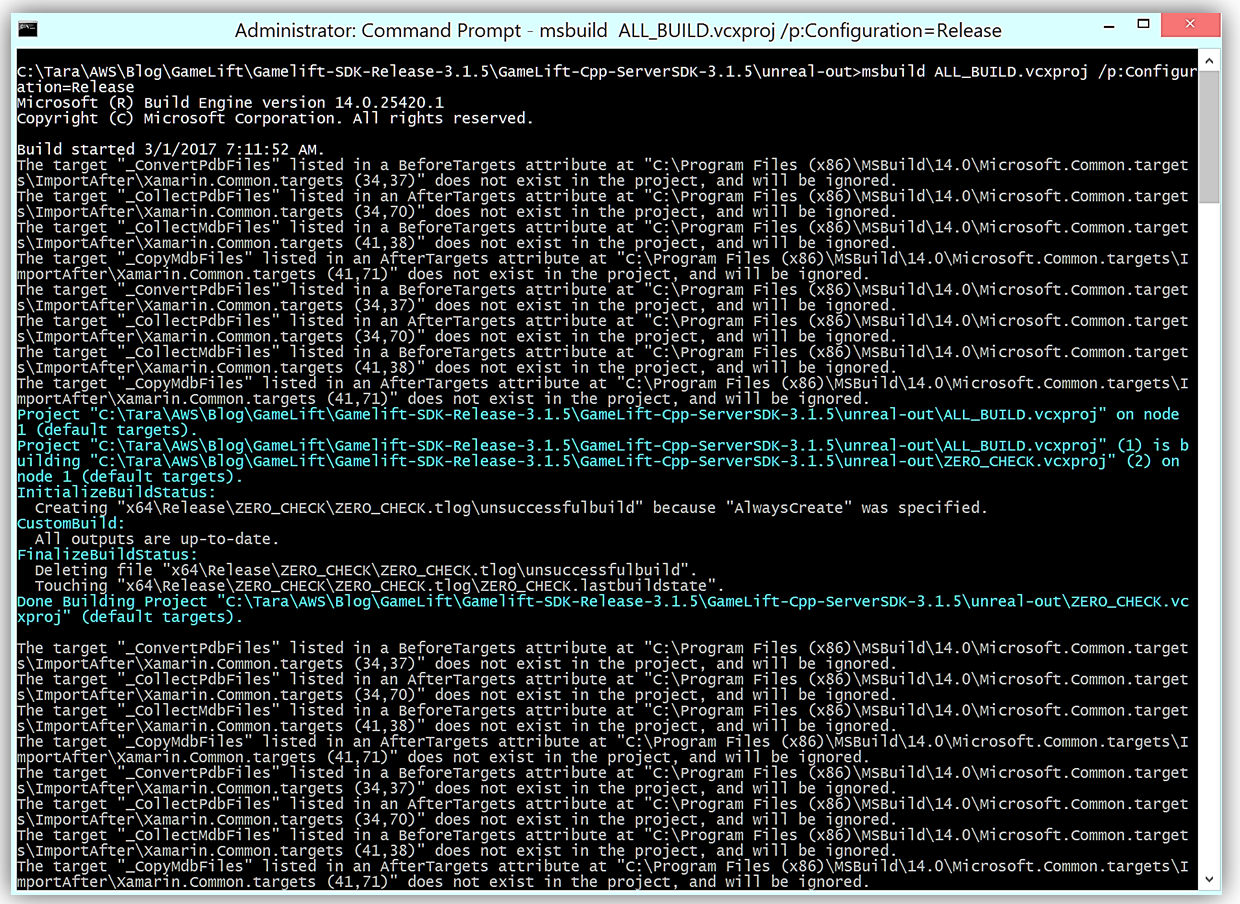
- Build C++ project to create binaries using selected Build System (MS Build for this project):
msbuild ALL_BUILD.vcxproj /p:Configuration=Release
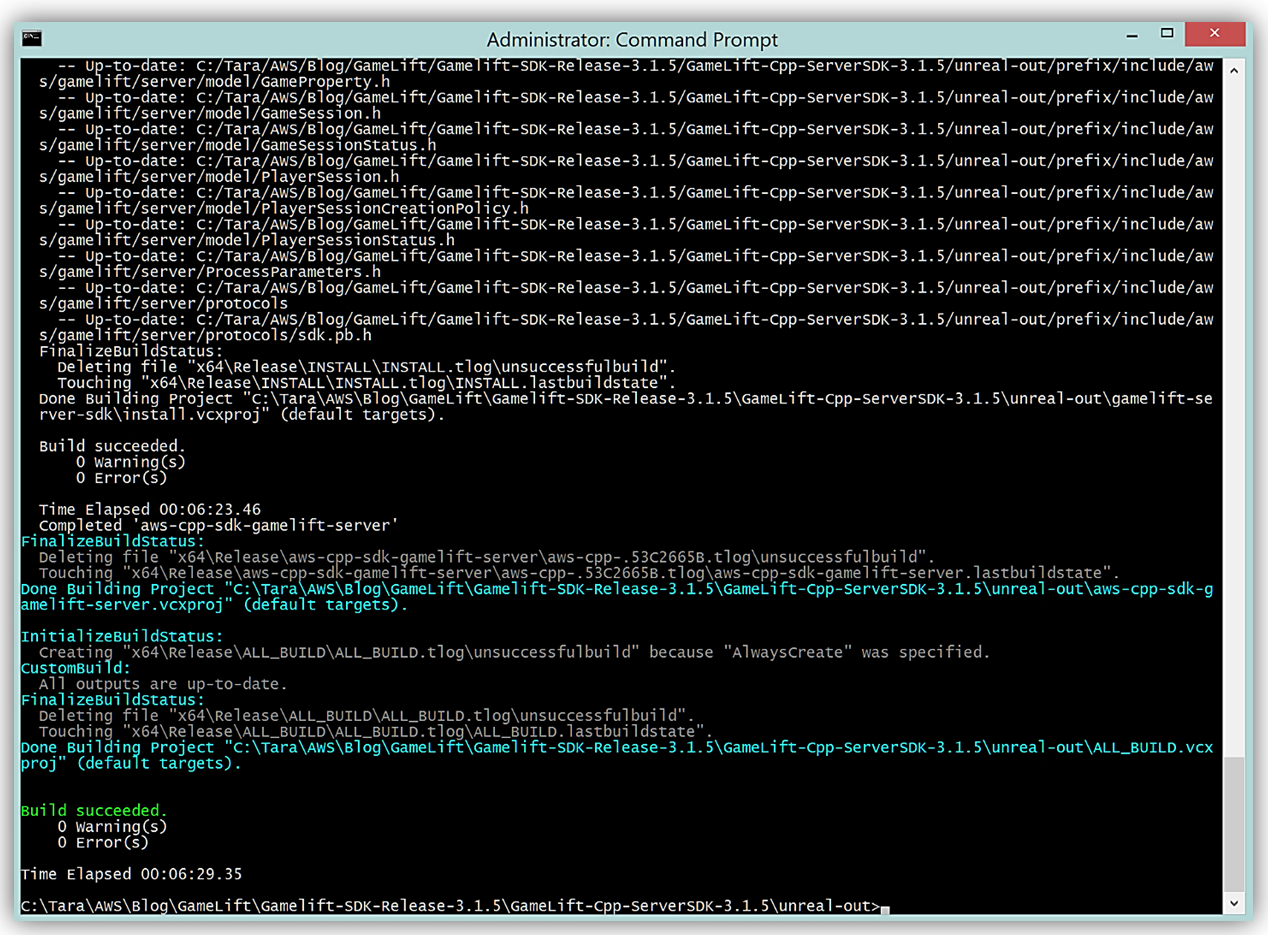
With my libraries compiled, I should have the following binary files required to use the Amazon GameLift Unreal Engine plugin.
Linux:
* out/prefix/lib/aws-cpp-sdk-gamelift-server.so
Windows:
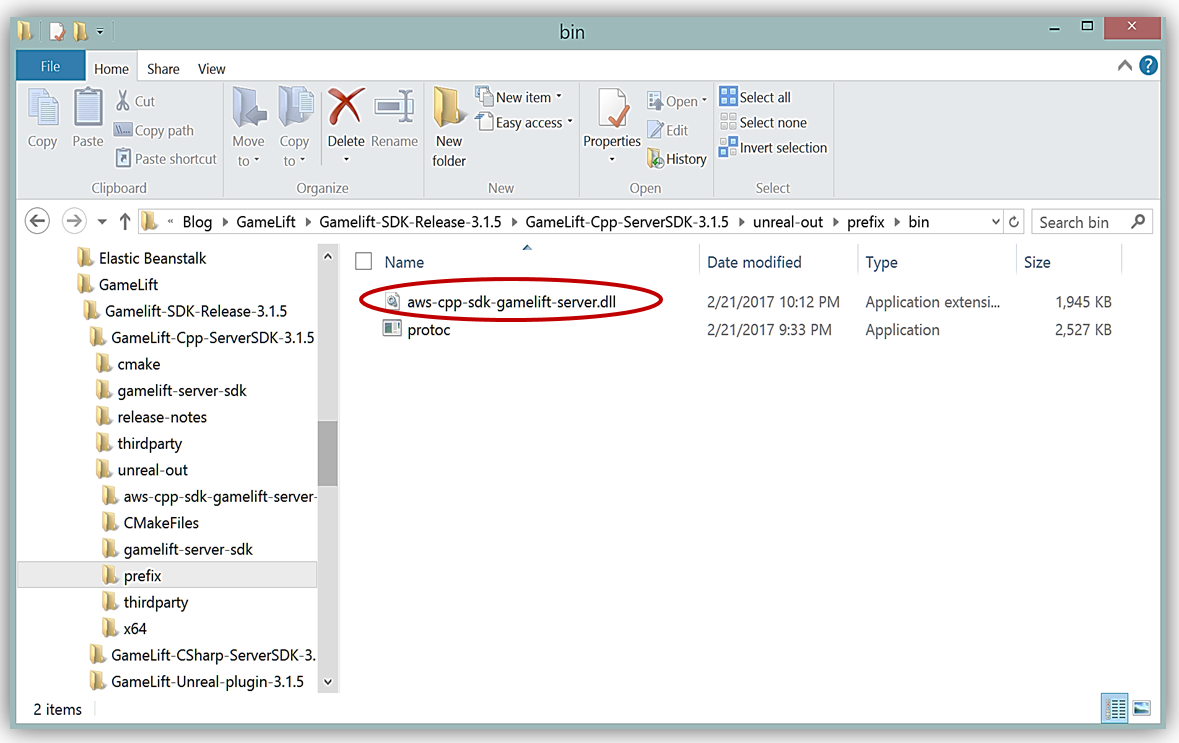
* out\prefix\bin\aws-cpp-sdk-gamelift-server.dll
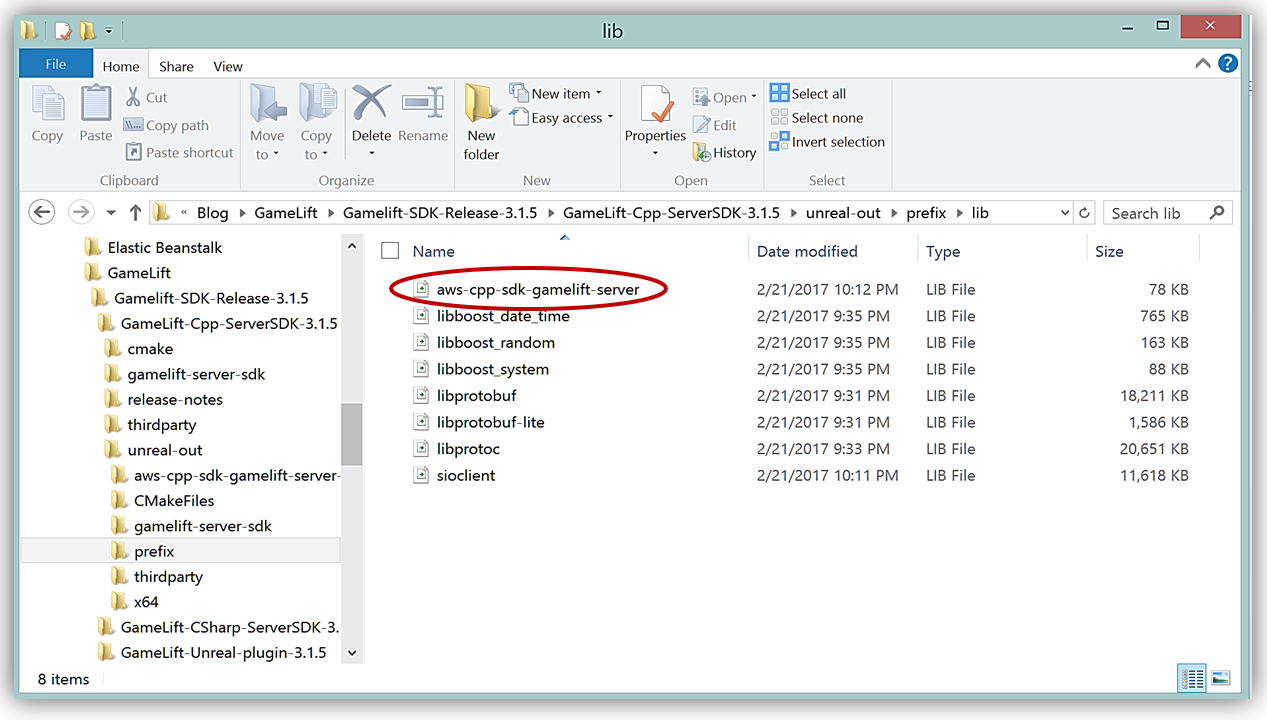
* out\prefix\lib\aws-cpp-sdk-gamelift-server.lib
As you can see below, since I am on Windows, my compiled Amazon GameLift libraries, aws-cpp-sdk-gamelift-server.dll and aws-cpp-sdk-gamelift-server.lib, are located in the prefix\bin and prefix\lib folders respectively.
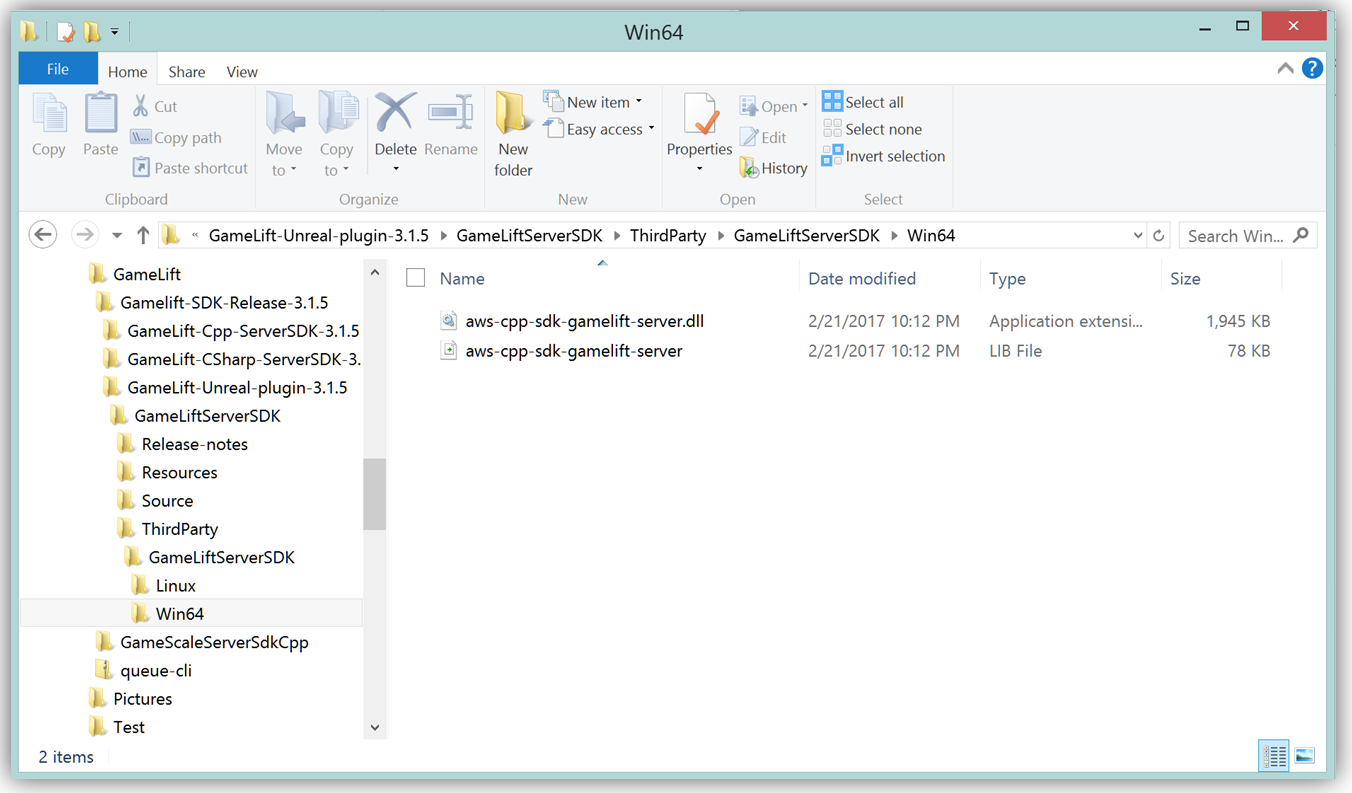
After copying the binaries to the GameLiftSDK Unreal Engine plugin folder, my Amazon GameLift plugin folder is configured and ready to be added to an Unreal Engine game project.
Given this, it is now time to add the Amazon GameLift plugin to the Unreal Engine ShooterGame project. I could use the Unreal Engine Editor to add the plugin, but instead, I will stay in the Visual Studio project and add the plugin by updating the game directory and project file.
In Windows Explorer, I add a folder called Plugins in the ShooterGame directory and copy my prepared GameLiftServerSDK folder into the directory as noted by the Unreal Engine documentation on plugins.
Now I will open up the ShooterGame.Build.cs file, which is a C# file that holds information about game dependencies.
Within the file I will add the following code:
PublicDependencyModuleNames.AddRange(
            new string[] {
                "Core",
                "CoreUObject",
                "Engine",
                "InputCore",
                "GameLiftServerSDK"
            }
       );
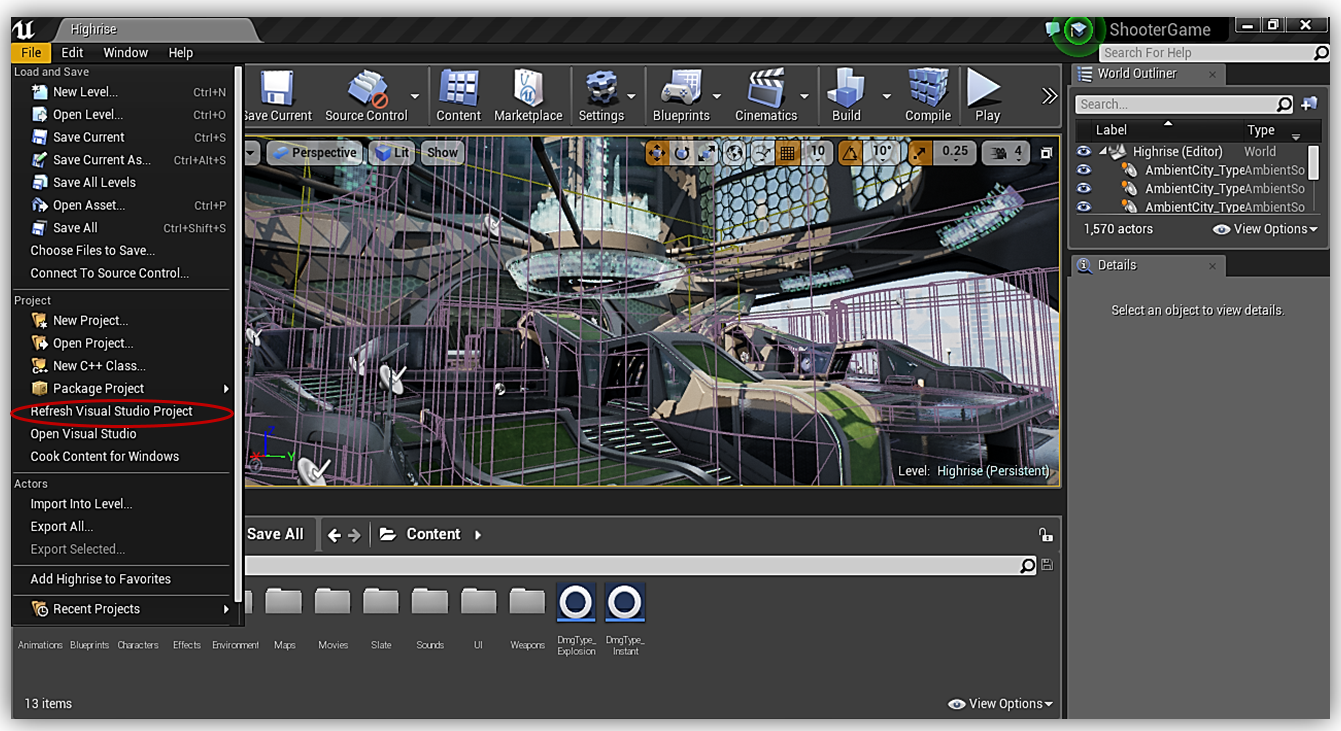
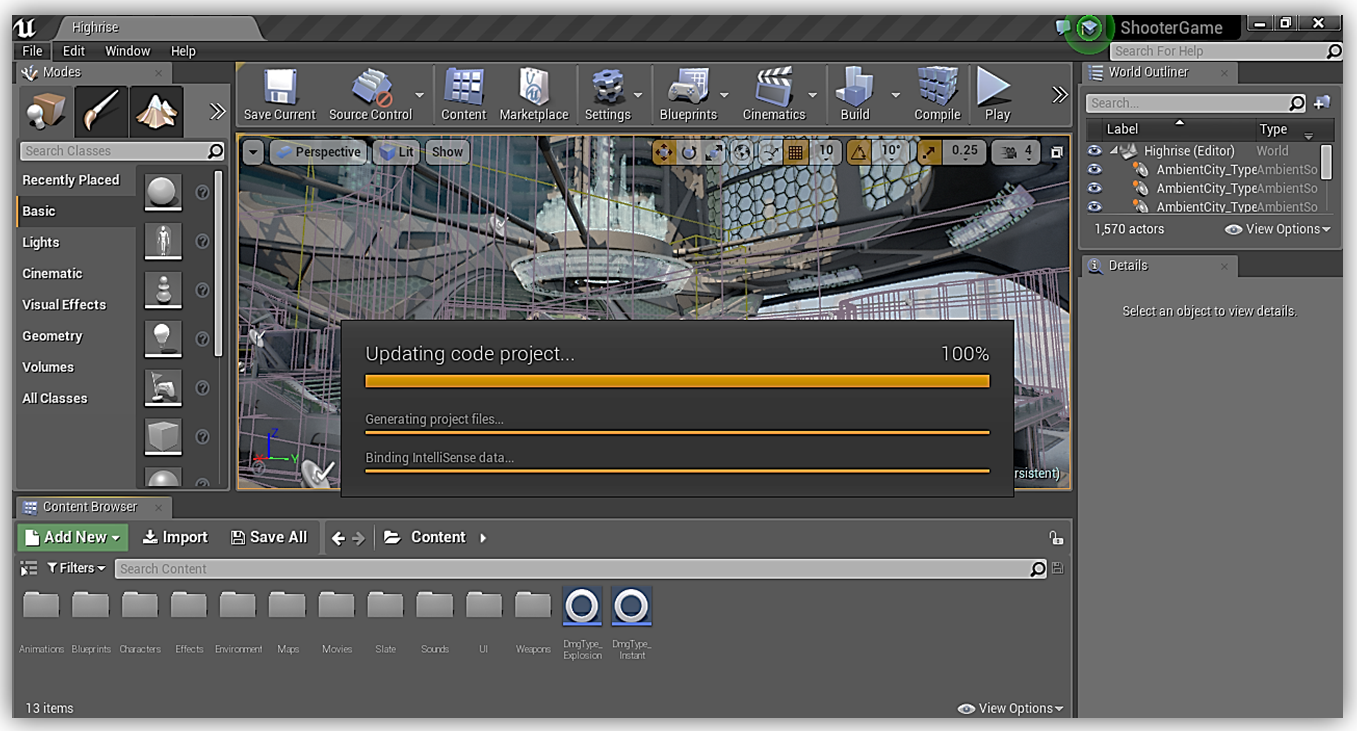
Just to ensure all is in sync with the changes made thus far, I close Visual Studio, go back to the UE Editor, and select Refresh Visual Studio Project.
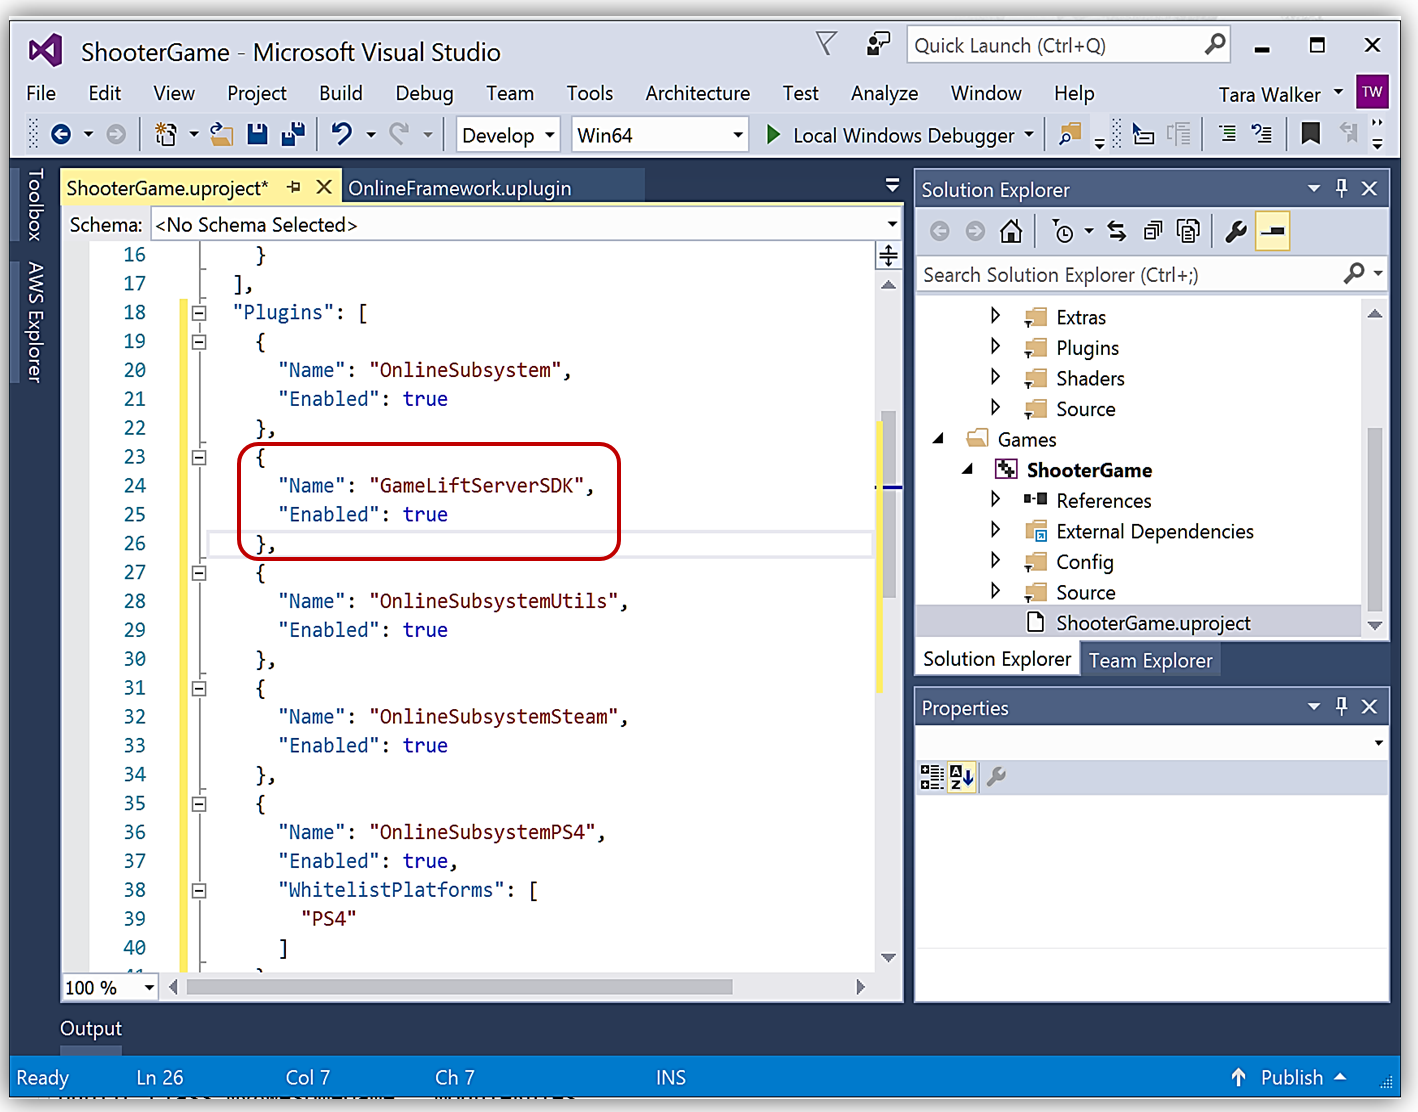
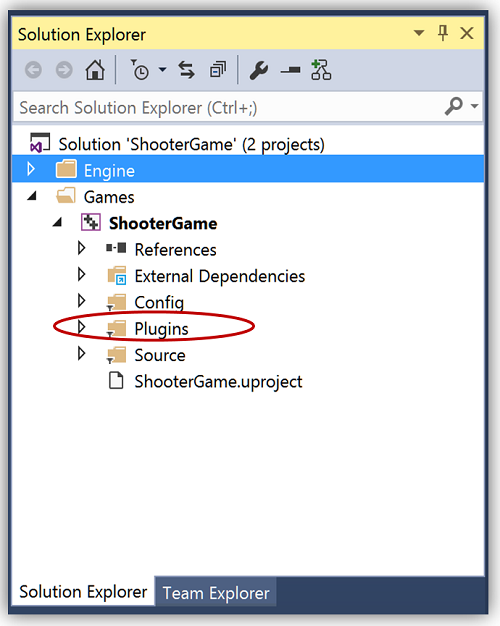
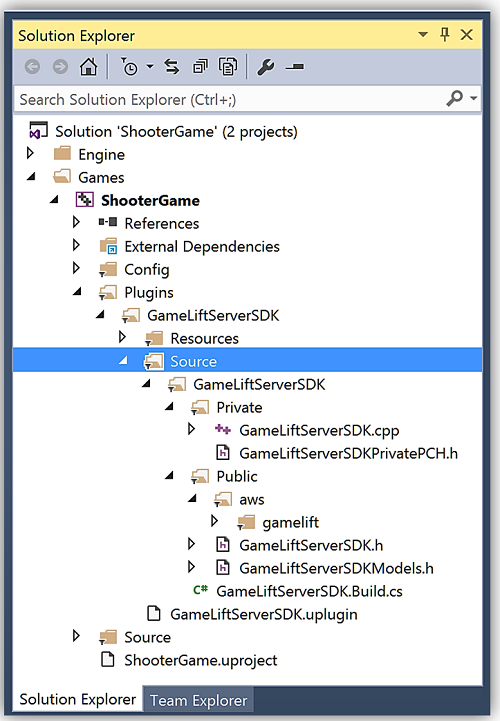
Upon completion, I select Open Visual Studio and the Plugins folder I added in the ShooterGame directory is now included in the project and able to be viewed in Solution Explorer.
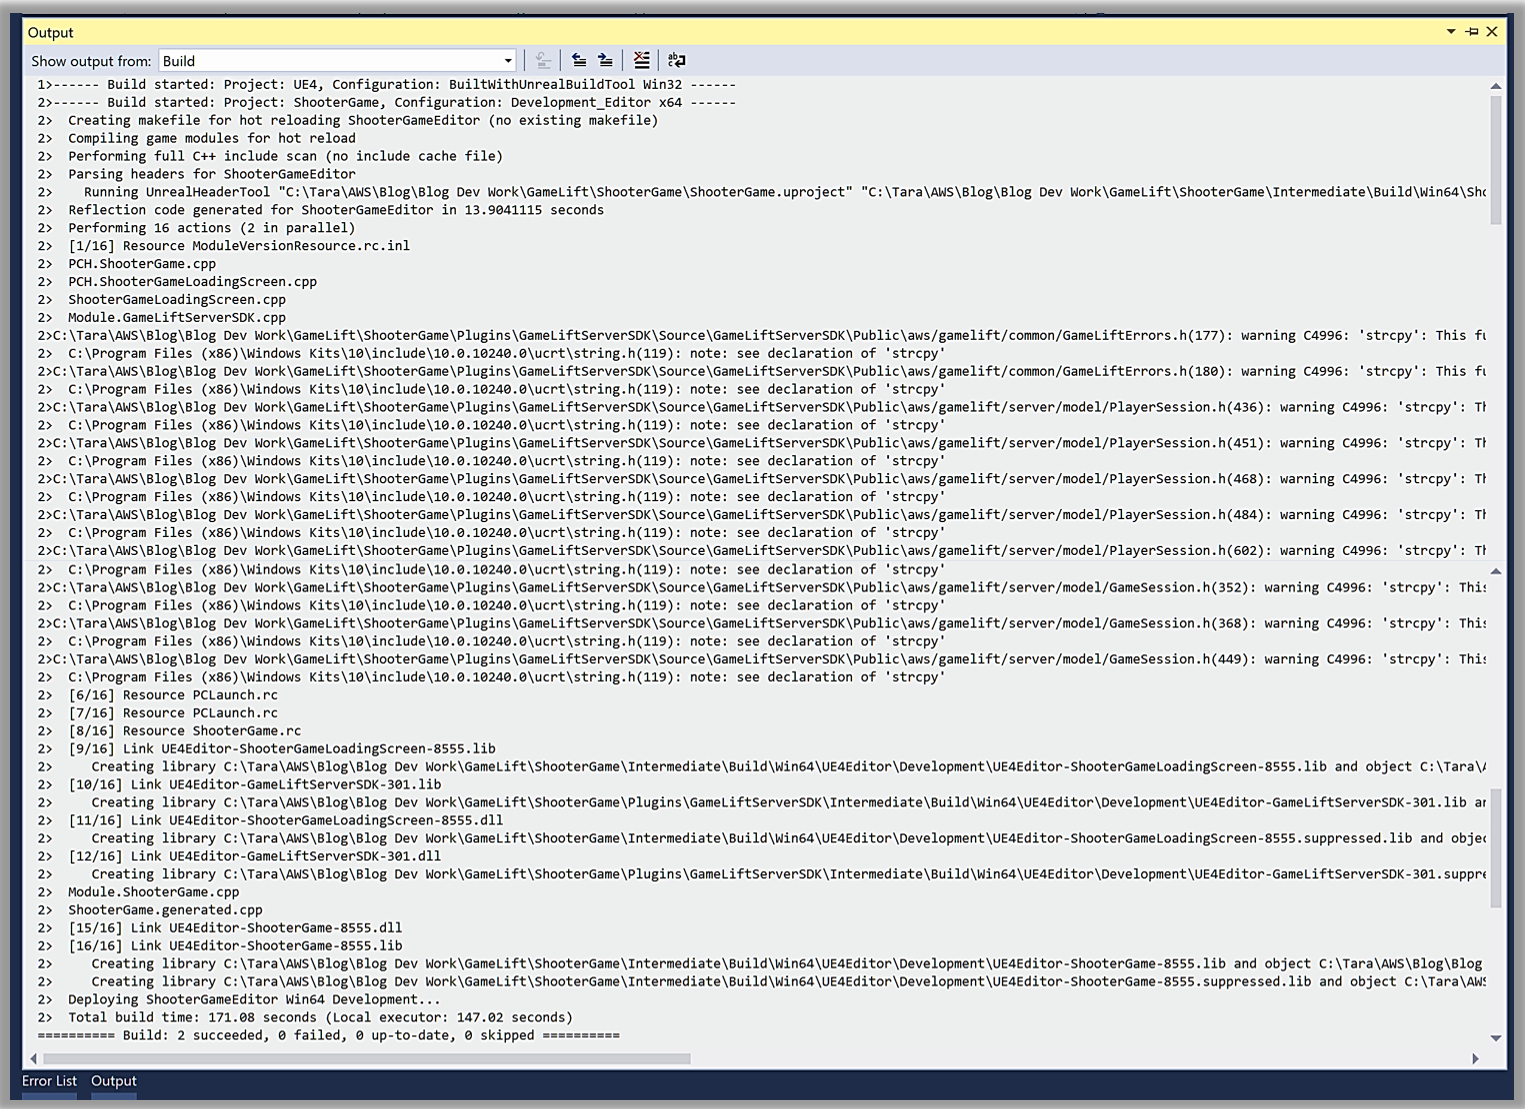
Next, I rebuild my entire solution to get the Amazon GameLift SDK binaries integrated into the project.
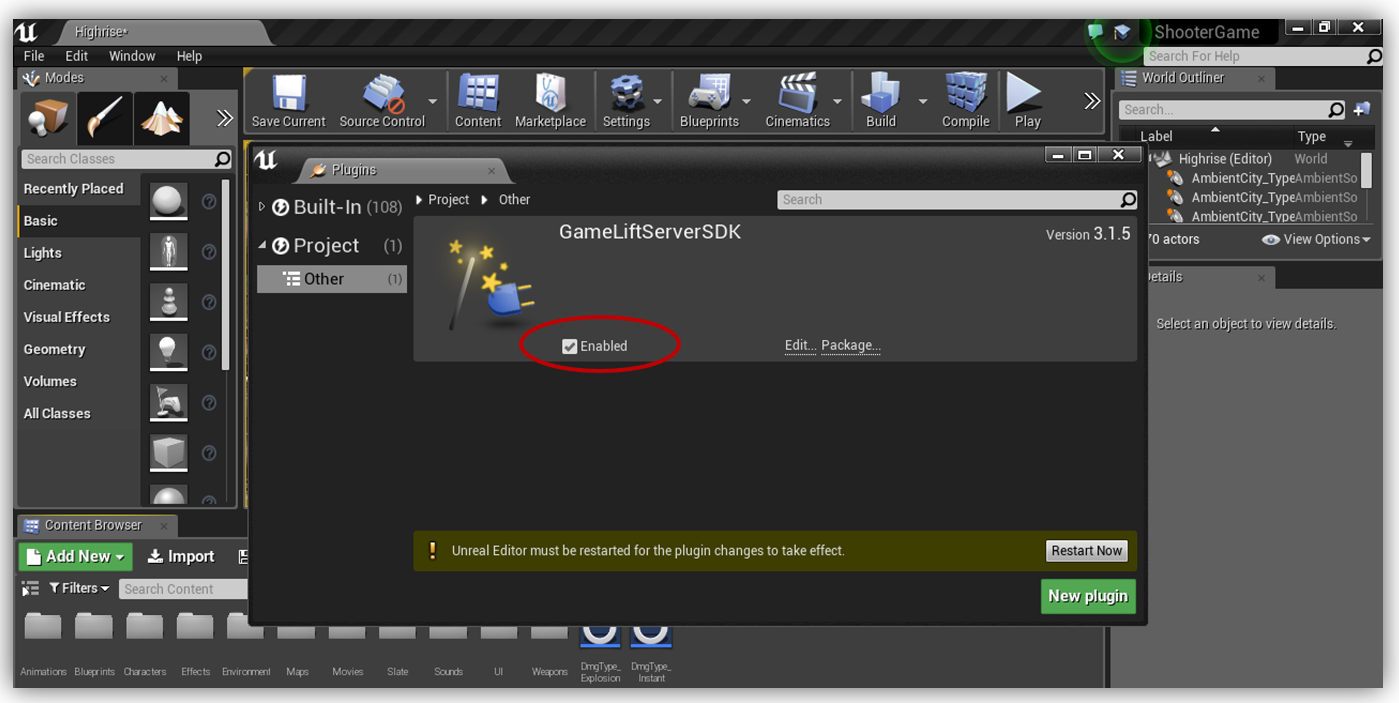
I’ll go back to the UE Editor and select Build from the toolbar to ensure the aspects of the Amazon GameLift plugin are included in my ShooterGame. Once compilation is complete, a quick visit to the Settings toolbar and Plugins option shows that the Amazon GameLift plugin is added and is recognized in the project. I will select the Enabled checkbox, which will prompt me to restart the UE Editor. I select Restart Now and allow the Unreal Engine to rebuild the game code files.
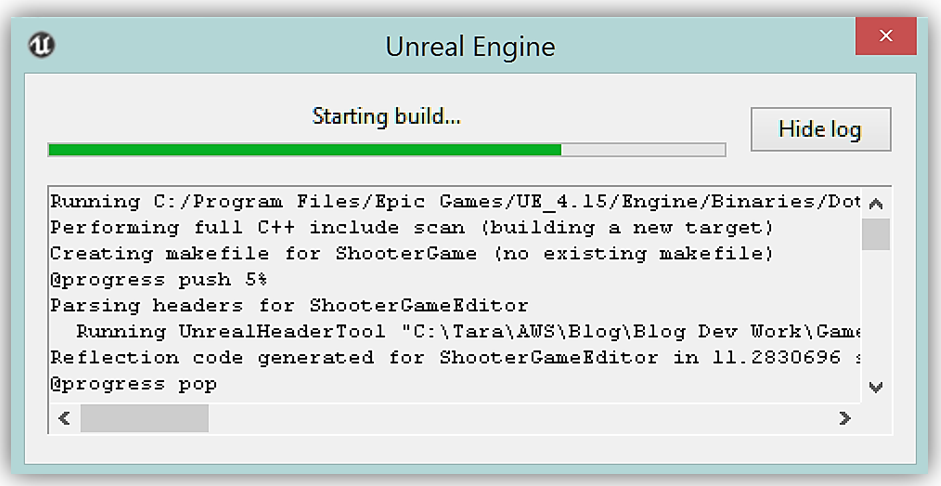
Upon completion of the build, the editor will restart and reopen my ShooterGame.
Now things are set for the use of the Amazon GameLift SDK in the ShooterGame project.
With the Unreal editor open, I’ll go into the Open Visual Studio menu option to get back to the ShooterGame code. This will open up Visual Studio and the game code. With Visual Studio open, I go to the ShooterGameMode.cpp file to add the code to initialize the Amazon GameLift SDK. Some key things I must do in order to correctly add the code for Amazon GameLift within my Shooter game project are:
- Enclose the Amazon GameLift code within a preprocessor condition using the flag WITH_GAMELIFT=1
- Build a dedicated server in Unreal Engine for my targeted server OS ex. Linux
- Ensure my build target is a game server type i.e. Type == TargetRules.TargetType.Server
You can find an example of the code needed to add Amazon GameLift in your Unreal Engine project in the documentation here. In addition, you can learn how to build a dedicated server for Unreal Engine by following the Dedicated Server Guide for Windows and Linux provided in the Unreal Engine wiki. With these resources in hand, you should be well on your way to integrating Amazon GameLift into a game project.
I just did a quick review of incorporating the Amazon GameLift SDK in the Unreal Engine game engine, but don’t forget you have the option to add the Amazon GameLift SDK into C# engines like Unity. By downloading the Amazon GameLift Server SDK and compiling the .Net framework 3.5 solution, GameLiftServerSDKNet35.sln. The GameLiftServerSDKNet35.sln solution will enable you to add the Amazon GameLift libraries your Unity3D project. Review the Amazon GameLift SDK documentation, Using the C# Server SDK for Unity, in order to learn more about setting up and using the Amazon GameLift C# Server SDK plugin.
Summary
We reviewed just one of the new aspects added of the Amazon GameLift managed service, but the service provides game developers and game studios with even more. Amazon GameLift enables the building of distributed games by making it easy to manage infrastructure, scale capacity, and match players into available game sessions while defending games from DDoS attacks.
You can learn more about the Amazon GameLift service by reviewing the Amazon GameLift documentation, the Amazon GameLift developer guide and/or check out the Amazon GameLift tutorials on the Amazon GameDev tutorial page in order to hit the ground running with game development with Amazon GameLift service.
Happy Gaming!
– Tara
Lumberyard + Amazon GameLift + Twitch for Games on AWS
Building world-class games is a very difficult, time-consuming, and expensive process. The audience is incredibly demanding. They want engaging, social play that spans a wide variety of desktop, console, and mobile platforms. Due to the long lead time inherent in the game development and distribution process, the success or failure of the game can often be determined on launch day, when pent-up demand causes hundreds of thousands or even millions of players to sign in and take the game for a spin.
Behind the scenes, the development process must be up to this challenge. Game creators must be part of a team that includes developers with skills in story telling, game design, physics, logic design, sound creation, graphics, visual effects, and animation. If the game is network-based, the team must also include expertise in scaling, online storage, network communication & management, security.
With development and creative work that can take 18 to 36 months, today’s games represent a considerable financial and reputational risk for the studio. Each new game is a make-or-break affair.
New AWS Game Services
Today I would like to tell you about a pair of new AWS products that are designed for use by professional game developers building cloud-connected, cross-platform games. We started with several proven, industry leading engines and developer tools, added a considerable amount of our own code, and integrated the entire package with our Twitch video platform and community, while also mixing in access to relevant AWS messaging, identity, and storage services. Here’s what we are announcing today:
Lumberyard – 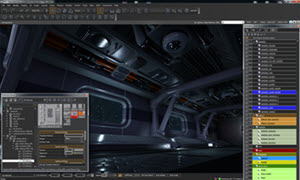 A game engine and development environment designed for professional developers. A blend of new and proven technologies from CryEngine, Double Helix, and AWS, Lumberyard simplifies and streamlines game development. As a game engine, it supports development of cloud-connected and standalone 3D games, with support for asset management, character creation, AI, physics, audio, and more. On the development side, the Lumberyard IDE allows you to design indoor and outdoor environments, starting from a blank canvas. You (I just promoted you to professional game developer) can take advantage of built-in content workflows and an asset pipeline, editing game assets in Photoshop, Maya, or 3ds Max for editing and bringing them in to the IDE afterward. You can program your game in the traditional way using C++ and Visual Studio (including access to the AWS SDK for C++) or you can use our Flow Graph tool and the cool new Cloud Canvas to create cloud-connected gameplay features using visual scripting.
Amazon GameLift –  Many modern games include a server or backend component that must scale in proportion to the number of active sessions. Amazon GameLift will help you to deploy and scale session-based multiplayer game servers for the games that you build using Lumberyard. You simply upload your game server image to AWS and deploy the image into a fleet of EC2 instances that scales up as players connect and play. You don’t need to invest in building, scaling, running, or monitoring your own fleet of servers. Instead, you pay a small fee per daily active user (DAU) and the usual EC2 On-Demand rates for the compute capacity, EBS storage, and bandwidth that your users consume.
Twitch Integration – 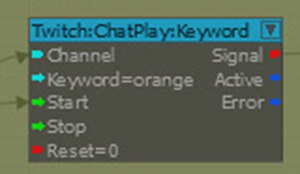 Modern gamers are a very connected bunch. When they are not playing themselves, they like to connect and interact with other players and gaming enthusiasts on Twitch. Professional and amateur players display their talents on Twitch and create large, loyal fan bases. In order to take this trend even further and to foster the establishment of deeper connections and stronger communities, games built with Lumberyard will be able to take advantage of two new Twitch integration features. Twitch ChatPlay allows you to build games that respond to keywords in a Twitch chat stream. For example, the audience can vote to have the player take the most desired course of action. Twitch JoinIn allows a broadcaster to invite a member of the audience into to the game from within the chat channel.
These services, like many other parts of AWS, are designed to allow you to focus on the unique and creative aspects of your game, with an emphasis on rapid turnaround and easy iteration so that you can continue to hone your gameplay until it reaches the desired level of engagement and fun.
Support Services – As the icing on this cake, we are also launching a range of support options including a dedicated Lumberyard forum and a set of tutorials (both text and video). Multiple tiers of paid AWS support are also available.
Developing with Lumberyard
Lumberyard is at the heart of today’s announcement. As I mentioned earlier, it is designed for professional developers and supports development of high-quality, cross-platform games. We are launching with support for the following environments:
- Windows – Vista, Windows 7, 8, and 10.
- Console – PlayStation 4 and Xbox One.
Support for mobile devices and VR headsets is in the works and should be available within a couple of months.
The Lumberyard development environment runs on your Windows PC or laptop. You’ll need a fast, quad-core processor, at least 8 GB of memory, 200 GB of free disk space, and a high-end video card with 2 GB or more of memory and Direct X 11 compatibility. You will also need Visual Studio 2013 Update 4 (or newer) and the Visual C++ Redistributables package for Visual Studio 2013.
The Lumberyard Zip file contains the binaries, templates, assets, and configuration files for the Lumberyard Editor. It also includes binaries and source code for the Lumberyard game engine. You can use the engine as-is, you can dig in to the source code for reference purposes, or you can customize it in order to further differentiate your game. The Zip file also contains the Lumberyard Launcher. This program makes sure that you have properly installed and configured Lumberyard and the third party runtimes, SDKs, tools, and plugins.
The Lumberyard Editor encapsulates the game under development and a suite of tools that you can use to edit the game’s assets.
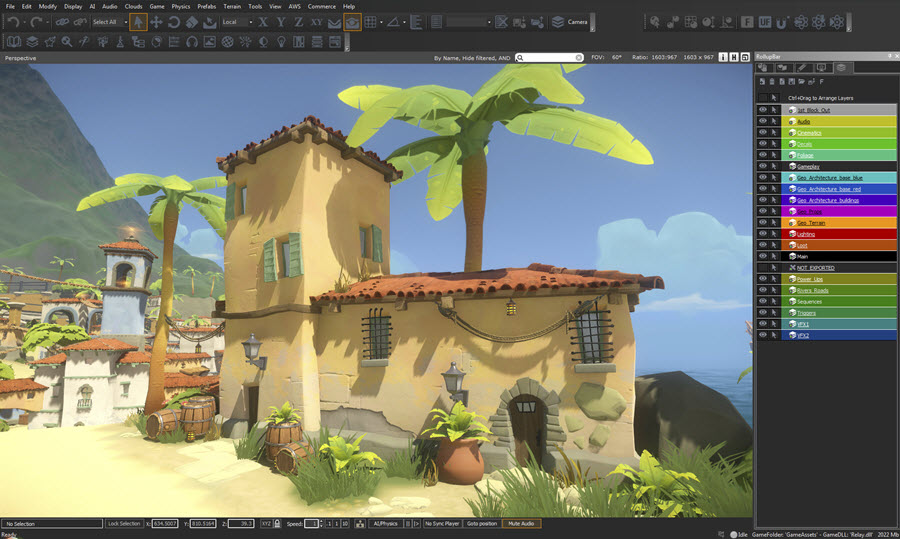
The Lumberyard Editor includes a suite of editing tools (each of which could be the subject of an entire blog post) including an Asset Browser, a Layer Editor, a LOD Generator, a Texture Browser, a Material Editor, Geppetto (character and animation tools), a Mannequin Editor, Flow Graph (visual programming), an AI Debugger, a Track View Editor, an Audio Controls Editor, a Terrain Editor, a Terrain Texture Layers Editor, a Particle Editor, a Time of Day Editor, a Sun Trajectory Tool, a Composition Editor, a Database View, and a UI Editor. All of the editors (and much more) are accessible from one of the toolbars at the top.
In order to allow you to add functionality to your game in a selective, modular form, Lumberyard uses a code packaging system that we call Gems. You simply enable the desired Gems and they’ll be built and included in your finished game binary automatically. Lumberyard includes Gems for AWS access, Boids (for flocking behavior), clouds, game effects, access to GameLift, lightning, physics, rain, snow, tornadoes, user interfaces, multiplayer functions, and a collection of woodlands assets (for detailed, realistic forests).
Coding with Flow Graph and Cloud Canvas
Traditionally, logic for games was built by dedicated developers, often in C++ and with the usual turnaround time for an edit/compile/run cycle. While this option is still open to you if you use Lumberyard, you also have two other options: Lua and Flow Graph.
Flow Graph is a modern and approachable visual scripting system that allows you to implement complex game logic without writing or or modifying any code. You can use an extensive library of pre-built nodes to set up gameplay, control sounds, and manage effects.
Flow graphs are made from nodes and links; a single level can contain multiple graphs and they can all be active at the same time. Nodes represent game entities or actions. Links connect the output of one node to the input of another one. Inputs have a type (Boolean, Float, Int, String, Vector, and so forth). Output ports can be connected to an input port of any type; an automatic type conversion is performed (if possible).
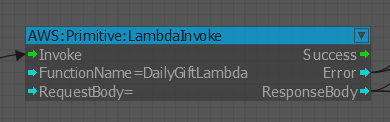
There are over 30 distinct types of nodes, including a set (known as Cloud Canvas) that provide access to various AWS services. These include two nodes that provide access to Amazon Simple Queue Service (SQS), four nodes that provide access to Amazon Simple Notification Service (SNS), seven nodes that provide read/write access to Amazon DynamoDB, one to invoke an AWS Lambda function, and another to manage player credentials using Amazon Cognito. All of the games calls to AWS are made via an AWS Identity and Access Management (IAM) user that you configure in to Cloud Canvas.
Here’s a node that invokes a Lambda function named DailyGiftLambda:
Here is a flow graph that uses Lambda and DynamoDB to implement a “Daily Gift” function:
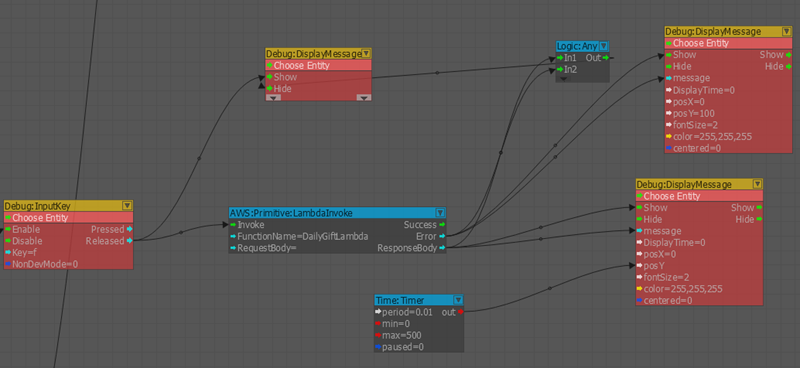
As usual, I have barely scratched the surface here! To learn more, read the Cloud Canvas documentation in the Lumberyard User Guide.
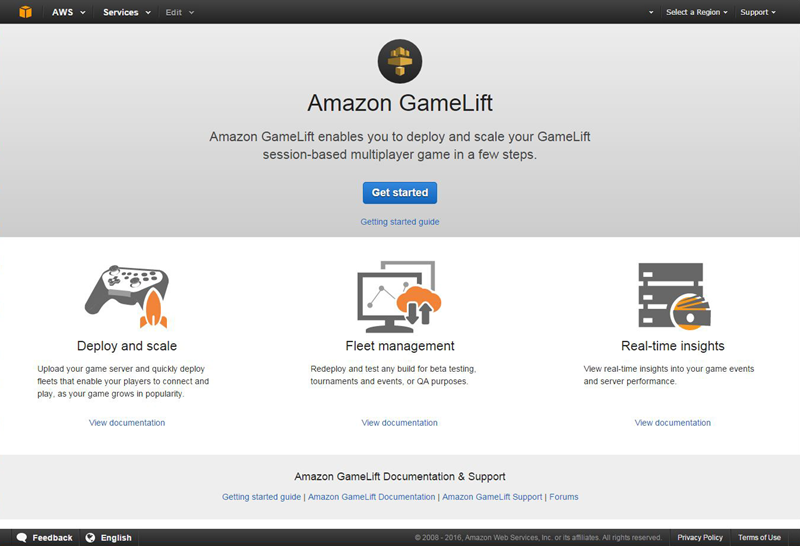
Deploying With Amazon GameLift
If your game needs a scalable, cloud-based runtime environment, you should definitely take a look at Amazon GameLift.
You can use it to host many different types of shared, connected, regularly-synchronized games including first-person shooters, survival & sandbox games, racing games, sports games, and MOBA (multiplayer Online Battlefield Arena) games.
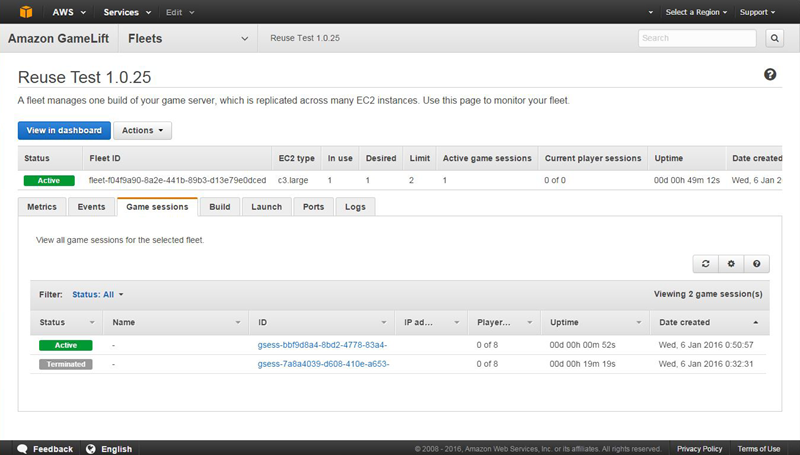
After you build your server-side logic, you simply upload it to Amazon GameLift. It will be converted to a Windows-based AMI (Amazon Machine Image) in a matter of minutes. Once the AMI is ready, you can create an Amazon GameLift fleet (or a new version of an existing one), point it at the AMI, and your backend will be ready to go.
Your fleets, and the game sessions, running on each fleet, are visible in the Amazon GameLift Console:
Your Flow Graph code can use the GameLift Gem to create an Amazon GameLift session and to start the session service.
To learn more, consult the Amazon GameLift documentation.
Twitch Integration
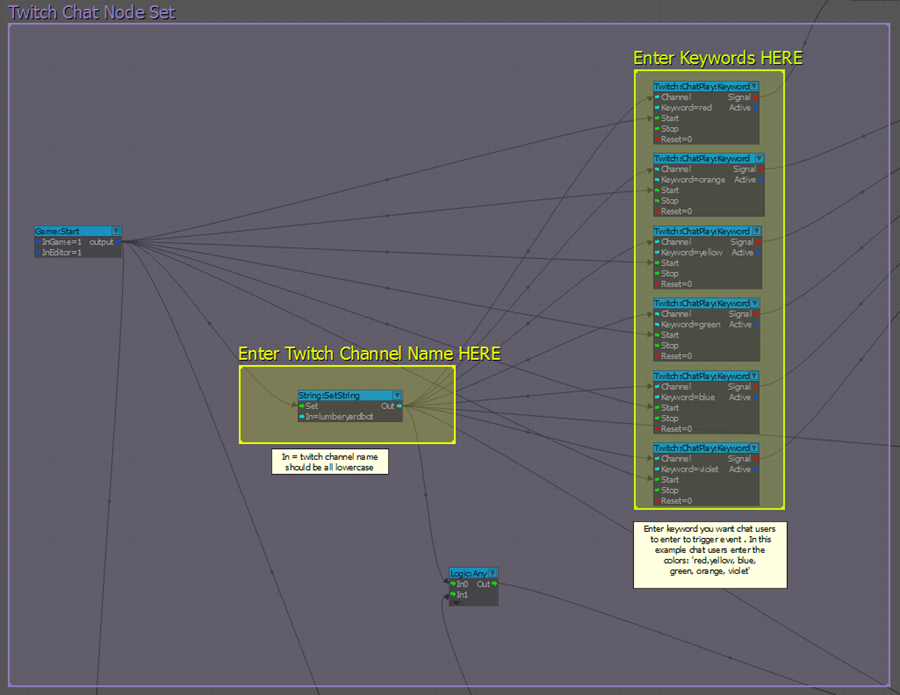
Last but definitely not least, your games can integrate with Twitch via Twitch ChatPlay and Twitch JoinIn.
As I mentioned earlier, you can create games that react to keywords entered in a designated Twitch channel. For example, here’s a Flow Graph that listens for the keywords red, yellow, blue, green, orange, and violet.
Pricing and Availability
Lumberyard and Amazon GameLift are available now and you can start building your games today!
You can build and run connected and standalone games using Lumberyard at no charge. You are responsible for the AWS charges for any calls made to AWS services using the IAM user configured in to Cloud Canvas, or through calls made using the AWS SDK for C++, along with any charges for the use of GameLift.
Amazon GameLift is launching in the US East (Northern Virginia) and US West (Oregon) regions, and will be coming to other AWS regions as well. As part of AWS Free Usage tier, you can run a fleet comprised of one c3.large instance for up to 125 hours per month for a period of one year. After that, you pay the usual On-Demand rates for the EC2 instances that you use, plus the charge for 50 GB / month of EBS storage per instance, and $1.50 per month for every 1000 daily active users.
— Jeff;