Category: AWS Storage Gateway
File Interface to AWS Storage Gateway
I should probably have a blog category for “catching up from AWS re:Invent!” Last November we made a really important addition to the AWS Storage Gateway that I was too busy to research and write about at the time.
As a reminder, the Storage Gateway is a multi-protocol storage appliance that fits in between your existing applications and the AWS Cloud. Your applications and your client operating systems see the gateway as (depending on the configuration), a file server, a local disk volume, or a virtual tape library (VTL). Behind the scenes, the gateway uses Amazon Simple Storage Service (S3) for cost-effective, durable, and secure storage. Storage Gateway caches data locally and uses bandwidth management to optimize data transfers.
Storage Gateway is delivered as a self-contained virtual appliance that is easy to install, configure, and run (read the Storage Gateway User Guide to learn more). It allows you to take advantage of the scale, durability, and cost benefits of cloud storage from your existing environment. It reduces the process of moving existing files and directories into S3 to a simple drag and drop (or a CLI-based copy).
As is the case with many AWS services, the Storage Gateway has gained many features since we first launched it in 2012 (The AWS Storage Gateway – Integrate Your Existing On-Premises Applications with AWS Cloud Storage). At launch, the Storage Gateway allowed you to create storage volumes and to attach them as iSCSI devices, with options to store either the entire volume or a cache of the most frequently accessed data in the gateway, all backed by S3. Later, we added support for Virtual Tape Libraries (Create a Virtual Tape Library Using the AWS Storage Gateway). Earlier this year we added read-only file shares, user permission squashing, and scanning for added and removed objects.
New File Interface
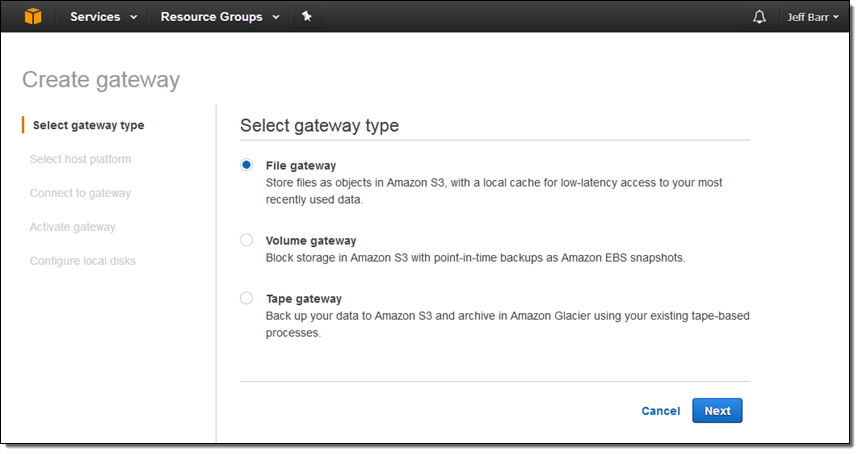
At AWS re:Invent we launched a third option, and that’s what I’d like to tell you about today. You can now use the Storage Gateway as a virtual file server that you can mount on your on-premises servers and desktops. After you set it up in your data center or in the cloud, your configured buckets will be available as NFS mount points. Your application simply reads and writes files and directories over NFS; behind the scenes, the gateway turns these operations into object-level requests on your S3 buckets, where they are accessible natively (one S3 object per file). To create a file gateway, you simply visit the Storage Gateway Console, click on Get started, and choose File gateway:
Then choose your host platform: VMware ESXi or Amazon EC2:
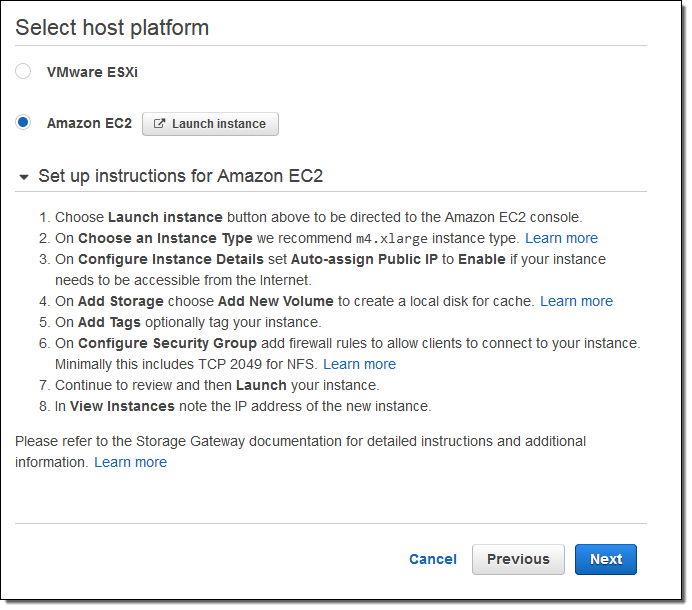
I expect many of our customers to host the Storage Gateway on premises and to use it as a permanent or temporary bridge to the cloud. Use cases for this option include simplified backups, migration, archiving, analytics, storage tiering, and compute-intensive cloud-based processing. Once the data is in the cloud, you can take advantage of many features of S3 including multiple storage tiers (Infrequent Access and Glacier are great for archiving), storage analytics, tagging, and the like.
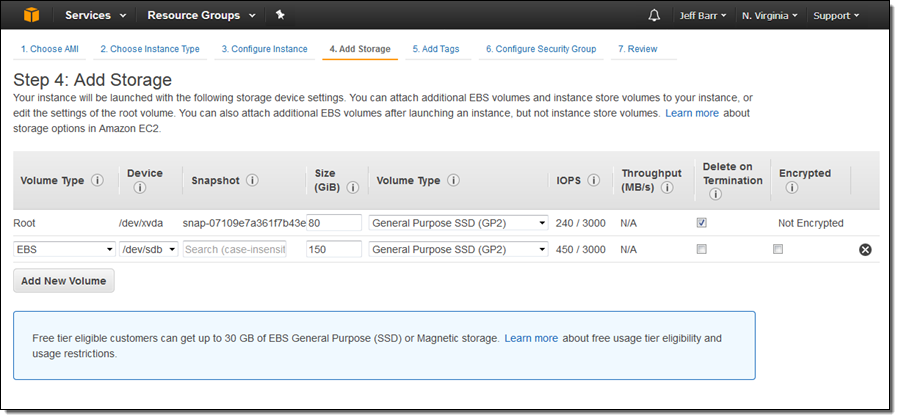
I don’t have much data on-premises so I’m going to run the Storage Gateway on an EC2 instance for this post. I launched the instance and set it up per the instructions on the screen, taking care to create the proper inbound security group rules (port 80 for HTTP access and port 2049 for NFS). I added 150 GiB of General Purpose SSD storage to be used as a cache:
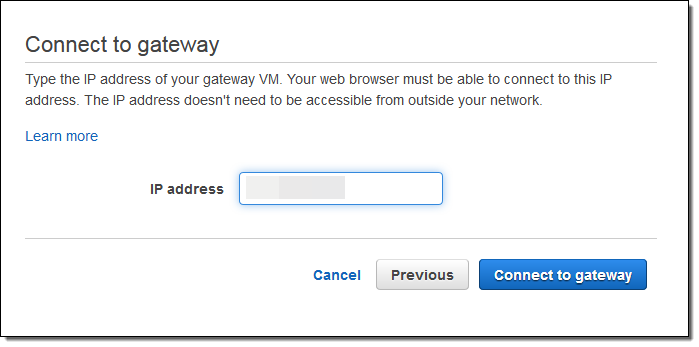
After the instance launched I captured its public IP address and used it to connect to my newly launched gateway:
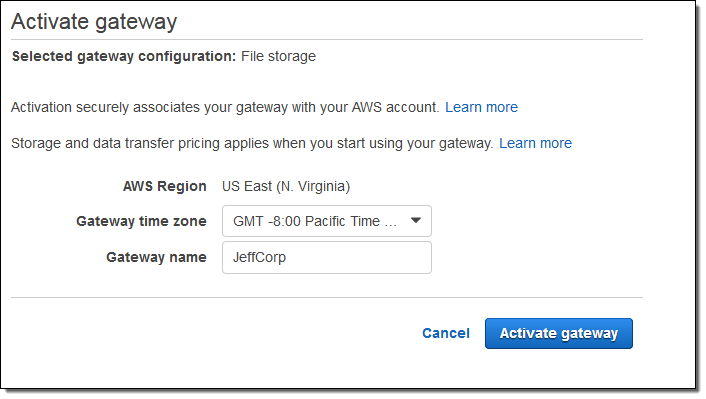
I set the time zone and assigned a name to my gateway and clicked on Activate gateway:
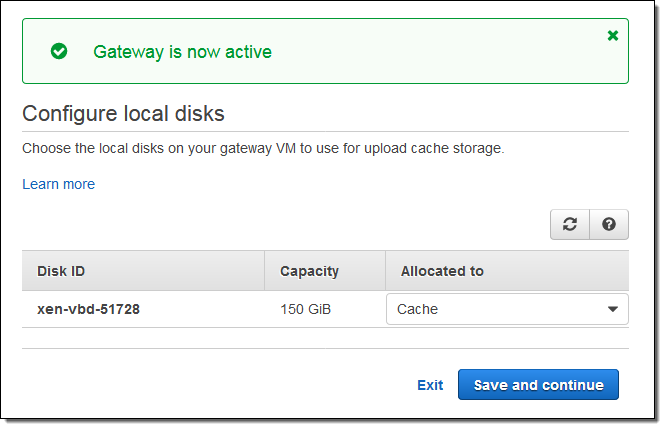
Then I configured the local storage as a cache, and clicked on Save and continue:
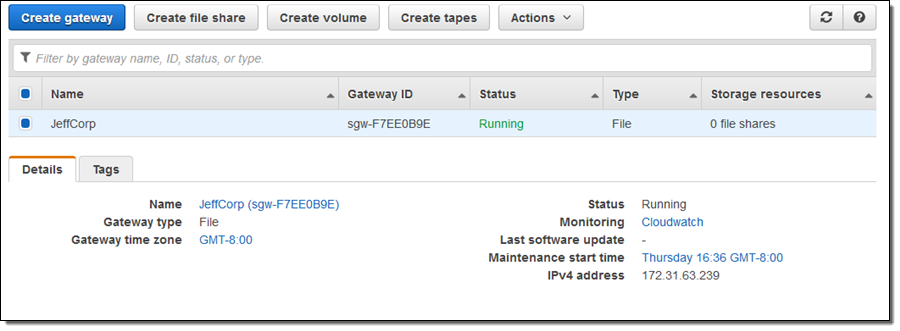
My gateway was up and running, and I could see it in the console:
Next, I clicked on Create file share to create an NFS share and associate it with an S3 bucket:

As you can see, I had the opportunity to choose my storage class (Standard or Standard – Infrequent Access in accord with my needs and my use case). The gateway needs to be able to upload files into my bucket; clicking on Create a new IAM role will create a role and a policy (read Granting Access to an Amazon S3 Destination to learn more).
I review my settings and click on Create file share:
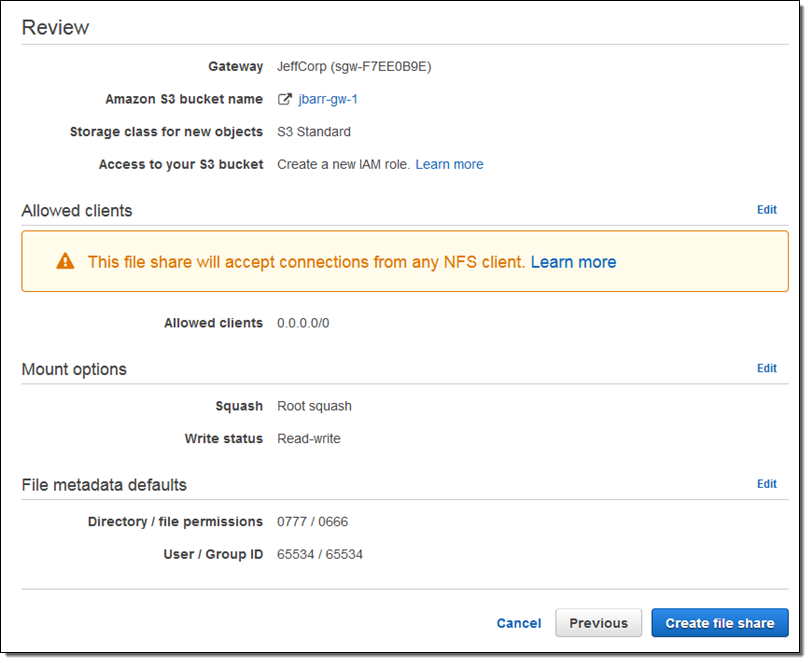
By the way, Root squash is a feature of the AWS Storage Gateway, not a vegetable. When enabled (as it is by default) files that arrive as owned by root (user id 0) are mapped to user id 65534 (traditionally known as nobody). I can also set up default permissions for new files and new directories.
My new share is visible in the console, and available for use within seconds:

The console displays the appropriate mount commands for Linux, Microsoft Windows, and macOS. Those commands use the private IP address of the instance; in many cases you will want to use the public address instead (needless to say, you should exercise extreme care when you create a public NFS share, and maintain close control over the IP addresses that are allowed to connect).
I flipped over to the S3 console and inspected the bucket (jbarr-gw-1), finding it empty, as expected:
![]()
Then I turned to my EC2 instance, mounted the share, and copied some files to it:
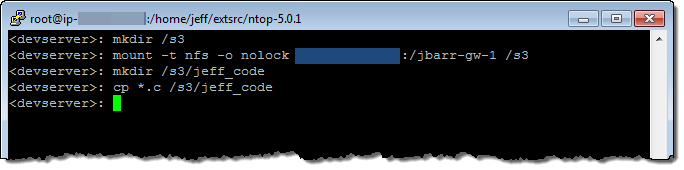
I returned to the console and found a new folder (jeff_code) in my bucket, as expected. I ventured inside and found the files that I had copied to the share:
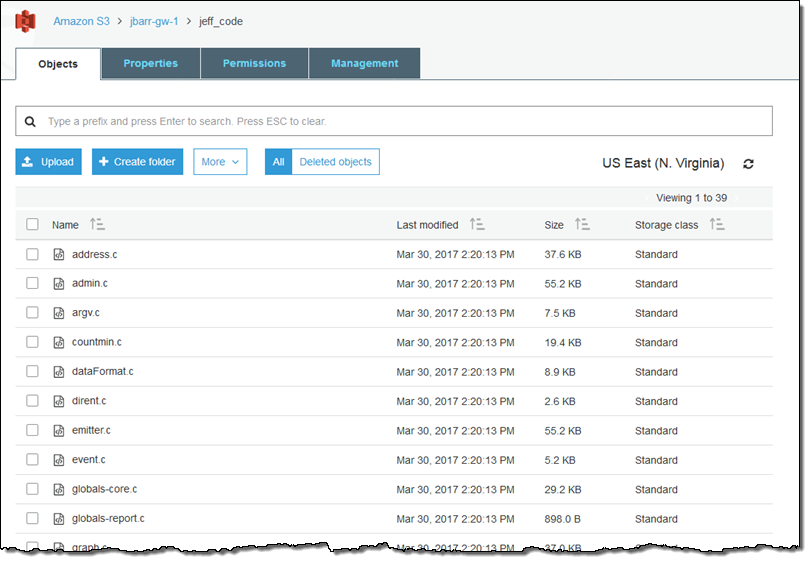
As you can see, my files are copied directly into S3 and are simply regular S3 objects. This means that I can use my existing S3 tools, code, and analytics to process them. For example:
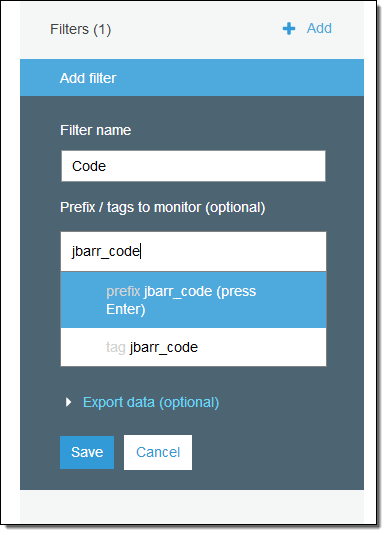
- Analytics – The new S3 metrics and analytics can be used to analyze the entire bucket or any directory tree within it:
- Code – AWS Lambda and Amazon Rekognition can be used to process uploaded images; see Serverless Photo Recognition for some ideas and some code. I could also use Amazon Elasticsearch Service to index some or all of the files or Amazon EMR to process massive amounts of data.
- Tools – I can process the existing objects in the bucket and I can also create new ones using the the S3 APIs. Any code or script that creates or removes should call the RefreshCache function to synchronize the contents of any gateways attached to the bucket (I can create a multi-site data distribution workflow by pointing multiple read-only gateways at the same bucket). I can also make use of existing, file-centric backup tools by using the share as the destination for my backups.
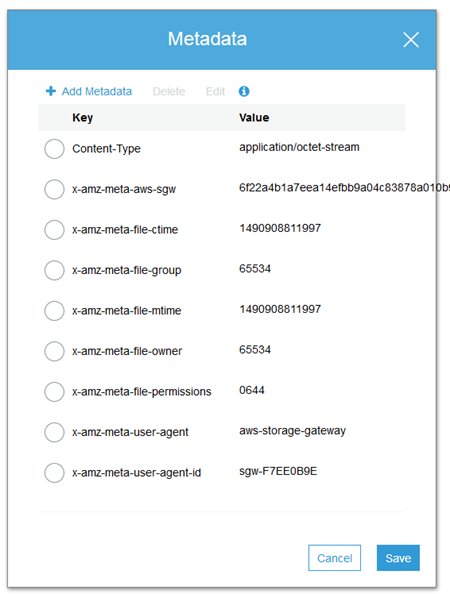
The gateway stores all of the file metadata (owner, group, permissions, and so forth) as S3 metadata:
Storage Gateway Resources
Here are some resources that will help you to learn more about the Storage Gateway:
Presentation – Deep Dive on the AWS Storage Gateway:
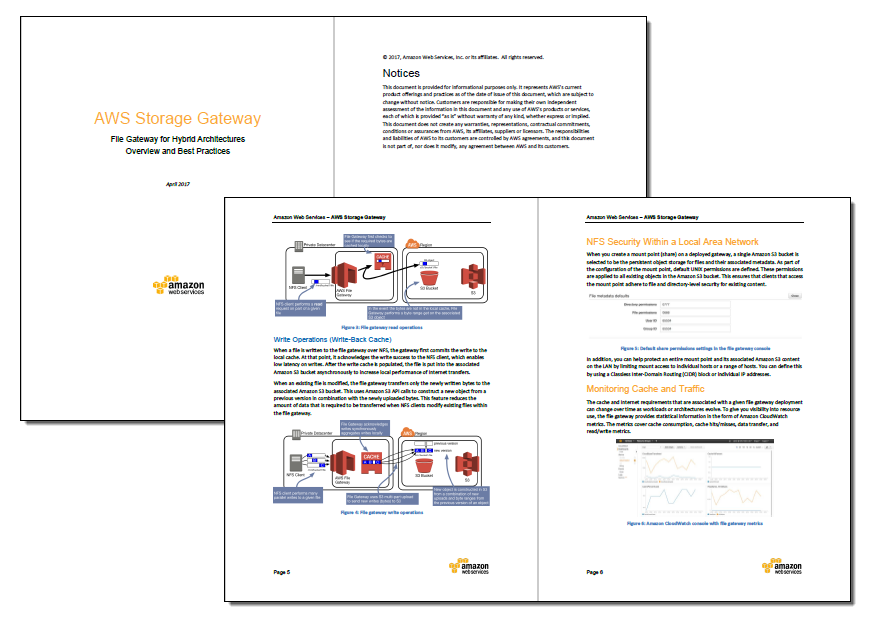
White Paper – File Gateway for Hybrid Architectures – Overview and Best Practices:
Recent Videos:
- Deep Dive on the AWS Storage Gateway – AWS Online Tech Talk.
- Introducing the New AWS Storage Gateway – re:Invent 2016.
- Using the AWS Storage Gateway Virtual Tape Library with Veritas Backup Exec.
- Getting Started with the Hybrid Cloud: Enterprise Backup and Recovery – re:Invent 2016.
Available Now
This cool AWS feature has been available since last November!
— Jeff;
They’re Here – Longer EBS and Storage Gateway Resource IDs Now Available
Last November I let you know that were were planning to increase the length of the resource IDs for EC2 instances, reservations, EBS volumes, and snapshots in 2016. Early this year I showed you how to opt in to the new format for EC2 instances and EC2 reservations.
Effective today you can now opt in to the new format for volumes and snapshots for EBS and Storage Gateway.
As I said earlier:
If you build libraries, tools, or applications that make direct calls to the AWS API, now is the time to opt in and to start your testing process! If you store the IDs in memory or in a database, take a close look at fixed-length fields, data structures, schema elements, string operations, and regular expressions. Resources that were created before you opt in will retain their existing short identifiers; be sure that your revised code can still handle them!
You can opt in to the new format using the AWS Management Console, the AWS Command Line Interface (CLI), the AWS Tools for Windows PowerShell, or by calling the ModifyIdFormat API function.
Opting In – Console
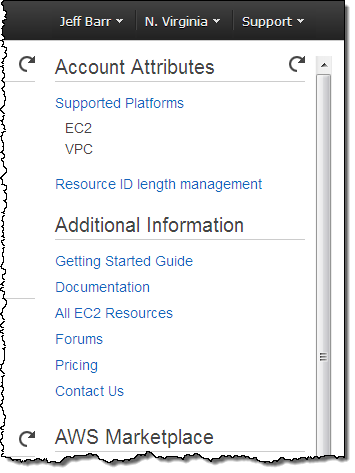
To opt in via the Console, simply log in, choose EC2, and click on Resource ID length management:
Then click on Use Longer IDs for the desired resource types:
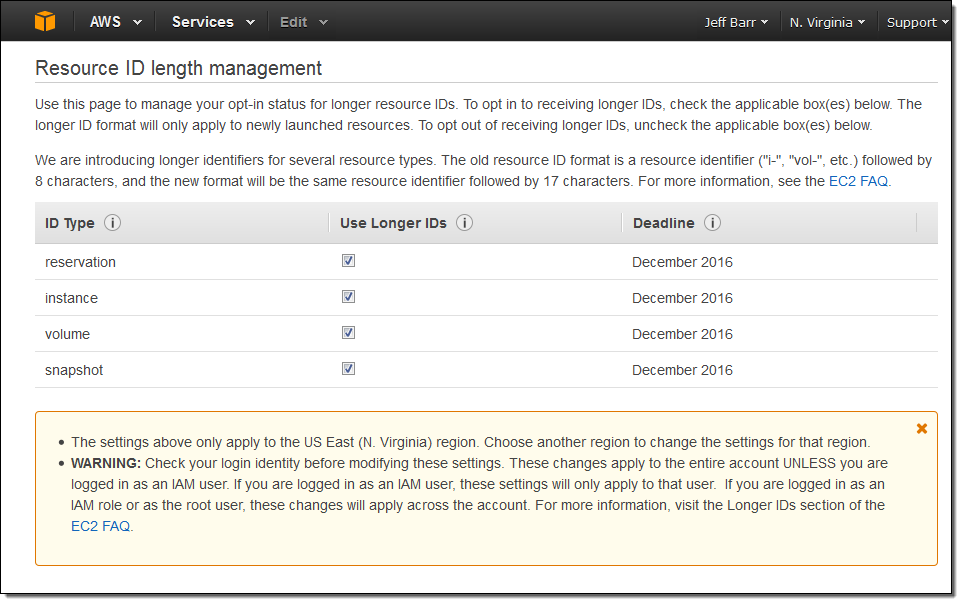
Note that volume applies to EBS volumes and to Storage Gateway volumes and that snapshot applies to EBS snapshots (both direct and through Storage Gateway).
For information on using the AWS Command Line Interface (CLI) or the AWS Tools for Windows PowerShell, take a look at They’re Here – Longer EC2 Resource IDs Now Available.
Things to Know
Here are a couple of things to keep in mind as you transition to the new resource IDs:
- Some of the older versions of the AWS SDKs and CLIs are not compatible with the new format. Visit the Longer EC2 and EBS Resource IDs FAQ for more information on compatibility.
- New AWS Regions get longer instance, reservation, volume, and snapshot IDs by default. You can opt out for Regions that launch between now and December 2016.
- Starting on April 28, 2016, new accounts in all commercial regions except China (Beijing) and AWS GovCloud (US) will get longer instance and reservation IDs by default, again with the ability to opt out.
— Jeff;
Create a Virtual Tape Library Using the AWS Storage Gateway
The AWS Storage Gateway connects an on-premises software appliance with cloud-based storage to integrate your on-premises IT environment with the AWS storage infrastructure.
Once installed and configured, each Gateway presents itself as one or more iSCSI storage volumes. Each volume can be configured to be Gateway-Cached (primary data stored in Amazon S3 and cached in the Gateway) or Gateway-Stored (primary data stored on the Gateway and backed up to Amazon S3 in asynchronous fashion).
Roll the Tape
Today we are making the Storage Gateway even more flexible. You can now configure a Storage Gateway as a Virtual Tape Library (VTL), with up to 10 virtual tape drives per Gateway. Each virtual tape drive responds to the SCSI command set, so your existing on-premises backup applications (either disk-to-tape or disk-to-disk-to-tape) will work without modification.
Virtual tapes in the Virtual Tape Library will be stored in Amazon S3, with 99.999999999% durability. Each Gateway can manage up to 1,500 virtual tapes or a total of 150 TB of storage in its Virtual Tape Library.
Virtual tapes in the Virtual Tape Library can be mounted to a tape drive and become accessible in a matter of seconds.
For long term, archival storage Virtual Tape Libraries are integrated with a Virtual Tape Shelf (VTS). Virtual tapes on the Virtual Tape Shelf will be stored in Amazon Glacier, with the same durability, but at a lower price per gigabyte and a longer retrieval time (about 24 hours). You can easily move your virtual tapes to your Virtual Tape Shelf, by simply ejecting them from the Virtual Tape Library using your backup application.
The virtual tapes are stored in a secure and durable manner. Amazon S3 and Amazon Glacier both make use of multiple storage facilities, and were designed to maintain durability even if two separate storage facilities fail simultaneously. Data moving from your Gateway to and from the AWS cloud is encrypted using SSL; data stored in S3 and Glacier is encrypted using 256-bit AES.
Farewell to Tapes and Tape Drives
As you should be able to tell from my description above, the Storage Gateway, when configured as a Virtual Tape Library, is a complete, plug-in replacement for your existing physical tape infrastructure. You no longer have to worry about provisioning, maintaining, or upgrading tape drives or tape robots. You don’t have to initiate lengthy migration projects every couple of years, and you don’t need to mount and scan old tapes to verify the integrity of the data. You can also forget about all of the hassles of offsite storage and retrieval!
In short, all of the headaches inherent in dealing with cantankerous mechanical devices with scads of moving parts simply vanish when you switch to a virtual tape environment. What’s more, so does the capital expenditure. You pay for what you use, rather than what you own.
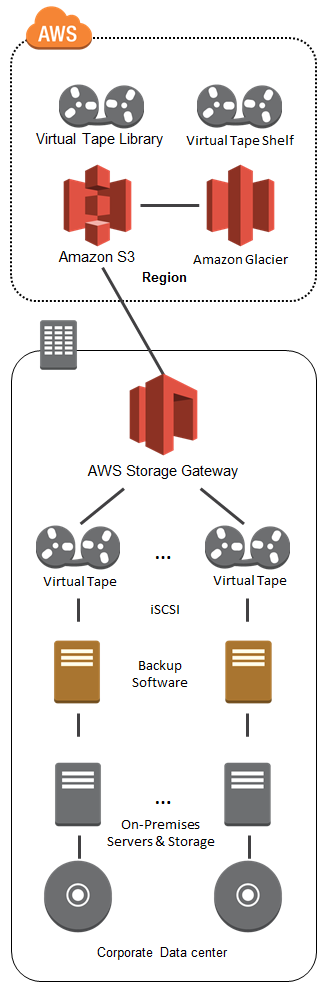
Looks Like Tape, Tastes Like Cloud
Here’s a diagram to help you understand the Gateway-VTL concept. Your backup applications believe that they are writing to actual magnetic tapes. In actuality, they are writing data to the Storage Gateway, where it is uploaded to the AWS cloud:
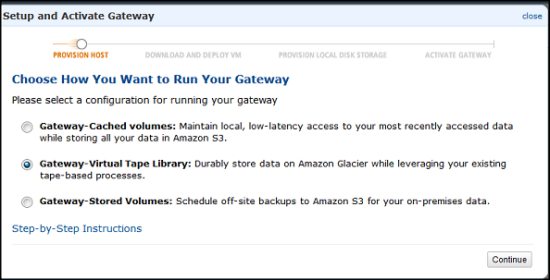
Getting Started
The Gateway takes the form of a virtual machine image that you run on-premises on a VMWare or Hyper-V host. The Storage Gateway User Guide will walk you through the process of installing the image, configuring the local storage, and activating your Gateway using the AWS Management Console:
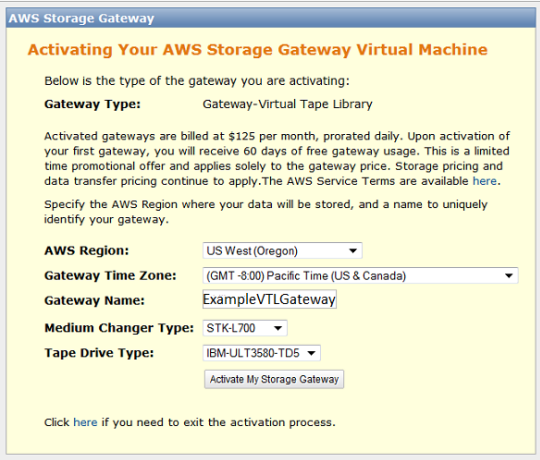
As part of the activation process, you will specify the type of medium changer and tape drive exposed by the Gateway:
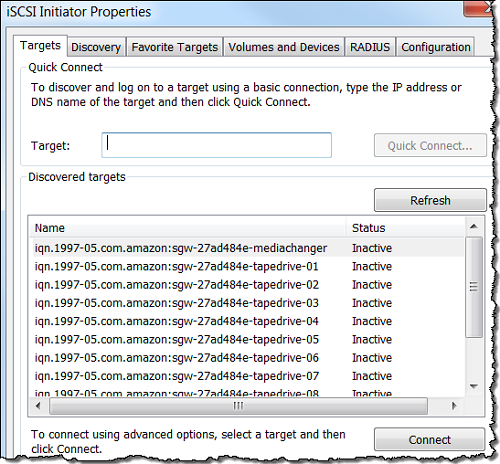
You will need to locate the Virtual Tape Drives in order to use them for backup. The details vary by operating system and backup tool. Here’s what the discovery process looks like from the Microsoft iSCSI Initiator running on the system that you use to create backups:
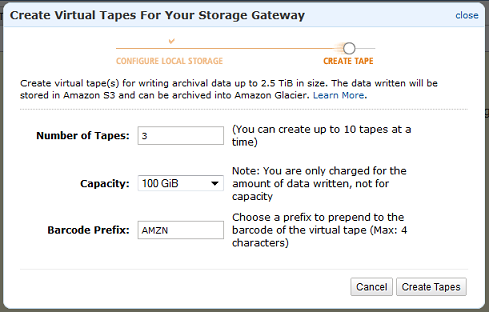
Then you create some virtual tapes:
Backing Up and Managing Tapes
Once you locate the tape drives and tell your backup applications to use them, you can initiate your offsite backup process. You can find your Virtual Tapes in the AWS Management Console:
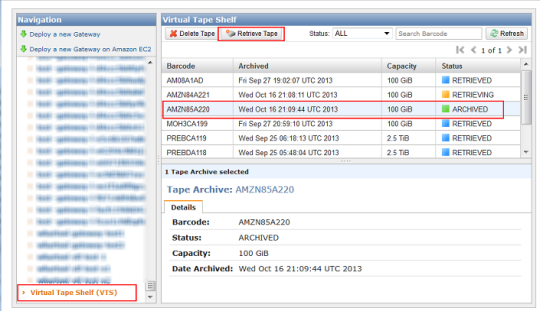
As you can see, the console provides you with a single, integrated view of all of your Virtual Tapes whether they are in the Virtual Tape Library and immediately accessible, or on the Virtual Tape Shelf, and accessible in about 24 hours.
Gateway in the Cloud
The Storage Gateway is also available as an Amazon EC2 AMI and you can launch it from the AWS Marketplace. There are several different use cases for this:
Perhaps you have migrated (or about to migrate) some on-premises applications to the AWS cloud. You can maintain your existing backup regimen and you can stick with tools that are familiar to you by using a cloud-based Gateway.
You can also use a cloud-based Gateway for Disaster Recovery. You can launch the Gateway and some EC2 instances, and bring your application back to life in the cloud. Take a look at our Disaster Recovery page to learn more about how to implement this scenario using AWS.
Speaking of Disaster Recovery, you can also use a cloud-based Gateway to make sure that you can successfully recover from an incident. You can make sure that your backups contain the desired data, and you can verify your approach to restoring the data and loading it into a test database.
Bottom Line
The AWS Storage Gateway is available in multiple AWS Regions and you can start using it today. Here’s what it will cost you:
- Each activated gateway costs $125 per month, with a 60-day free trial.
- There’s no charge for data transfer from your location up to AWS.
- Virtual Tapes stored in Amazon S3 cost $0.095 (less than a dime) per gigabyte per month of storage. You pay for the storage that you use, and not for any “blank tape” (so to speak).
- Virtual Tapes stored in Amazon Glacier cost $0.01 (a penny) per gigabyte per month of storage. Again, you pay for what you use.
- Retrieving data from a Virtual Tape Shelf costs $0.30 per gigabyte. If the tapes that you delete from the Virtual Tape Shelf are less than 90 days old, there is an additional, pro-rated charge of $0.03 per gigabyte.
These prices are valid in the US East (Northern Virginia) Region. Check the Storage Gateway Pricing page for costs in other Regions.
— Jeff;
AWS Storage Gateway Now Supports Microsoft Hyper-V
The AWS Storage Gateway can now be run in the Microsoft Hyper-V virtualization environment. You can use the Storage Gateway to marry your existing on-premises storage systems with the AWS cloud for backup, departmental file share storage, or disaster recovery.
With today’s launch of support for Hyper-V, you can now use the Storage Gateway on-premises in two of the most popular virtualization environments: Microsoft Hyper-V and VMware ESXi. You can also run the Storage Gateway on Amazon EC2. This allows you to mirror your on-premises environment in the AWS cloud for on-demand computing and disaster recovery (DR).
About the Storage Gateway
The AWS Storage Gateway combines a software appliance (a virtual machine image that installs in your on-premises IT environment) and Amazon S3 storage. You can use the Storage Gateway to support several different file sharing, backup, and disaster recovery use cases. For example, you can use the Storage Gateway to host your company’s home directory files in Amazon S3 while keeping copies of recently accessed files on-premises for fast access. This minimizes the need to scale your local storage infrastructure.
As part of the installation process for the Storage Gateway, you will create one or more storage volumes. The AWS Storage Gateway gives you two options:
Gateway-Cached Volumes store your primary data in S3 and retain frequently accessed data locally. Volumes can be up to 32 TB in size, but you need just a fraction of that amount of local storage. This gives you the ability to trade off overall storage performance and cost, fine-tuning the balance as needed to best serve your application and your users. For example, in a remote office scenario, as your storage footprint increases, you can increase utilization of your Gateway-Cached volume in Amazon S3, without having to physically allocate additional on-premisse storage in the remote office.
Gateway-Stored Volumes store all of your data locally with an asynchronous backup to S3 at the time and frequency of your choice for durable, off-site backups. These volumes can be up to 1 TB in size, and you’ll need that amount of local storage.
You can create multiple volumes on each of your Storage Gateways, in your choice of sizes. Each volume appears as an iSCSI target and can be attached and used just like a local storage volume would be.
Storage Gateway in Action
Jollibee Foods Corporation (JFC) is using the AWS Storage Gateway to backup and mirror their Oracle databases from their on-premises data center to AWS. JFC is the largest fast food chain in the Philippines with revenues well over 2 Billion USD and presence in more than a dozen countries worldwide. They like the operational simplicity the Storage Gateway enables, making backup of their multiple TB-sized database snapshots to AWS easy and efficient. The Storage Gateway also provides them access to the same database snapshots for use in Amazon EC2, providing a cost-effective in-cloud DR solution.
Getting Started
If you have never used the Storage Gateway before, you can sign up for a 60 day free trial. If you are eligible for the AWS Free Usage Tier, you will receive 1 GB of snapshot storage and 15 GB of data transfer out (aggregated across all AWS services).
The AWS Storage Gateway User Guide will give you all of the information that you need to get started.
— Jeff;