Category: Amazon CodePipeline
CodePipeline Update – Build Continuous Delivery Workflows for CloudFormation Stacks
When I begin to write about a new way for you to become more productive by using two AWS services together, I think about a 1980’s TV commercial for Reese’s Peanut Butter Cups! The intersection of two useful services or two delicious flavors creates a new one that is even better.
Today’s chocolate / peanut butter intersection takes place where AWS CodePipeline meets AWS CloudFormation. You can now use CodePipeline to build a continuous delivery pipeline for CloudFormation stacks. When you practice continuous delivery, each code change is automatically built, tested, and prepared for release to production. In most cases, the continuous delivery release process includes a combination of manual and automatic approval steps. For example, code that successfully passes through a series of automated tests can be routed to a development or product manager for final review and approval before it is pushed to production.
This important combination of features allows you to use the infrastructure as code model while gaining all of the advantages of continuous delivery. Each time you change a CloudFormation template, CodePipeline can initiate a workflow that will build a test stack, test it, await manual approval, and then push the changes to production.The workflow can create and manipulate stacks in many different ways:

As you will soon see, the workflow can take advantage of advanced CloudFormation features such as the ability to generate and then apply change sets (read New – Change Sets for AWS CloudFormation to learn more) to an operational stack.
The Setup
In order to learn more about this feature, I used a CloudFormation template to set up my continuous delivery pipeline (this is yet another example of infrastructure as code). This template (available here and described in detail here) sets up a full-featured pipeline. When I use the template to create my pipeline, I specify the name of an S3 bucket and the name of a source file:
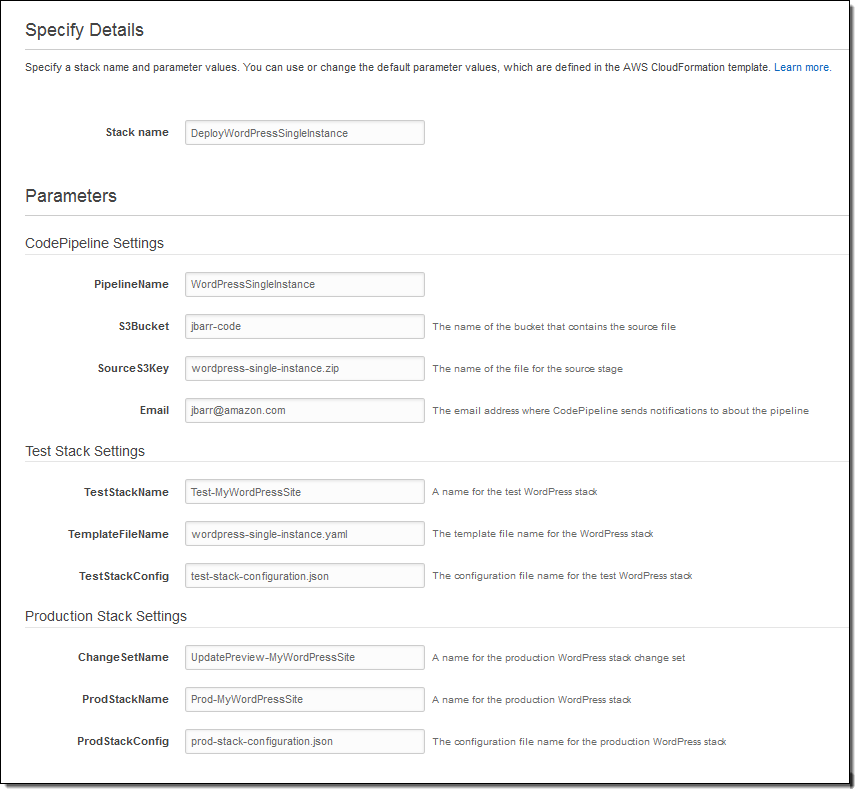
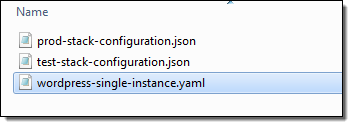
The SourceS3Key points to a ZIP file that is enabled for S3 versioning. This file contains the CloudFormation template (I am using the WordPress Single Instance example) that will be deployed via the pipeline that I am about to create. It can also contain other deployment artifacts such as configuration or parameter files; here’s what mine looks like:
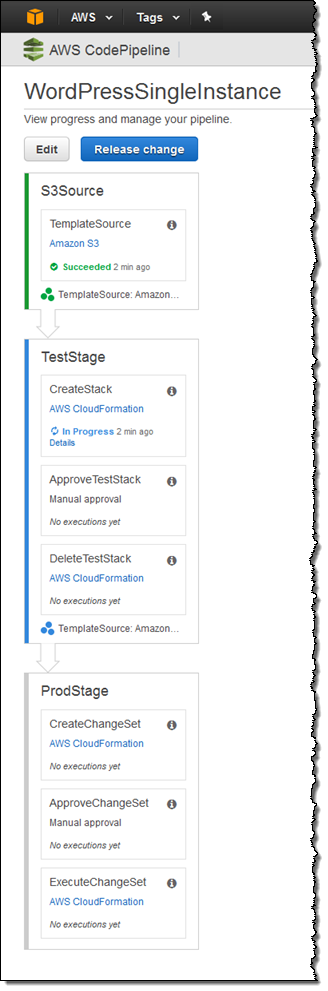
The entire continuous delivery pipeline is ready just a few seconds after I click on Create Stack. Here’s what it looks like:
The Action
At this point I have used CloudFormation to set up my pipeline. With the stage set (so to speak), now I can show you how this pipeline makes use of the new CloudFormation actions.
Let’s focus on the second stage, TestStage. Triggered by the first stage, this stage uses CloudFormation to create a test stack:
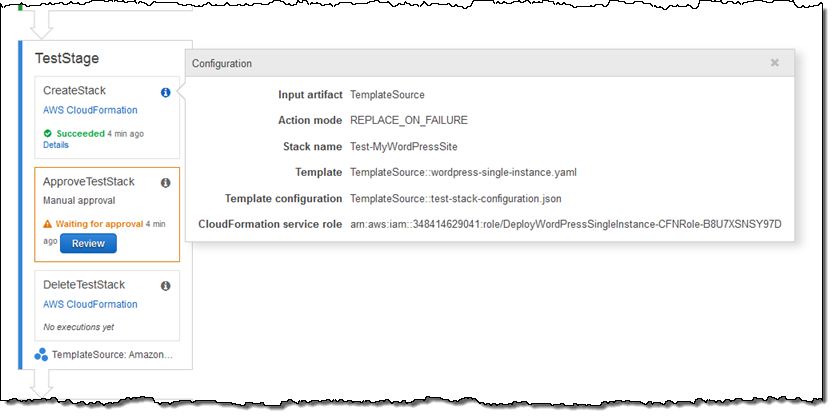
The stack is created using parameter values from the test-stack-configuration.json file in my ZIP. Since you can use different configuration files for each CloudFormation action, you can use the same template for testing and production.
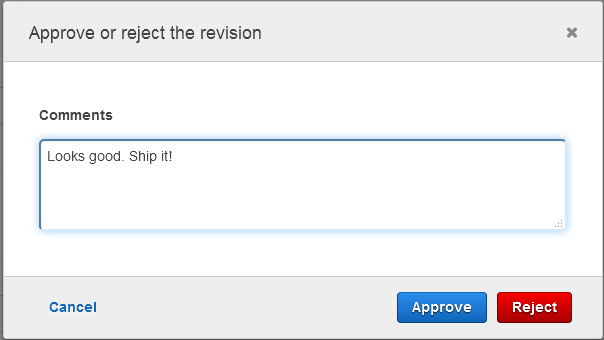
After the stack is up and running, the ApproveTestStack step is used to await manual approval (it says “Waiting for approval above.”). Playing the role of the dev manager, I verify that the test stack behaves and performs as expected, and then approve it:
After approval, the DeleteTestStack step deletes the test stack.
Now we are just about ready to deploy to production. ProdStage creates a CloudFormation change set and then submits it for manual approval. This stage uses the parameter values from the prod-stack-configuration.json file in my ZIP. I can use the parameters to launch a modestly sized test environment on a small EC2 instance and a large production environment from the same template.
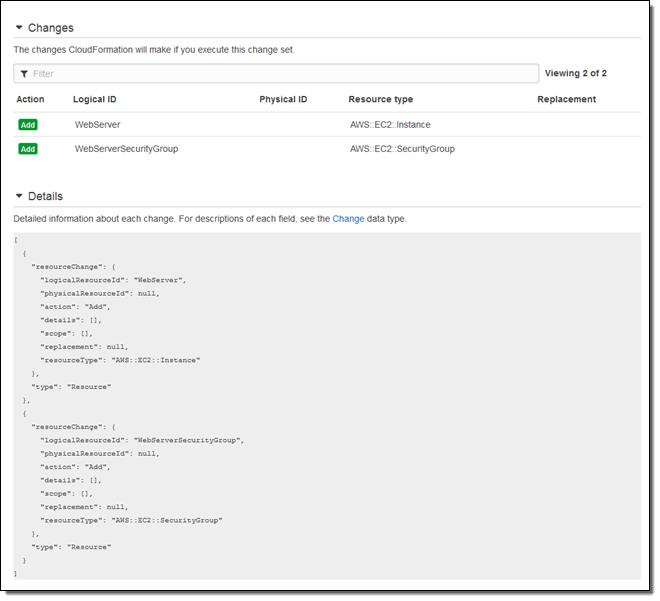
Now I’m playing the role of the big boss, responsible for keeping the production site up and running. I review the change set in order to make sure that I understand what will happen when I deploy to production. This is the first time that I am running the pipeline, so the change set indicates that an EC2 instance and a security group will be created:
And then I approve it:
With the change set approved, it is applied to the existing production stack in the ExecuteChangeSet step. Applying the change to an existing stack keeps existing resources in play where possible and avoids a wholesale restart of the application. This is generally more efficient and less disruptive than replacing the entire stack. It keeps in-memory caches warmed up and avoids possible bursts of cold-start activity.
Implementing a Change
Let’s say that I decide to support HTTPS. In order to do this, I need to add port 443 to my application’s security group. I simply edit the CloudFormation template, put it into a fresh ZIP, and upload it to S3. Here’s what I added to my template:
- CidrIp: 0.0.0.0/0
FromPort: '443'
IpProtocol: tcp
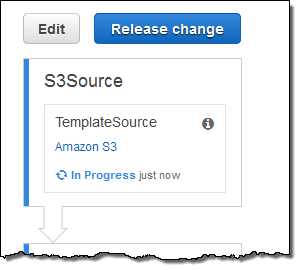
ToPort: '443'Then I return to the Console and see that CodePipeline has already detected the change and set the pipeline in to motion:
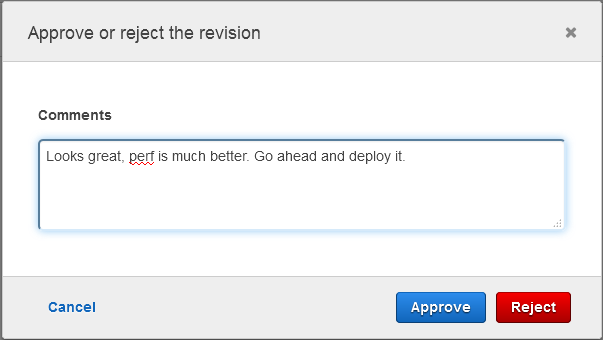
The pipeline runs again, I approve the test stack, and then inspect the change set, confirming that it will simply modify an existing security group:
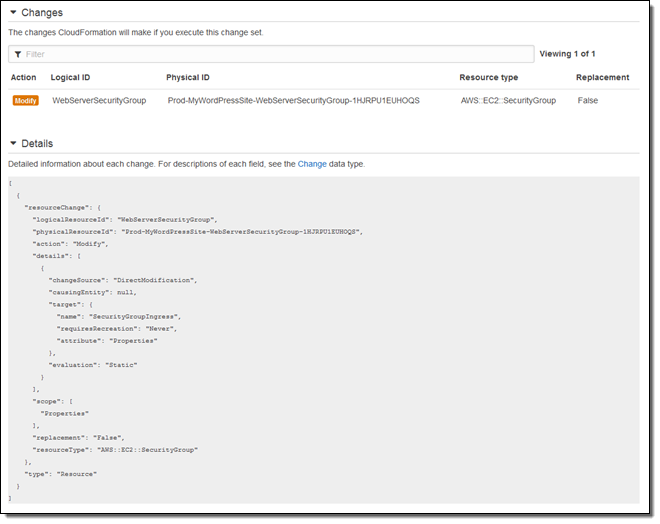
One quick note before I go. The CloudFormation template for the pipeline creates an IAM role and uses it to create the test and deployment stacks (this is a new feature; read about the AWS CloudFormation Service Role to learn more). For best results, you should delete the stacks before you delete the pipeline. Otherwise, you’ll need to re-create the role in order to delete the stacks.
There’s More
I’m just about out of space and time, but I’ll briefly summarize a couple of other aspects of this new capability.
Parameter Overrides – When you define a CloudFormation action, you may need to exercise additional control over the parameter values that are defined for the template. You can do this by opening up the Advanced pane and entering any desired parameter overrides:
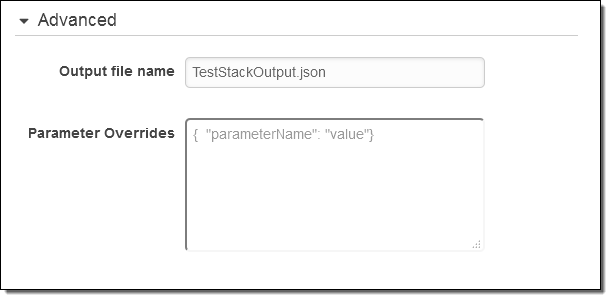
Artifact References – In some situations you may find that you need to reference an attribute of an artifact that was produced by an earlier stage of the pipeline. For example, suppose that an early stage of your pipeline copies a Lambda function to an S3 bucket and calls the resulting artifact LambdaFunctionSource. Here’s how you would retrieve the bucket name and the object key from the attribute using a parameter override:
{
  "BucketName" : { "Fn::GetArtifactAtt" : ["LambdaFunctionSource", "BucketName"]},
  "ObjectKey" : { "Fn::GetArtifactAtt" : ["LambdaFunctionSource", "ObjectKey"]}
}
Access to JSON Parameter – You can use the new Fn::GetParam function to retrieve a value from a JSON-formatted file that is included in an artifact.
Note that Fn:GetArtifactAtt and Fn::GetParam are designed to be used within the parameter overrides.
S3 Bucket Versioning – The first step of my pipeline (the Source action) refers to an object in an S3 bucket. By enabling S3 versioning for the object, I simply upload a new version of my template after each change:
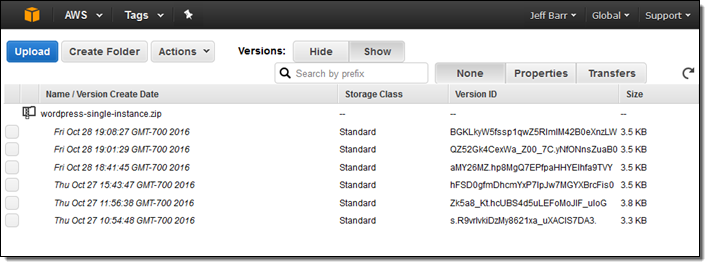
If I am using S3 as my source, I must use versioning (uploading a new object over the existing one is not supported). I can also use AWS CodeCommit or a GitHub repo as my source.
Create Pipeline Wizard
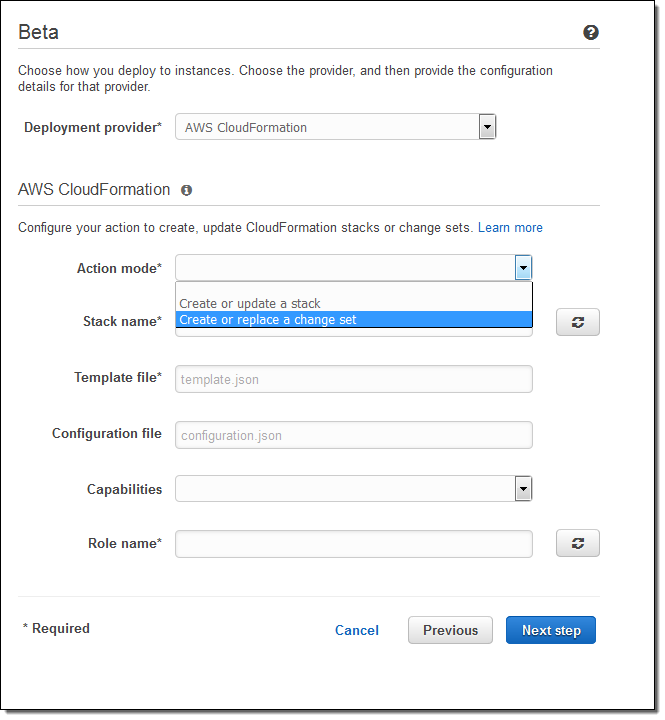
I started out this blog post by using a CloudFormation template to create my pipeline. I can also click on Create pipeline in the console and build my initial pipeline (with source, build, and beta deployment stages) using a wizard. The wizard now allows me to select CloudFormation as my deployment provider. I can create or update a stack or a change set in the beta deployment stage:
Available Now
This new feature is available now and you can start using it today. To learn more, check out the Continuous Delivery with AWS CodePipeline in CodePipeline Documentation.
— Jeff;
AWS Developer Tool Recap – Recent Enhancements to CodeCommit, CodePipeline, and CodeDeploy
 The AWS Developer Tools help you to put modern DevOps practices to work! Here’s a quick overview (read New AWS Tools for Code Management and Deployment for an in-depth look):
AWS CodeCommit is a fully-managed source code control service. You can use it to host secure and highly scalable private Git repositories while continuing to use your existing Git tools and workflows (watch the Introduction to AWS CodeCommit video to learn more).
AWS CodeDeploy automates code deployment to Amazon Elastic Compute Cloud (EC2) instances and on-premises servers. You can update your application at a rapid clip, while avoiding downtime during deployment (watch the Introduction to AWS CodeDeploy video to learn more).
AWS CodePipeline is a continuous delivery service that you can use to streamline and automate your release process. Checkins to your repo (CodeCommit or Git) will initiate build, test, and deployment actions (watch Introducing AWS CodePipeline for an introduction). The build can be deployed to your EC2 instances or on-premises servers via CodeDeploy, AWS Elastic Beanstalk, or AWS OpsWorks.
You can combine these services with your existing build and testing tools to create an end-to-end software release pipeline, all orchestrated by CodePipeline.
We have made a lot of enhancements to the Code* products this year and today seems like a good time to recap all of them for you! Many of these enhancements allow you to connect the developer tools to other parts of AWS so that you can continue to fine-tune your development process.
CodeCommit Enhancements
Here’s what’s new with CodeCommit:
- Repository Triggers
- Code Browsing
- Commit History
- Commit Visualization
- Elastic Beanstalk Integration
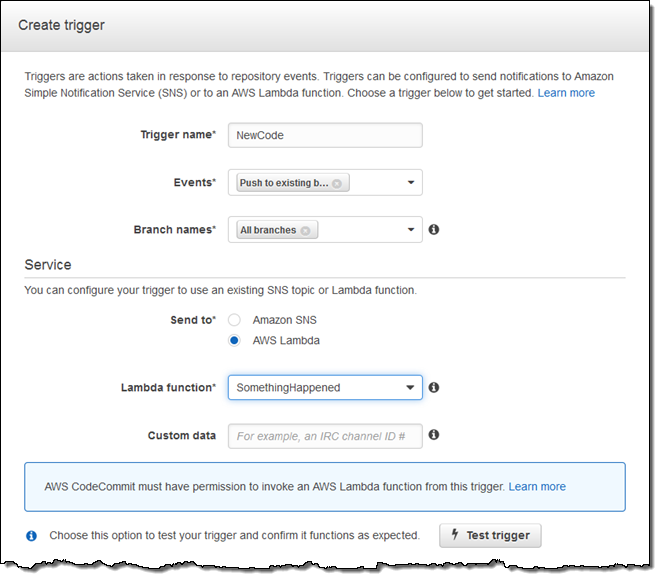
Repository Triggers – You can create Repository Triggers that Send Notification or Run Code whenever a change occurs in a CodeCommit repository (these are sometimes called webhooks — user-defined HTTP callbacks). These hooks will allow you to customize and automate your development workflow. Notifications can be delivered to an Amazon Simple Notification Service (SNS) topic or can invoke a Lambda function.
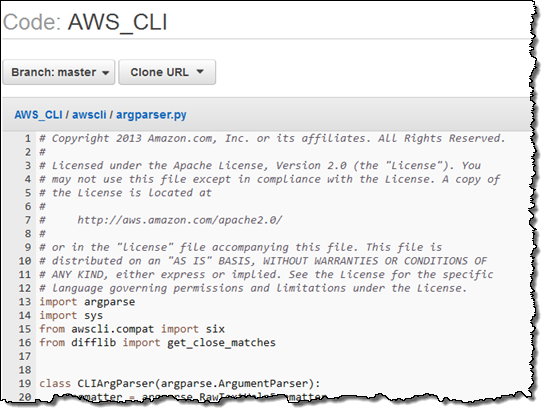
Code Browsing – You can Browse Your Code in the Console. This includes navigation through the source code tree and the code:
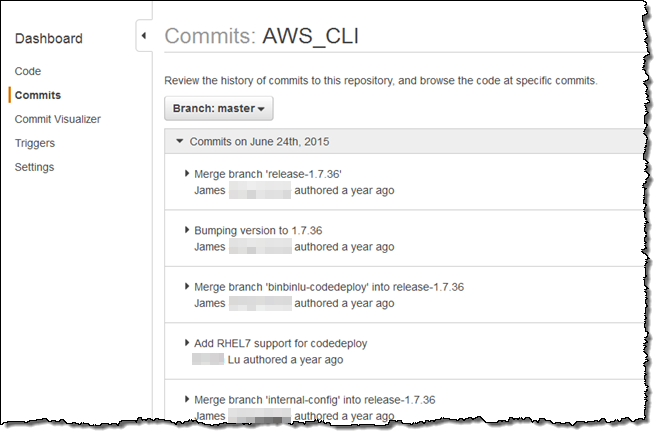
Commit History – You can View the Commit History for your repositories (mine is kind of quiet, hence the 2015-era dates):
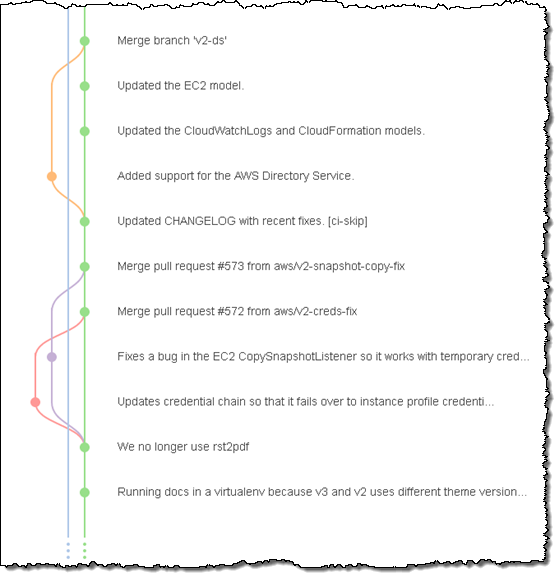
Commit Visualization – You can View a Graphical Representation of the Commit History for your repositories:
Elastic Beanstalk Integration – You can Use CodeCommit Repositories with Elastic Beanstalk to store your project code for deployment to an Elastic Beanstalk environment.
CodeDeploy Enhancements
Here’s what’s new with CodeDeploy:
- CloudWatch Events Integration
- CloudWatch Alarms and Automatic Deployment Rollback
- Push Notifications
- New Partner Integrations
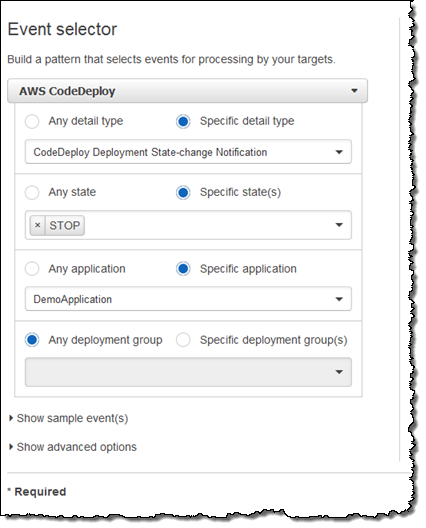
CloudWatch Events Integration – You can Monitor and React to Deployment Changes with Amazon CloudWatch Events by configuring CloudWatch Events to stream changes in the state of your instances or deployments to an AWS Lambda function, an Amazon Kinesis stream, an Amazon Simple Queue Service (SQS) queue, or an SNS topic. You can build workflows and processes that are triggered by your changes. You could automatically terminate EC2 instances when a deployment fails or you could invoke a Lambda function that posts a message to a Slack channel.
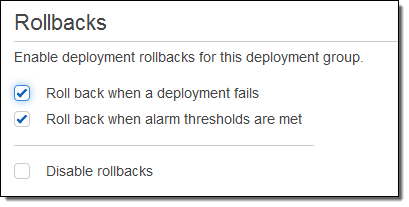
CloudWatch Alarms and Automatic Deployment Rollback – CloudWatch Alarms give you another type of Monitoring for your Deployments. You can monitor metrics for the instances or Auto Scaling Groups managed by CodeDeploy and take action if they cross a threshold for a defined period of time, stop a deployment, or change the state of an instance by rebooting, terminating, or recovering it. You can also automatically rollback a deployment in response to a deployment failure or a CloudWatch Alarm.
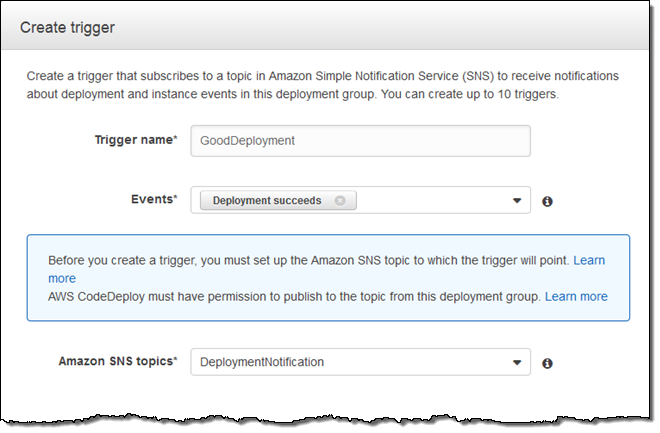
Push Notifications – You can Receive Push Notifications via Amazon SNS for events related to your deployments and use them to track the state and progress of your deployment.
New Partner Integrations – Our CodeDeploy Partners have been hard at work, connecting their products to ours. Here are some of the most recent offerings:
CodePipeline Enhancements
And here’s what’s new with CodePipeline:
- AWS OpsWorks Integration
- Triggering of Lambda Functions
- Manual Approval Actions
- Information about Committed Changes
- New Partner Integrations
AWS OpsWorks Integration – You can Choose AWS OpsWorks as a Deployment Provider in the software release pipelines that you model in CodePipeline:

You can also configure CodePipeline to use OpsWorks to deploy your code using recipes contained in custom Chef cookbooks.
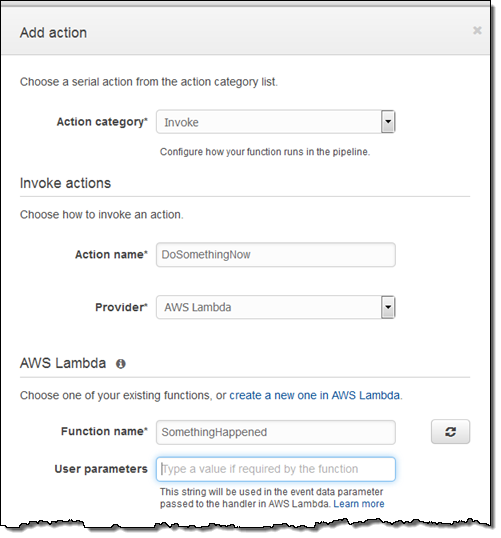
Triggering of Lambda Functions – You can now Trigger a Lambda Function as one of the actions in a stage of your software release pipeline. Because Lambda allows you to write functions to perform almost any task, you can customize the way your pipeline works:
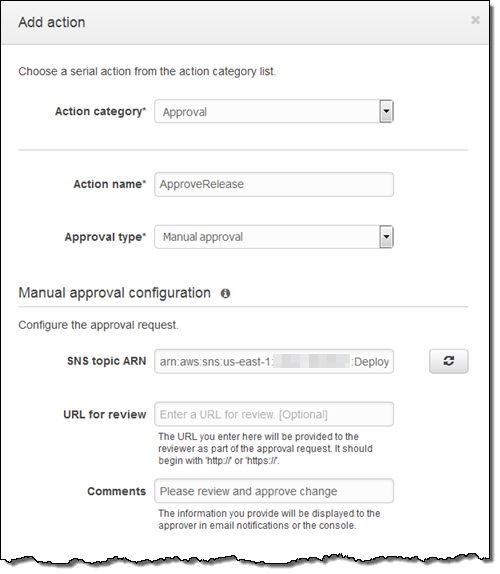
Manual Approval Actions – You can now add Manual Approval Actions to your software release pipeline. Execution pauses until the code change is approved or rejected by someone with the required IAM permission:
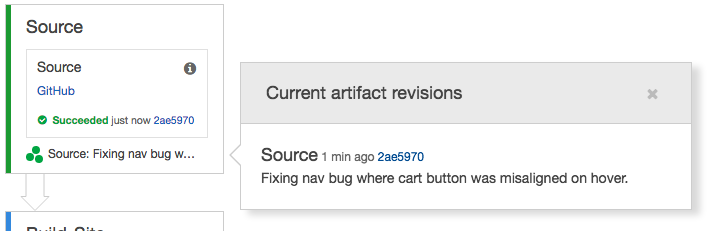
Information about Committed Changes – You can now View Information About Committed Changes to the code flowing through your software release pipeline:
New Partner Integrations – Our CodePipeline Partners have been hard at work, connecting their products to ours. Here are some of the most recent offerings:
New Online Content
In order to help you and your colleagues to understand the newest development methodologies, we have created some new introductory material:
Thanks for Reading!
I hope that you have enjoyed this quick look at some of the most recent additions to our development tools.
In order to help you to get some hands-on experience with continuous delivery, my colleagues have created a new Pipeline Starter Kit. The kit includes a AWS CloudFormation template that will create a VPC with two EC2 instances inside, a pair of applications (one for each EC2 instance, both deployed via CodeDeploy), and a pipeline that builds and then deploys the sample application, along with all of the necessary IAM service and instance roles.
— Jeff;
Now Available – AWS CodePipeline
We announced AWS CodePipeline at AWS re:Invent last fall (see my post, New AWS Tools for Code Management and Deployment for the details). As I said at that time, this tool will help you to model and automate your software release process. The automation provided by CodePipeline is designed to make your release process more reliable and more efficient.
Available Now
I am thrilled to be able to announce that CodePipeline is now available and you can start using it today.
Before I dive in to the details, I’d like to share a bit of the backstory with you.
Inside Amazon: Pipelines
Just as AWS CodeDeploy was inspired by an internal Amazon tool known as Apollo (read The Story of Apollo – Amazon’s Deployment Engine to learn more), CodePipeline has an internal Amazon predecessor.
We built our own continuous delivery service after we measured the time that it took code to be deployed to production after it was checked in. The time was far too long and was a clear measure of the challenge that our development teams felt as they worked to get features into the hands of customers as quickly as possible.
Upon further investigation it turned out that most of the time wasn’t being spent on actually performing builds, running tests, or doing deployments. Instead, manual, ticket-driven hand-offs between teams turned out to be a significant source of friction. Tickets sat in queues waiting someone to notice them, build and test results sat around until they could be reviewed, and person-to-person notifications had to be sent in order to move things along.
Given Amazon’s focus on automation and the use of robotics to speed the flow of tangible goods through our fulfillment centers, it was somewhat ironic that we relied on manual, human-driven processes to move intangible bits through our software delivery process.
In order to speed things up, we built an internal system known as Pipelines. This system allowed our teams to connect up all of the parts of their release process. This included source code control, builds, deployment & testing in a preproduction environment, and deployment to production. Needless to say, this tool dramatically reduced the time that it took for a given code change to make it to production.
Although faster delivery was the primary driver for this work, it turned out that we saw some other benefits as well. By ensuring that every code change went through the same quality gates, our teams caught problems earlier and produced releases that were of higher quality, resulting in a reduction in the number of rollbacks due to bad code that was deployed to production.
Now, Pipelines is used pervasively across Amazon. Teams use it as their primary dashboard and use it to monitor and control their software releases.
With today’s launch of CodePipeline, you now have access to the same capabilities our own developers do!
All About CodePipeline
CodePipeline is a continuous delivery service for software! It allows you to model, visualize, and automate the steps that are required to release your software. You can define and then fully customize all of the steps that your code takes as it travels from checkin, to build, on to testing, and then to deployment.
Your organization, like most others, probably uses a variety of tools (open source and otherwise) as part of your build process. The built-in integrations, along with those that are available from our partners, will allow you to use your existing tools in this new and highly automated workflow-driven world. You can also connect your own source control, build, test, and deployment tools to CodePipeline using the new custom action API.
Automating your release process will make it faster and more consistent. As a result, you will be able to push small changes in to production far more frequently. You’ll be able to use the CodePipeline dashboard to view and control changes as they flow through your release pipeline.
A Quick Tour
Let’s take a quick CodePipeline tour. I will create a simple two-stage pipeline that uses a versioned S3 bucket and AWS CodeDeploy to release a sample application.
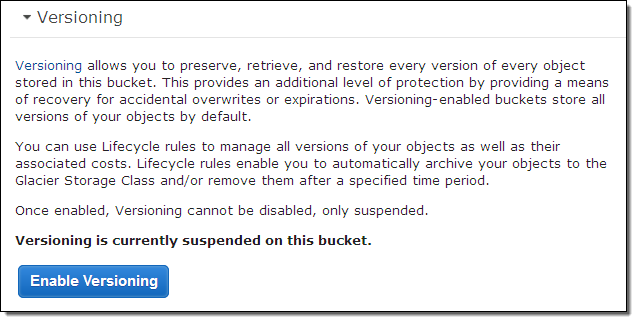
I start by creating a new bucket (jbarr-code) and enabling versioning:
![]()
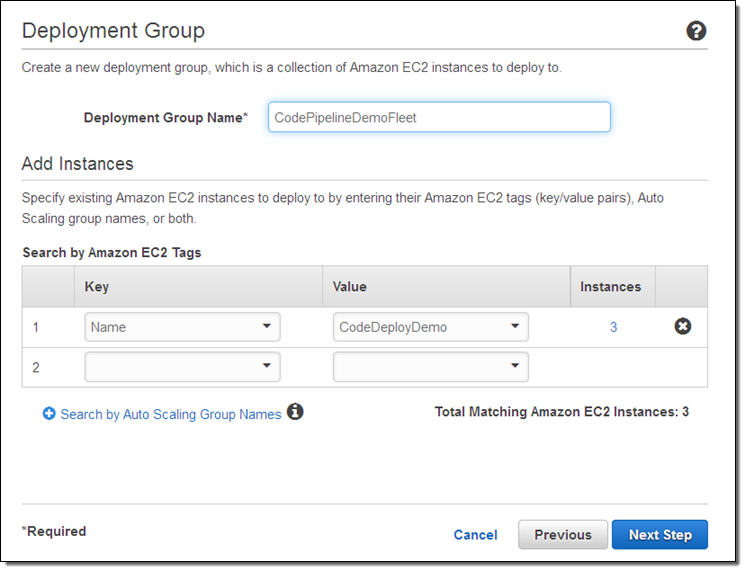
I need a place to deploy my code, so I open up the CodeDeploy Console and use the sample deployment. It launches three EC2 instances into a Deployment Group:
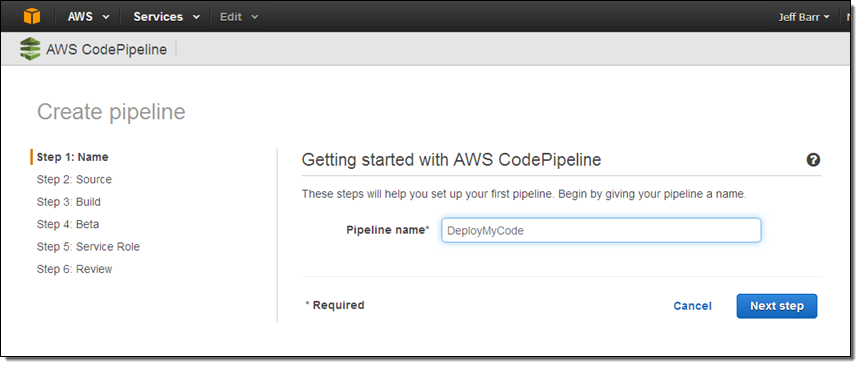
Then I open up the CodePipeline Console and use the Deployment Walkthrough Wizard to create my deployment resources. I’ll call my pipeline DeployMyCode:
Now I tell CodePipeline where to find the code. I reference the S3 bucket and the object name (this object contains the code that I want to deploy) as the Source Provider:
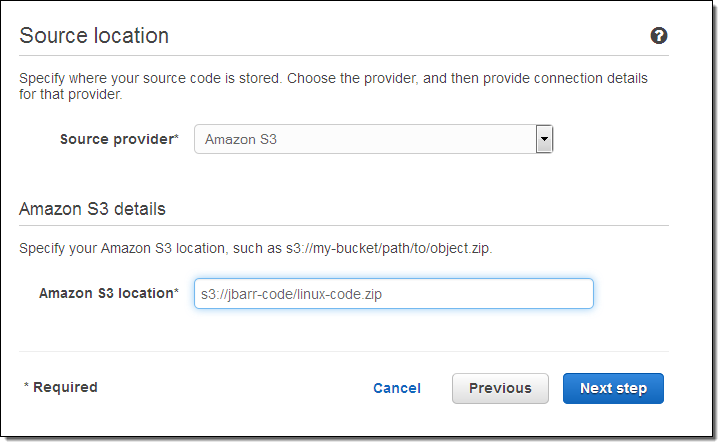
Alternatively, I could have used a GitHub repo as my Source Provider.
The next step is to tell CodePipeline how to build my code by specifying a Build Provider. In this case the code is a script and can be run as-is, so I don’t need to do a build.
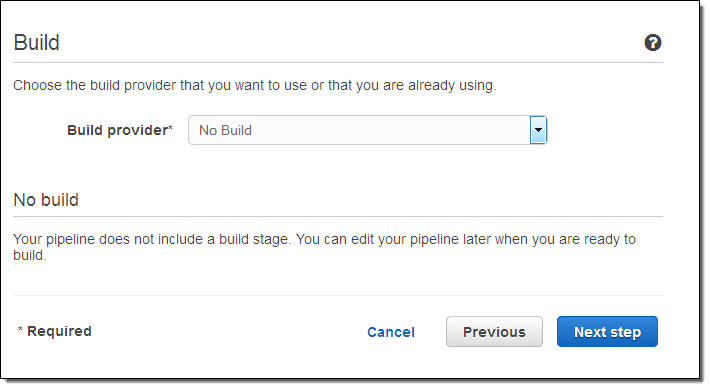
I can also use Jenkins as a Build Provider.
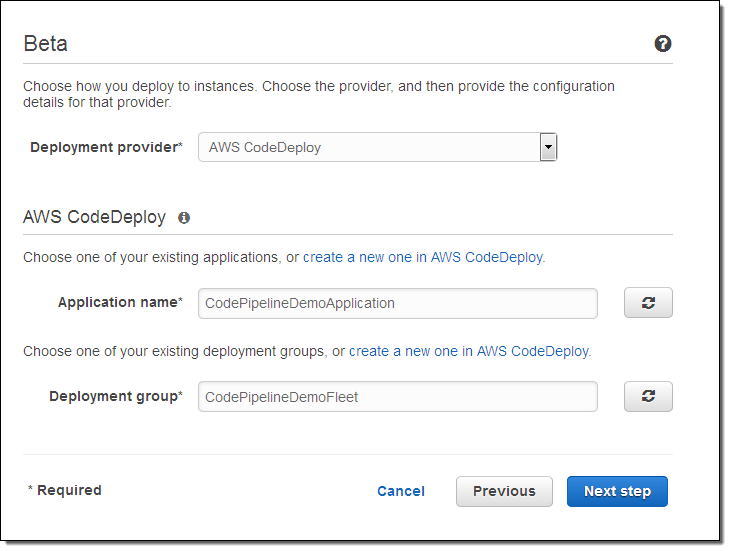
Since we’re not building code (when my pipeline runs) the next step is to deploy it for pre-deployment testing. I arrange to use the CodeDeploy configuration (including the target EC2 instances) that I set up a few minutes ago:
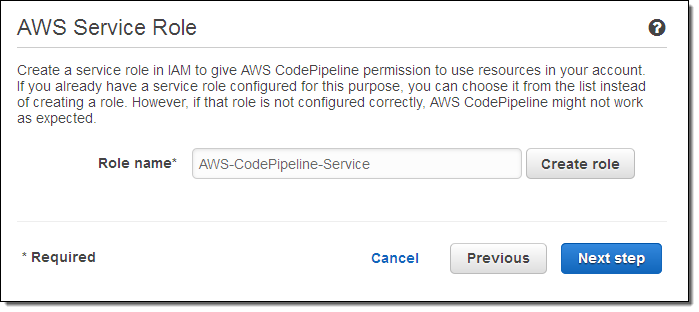
I need to give CodePipeline permission to use AWS resources in my account by creating an IAM role:
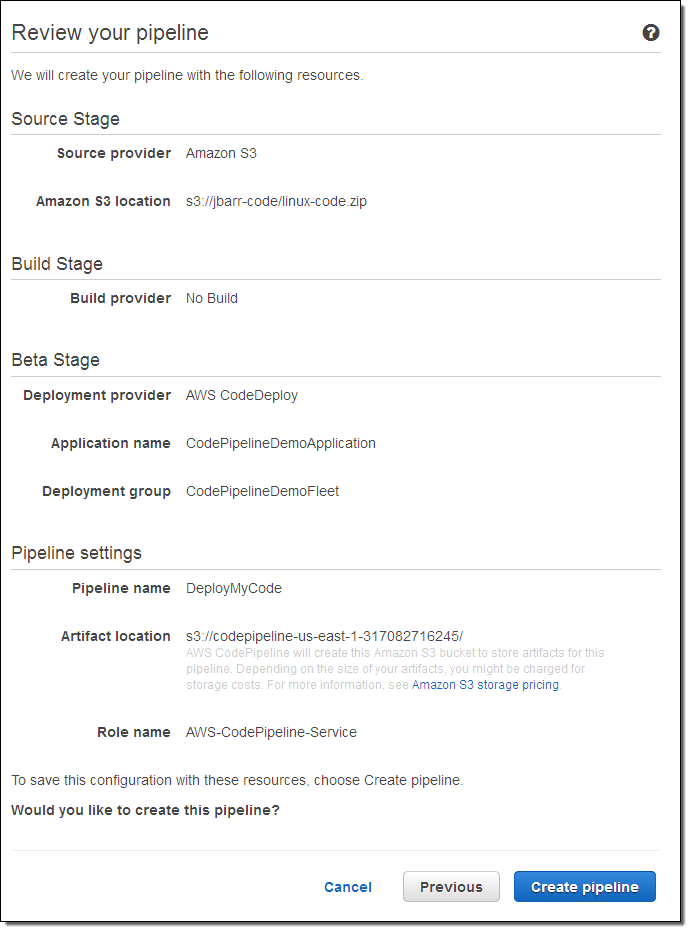
With that step done, I can confirm my selections and create my pipeline:
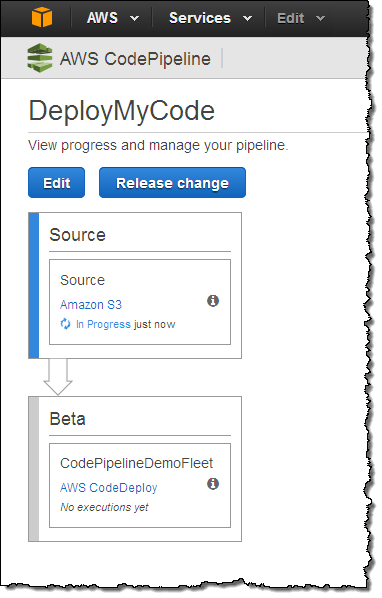
The pipeline starts running immediately:
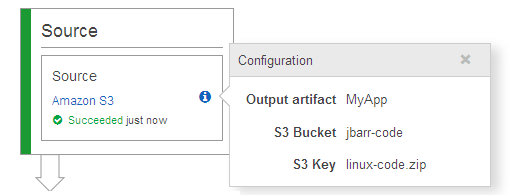
I can hover my cursor over the “i” to learn more about the configuration of a particular stage:
When my code changes and I upload a new version to S3 (in this case), CodePipeline will detect the change and run the pipeline automatically. I can also click on the Release change button to do the same thing.
If it ever becomes necessary to pause a pipeline between stages, I can do so with a click (and an explanation):
![]()
I can enable it again later with a click!
I can also edit my pipeline. I can alter an existing stage, append new stages at the end, or insert them at other points in the pipeline:
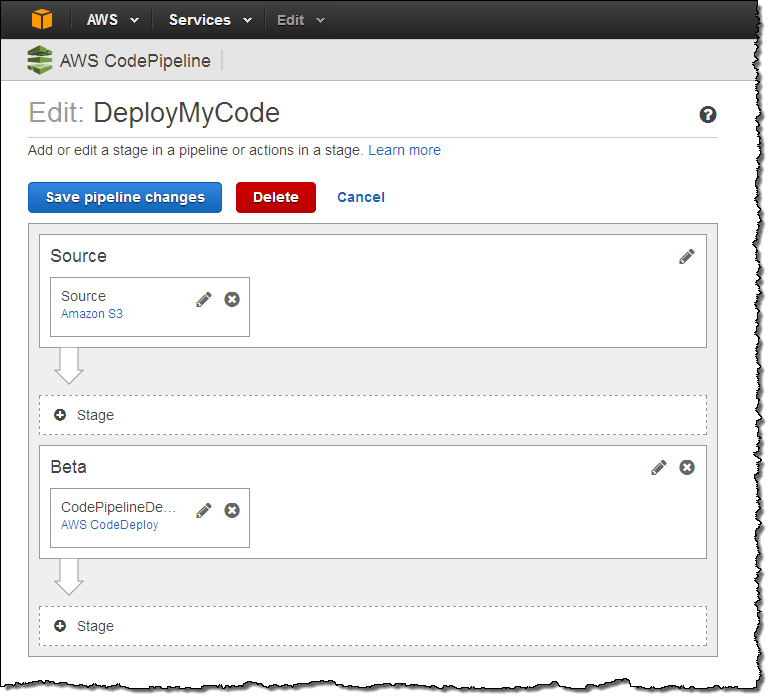
For example, I could add a testing step and then (if the test succeeds) a deployment to production. If I add a test step I also need to select and then connect to a test provider:
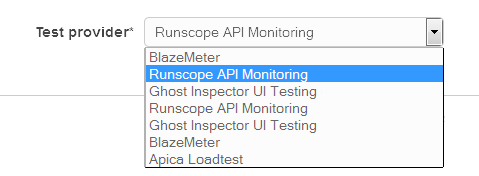
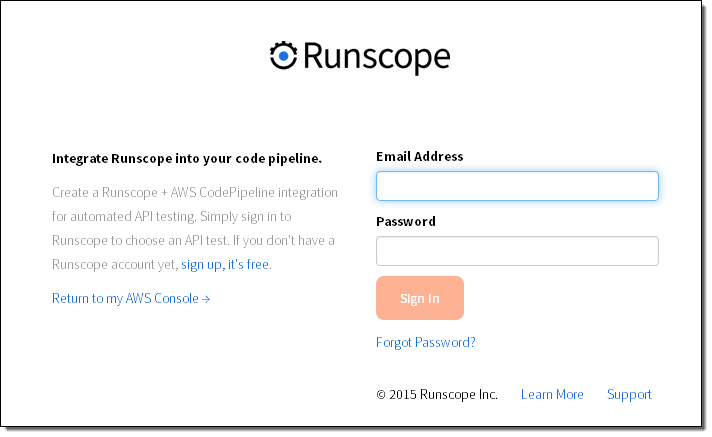
The connection step takes place on the test provider’s web site:
All of the actions described above (any many more) can also be performed via the AWS Command Line Interface (CLI).
CodePipeline Integration
As I mentioned earlier, CodePipeline can make use of existing source control, build, test, and deployment tools. Here’s what I know about so far (leave me a comment if I missed any and I’ll update this post):
Source Control
- Amazon Simple Storage Service (S3) – Connect a pipeline to release source changes from an S3 bucket.
- GitHub – Connect a pipeline to release source changes from a public or private repo.
Build & Continuous Integration
- Jenkins – Run builds on a Jenkins server hosted in the cloud or on-premises.
- CloudBees – Run continuous integration builds and tests on the CloudBees Jenkins Platform.
Testing
- Apica -Run high-volume load tests with the Apica LoadTest service.
- BlazeMeter -Run high-volume load tests with the BlazeMeter service.
- Ghost Inspector – Run UI automation tests with the Ghost Inspector service.
- Runscope -Run API tests with the Runscope service.
Deployment
- AWS CodeDeploy – Deploy to Amazon Elastic Compute Cloud (EC2) or any server using CodeDeploy
- AWS Elastic Beanstalk – Deploy to Elastic Beanstalk application containers.
- XebiaLabs – Deploy using declarative automation and pre-built plans with XL Deploy.
Available Now
CodePipeline is available now and you can start using it today in the US East (Northern Virginia) region, with plans (as usual) to expand to other regions over time.
You’ll pay $1 per active pipeline per month (the first one is available to you at no charge as part of the AWS Free Tier). An active pipeline has at least one code change move through it during the course of a month.
— Jeff;
New AWS Tools for Code Management and Deployment
Today I would like to tell you about a trio of new AWS tools that are designed to help individual developers, teams of developers, and system administrators store, integrate, and deploy their code on the cloud. Here is the lineup, in the order that you’d generally put them to use:
- AWS CodeDeploy – This service efficiently deploys your released code to a “fleet” of EC2 instances while taking care to leave as much of the fleet online as possible. It can accommodate fleets that range in size from one instance all the way up to tens of thousands of instances.
- AWS CodeCommit – This is a managed revision control service that hosts Git repositories and works with all Git-based tools. You no longer need to worry about hosting, scaling, or maintaining your own source code control infrastructure.
- AWS CodePipeline – This service will help you to model and automate your software release process. You can design a development workflow that fits your organization’s needs and your working style and use it to shepherd your code through the staging, testing, and release process. CodePipeline works with third-party tools but is also a complete, self-contained end-to-end solution.
We are launching AWS CodeDeploy today and you can start using it right away. I’ll share additional information on the launch plans for the other two tools as it becomes available. These tools were designed to work well independently and to provide even more functionality and value when used together.
Let’s take a closer look at each of these tools!
CodeDeploy
CodeDeploy was designed to help you to deploy code at scale, with a focus on rapid development and rapid deployment in mission-critical situations where the cost of failure is high. As I mentioned earlier, it was designed to update an EC2 fleet without the need for any down time. CodeDeploy will automatically schedule updates across multiple Availability Zones in order to maintain high availability during the deployment process.
The fundamental unit of CodeDeploy work is a Deployment. It copies an Application revision (a collection of files) to a set of EC2 instances (a Deployment Group) and can also run designated scripts throughout the deployment process. YAML-formatted files are used to describe Applications and Deployment Groups. A Deployment Group identifies a set of EC2 instances by tag name, and can also reference an Auto Scaling Group.
Each instance must be running a copy of the CodeDeploy Agent. This is a small, open source (Apache 2.0 licensed) app that knows how to copy and validate files, set up permissions, and run scripts on Linux and on Windows. You can also configure it to run at startup on your custom AMIs, and you can even install it manually on running instances.
You can use CodeDeploy from the AWS Management Console, the Command-Line Interface, or through a set of APIs. For example, you can initiate an entire deployment with one API call. CodeDeploy can also be used in conjunction with your existing Chef recipes and Puppet scripts.
Let’s walk through the process of setting up and deploying an Application. The CodeDeploy Console includes a handy demo option that I’ll use to get started. While there are a lot of screens below, most of this is setup work that you’ll do one and benefit from for a long time!
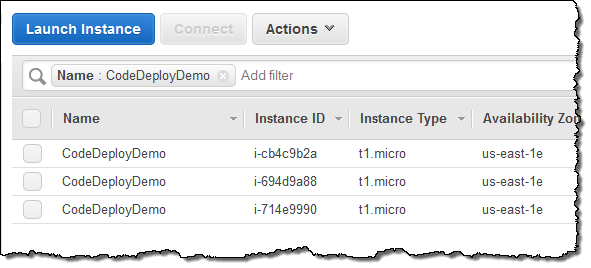
The demo uses a AWS CloudFormation template to launch three EC2 instances, all tagged as CodeDeployDemo:
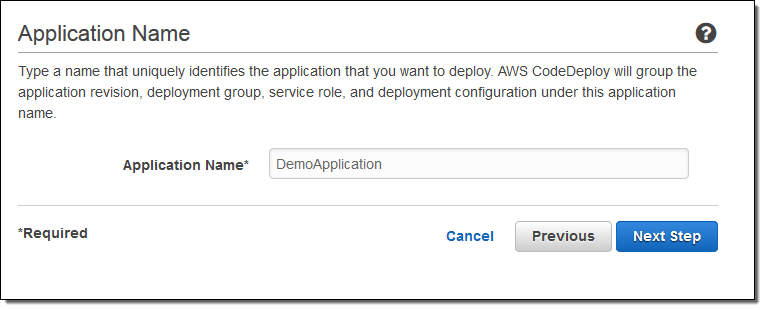
I begin by creating an Application:
Then I create a versioned Revision for deployment. My sample revision is stored in S3, but it could also come from CodeCommit or GitHub:

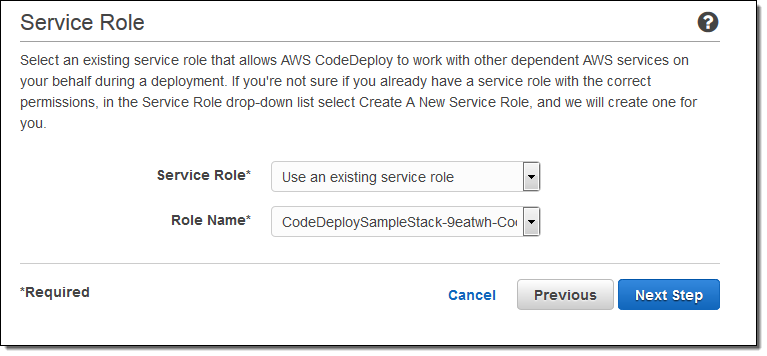
I need to tell CodeDeploy which IAM role to use when it interacts with other AWS services like EC2 or Auto Scaling (I can create a new one or use an existing one):
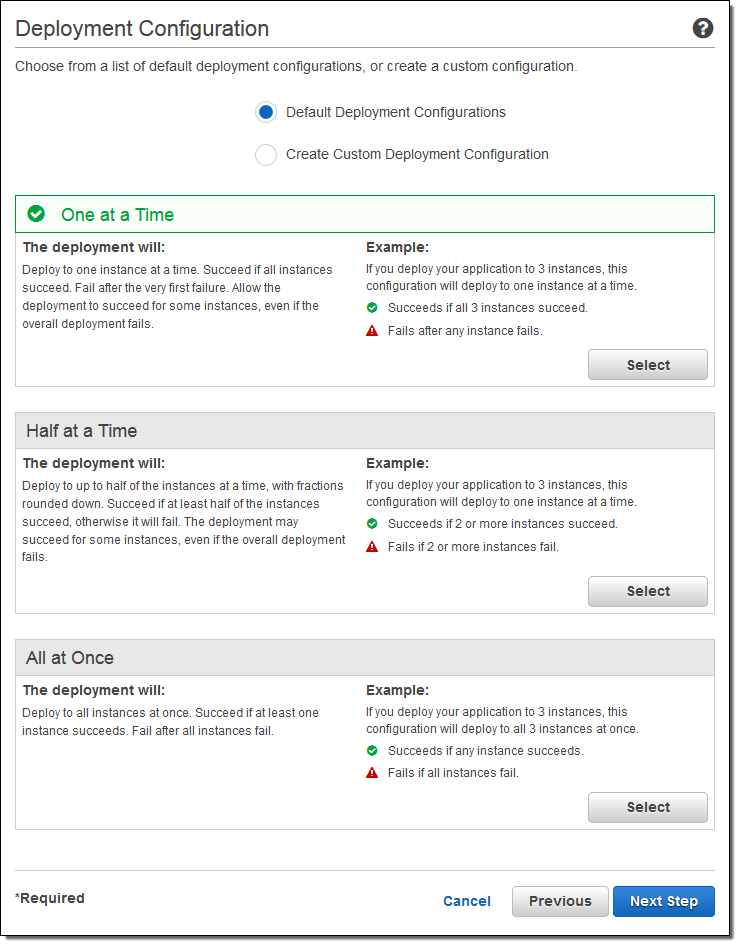
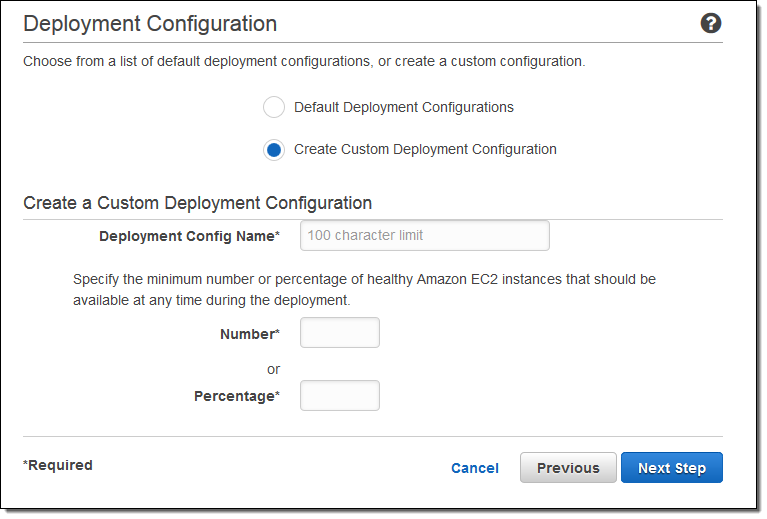
Now I need a Deployment Configuration. I can pick one of the defaults or I can create one from scratch. Here are the three default Deployment Configurations (these should be self-explanatory):
Here’s how I would create a custom Deployment Configuration:
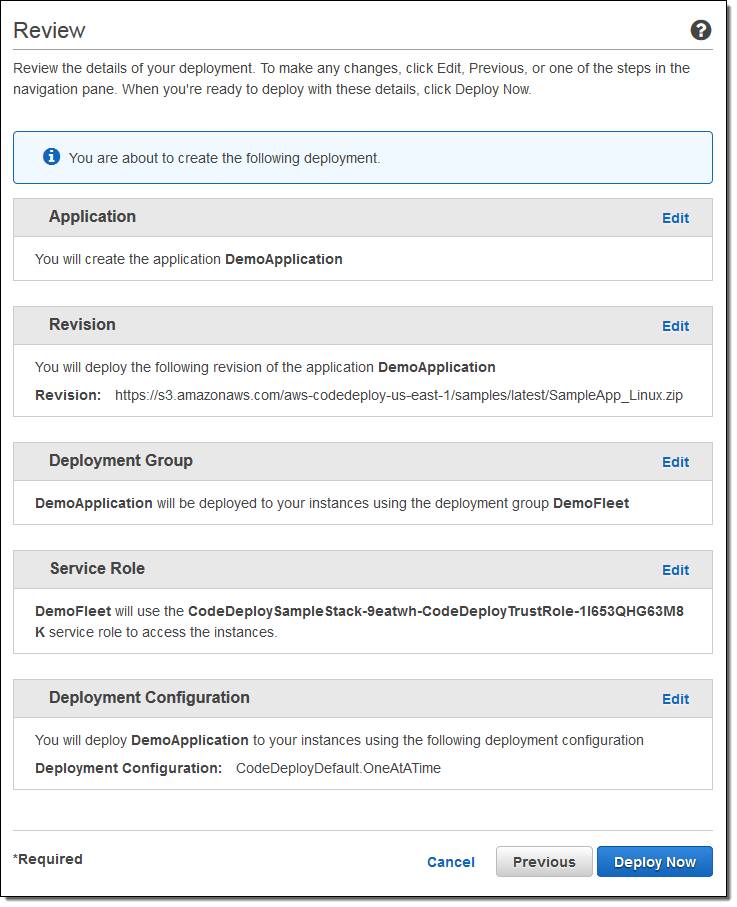
Now I can review the settings and perform my first deployment:
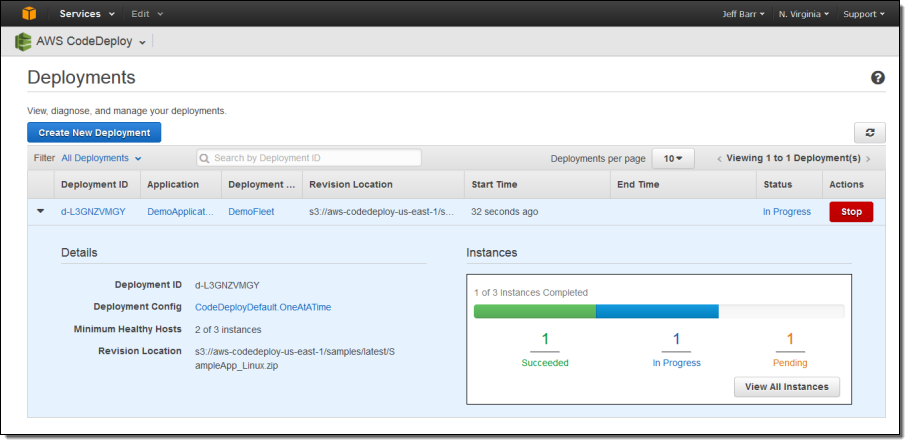
The Application is deployed per my Deployment Configuration and the Console updates as the work proceeds:
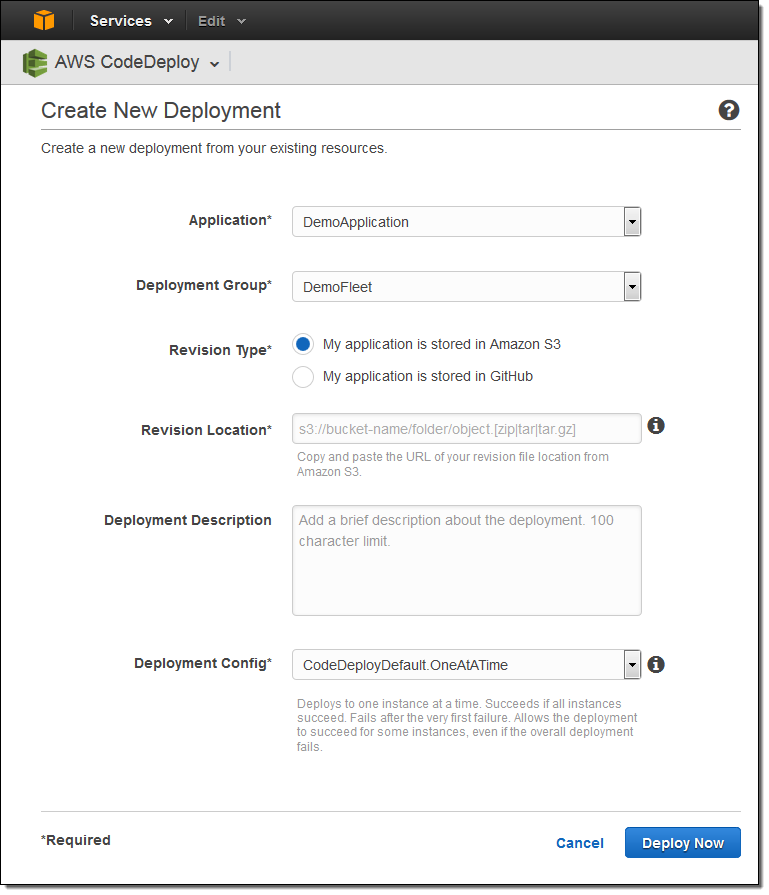
Once I have taken care of the setup work, I can easily create more Deployments and deploy them with a couple of clicks:
CodeCommit
Your application’s source code is a concrete representation of your intellectual property. It is also the most visible artifact of the hours that you spend slaving away at the keyboard! AWS CodeCommit is designed to keep it safe and sound. As I have already mentioned, it is a managed revision control service that hosts Git repositories. Your existing Git skills, tools (command line and IDE), and practices will continue to be applicable.
You (or your organization’s Cloud Administrator) can simply create a CodeCommit repo, assign permissions, and open it up to commits. CodeCommit will store code, binaries, and metadata in redundant fashion with high availability. You will be able to collaborate with local and remote teams to edit, compare, sync, and revise code.
Because CodeCommit runs in the AWS Cloud, it will work really well in situations where your development team works from multiple locations or involves collaboration with vendors or other partners (no more punching holes in corporate firewalls). You don’t have to worry about running out of space (go ahead, check in those images and videos). CodeCommit encrypts your files at checkin time and uses IAM roles to control developer and administrative access.
Here’s a sneak peek at a preliminary version of the CodeCommit Console:
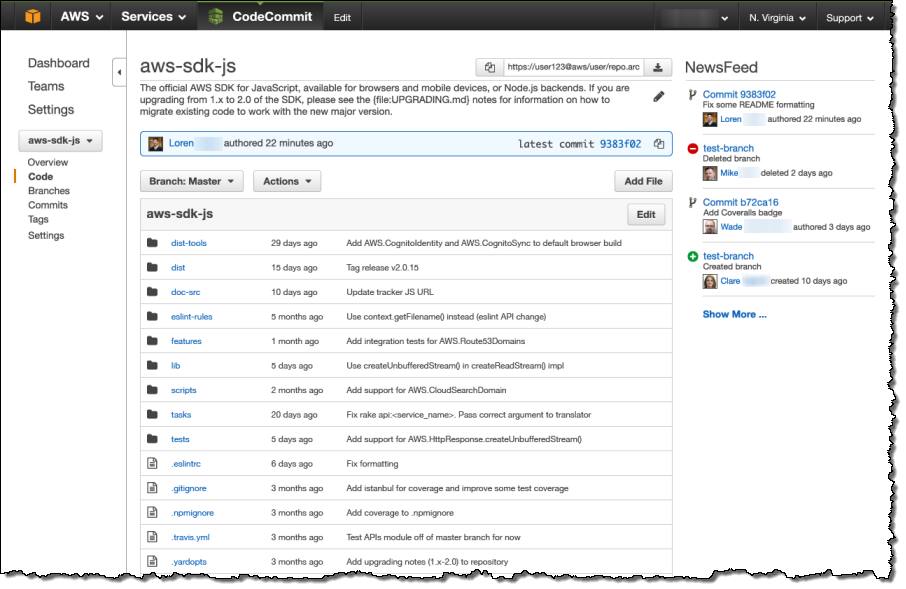
I’ll publish a more detailed blog post at launch time, so stay tuned.
CodePipeline
Presumably, your release process is more complex and more robust than “run a smoke test and ship it if nothing explodes!” As the process becomes more complex, automation becomes more and more valuable.
AWS CodePipeline will help you to codify and automate your release process. It should make your entire process more robust and more efficient. You’ll spend more time on features and less time on infrastructure. You will be able to test each code change as you make it, with the assurance that it will have pass through whatever test gates that you define before it is released to your customers.
You will be able to use the CodePipeline user interface to construct a graphical model of your release process using a combination of serial and parallel actions. The workflow can include time-based or manual approval gates between each stage. For example, you could choose to deploy new changes to staging servers only during weekday working hours in your own time zone.
CodePipeline watches your source code repo for changes and triggers the appropriate workflow. A release workflow could build the code in a production build tree, run test cases, and deploy tested code to a staging server. Upon final approval (a manual gate), the code can be promoted to production and widely deployed.
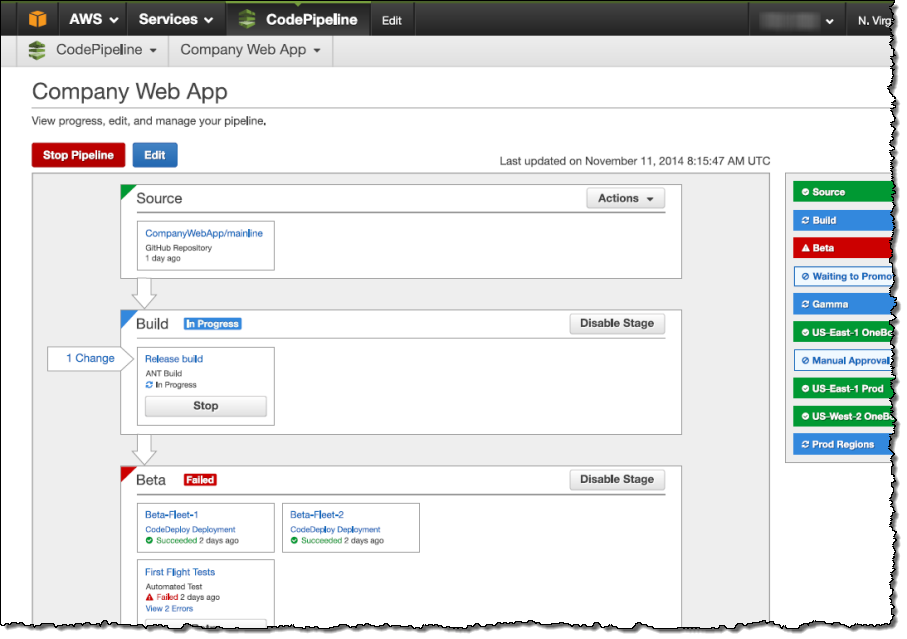
Here’s a sneak peek at the CodePipeline Console:
Availability
CodeDeploy is launching today and you can start using it now. Please stay tuned for more information on CodeCommit and CodePipeline!
— Jeff;